2D Games
You’ll create a top-down 2D version of the interactive living room scene you created earlier. Just like in the 3D scene, you’ll control a character, trying to collect all the objects in a room. By completing this scene, you’ll learn how working in 2D is similar to working in 3D, but also how it’s different.
Set up a 2D room
2D view
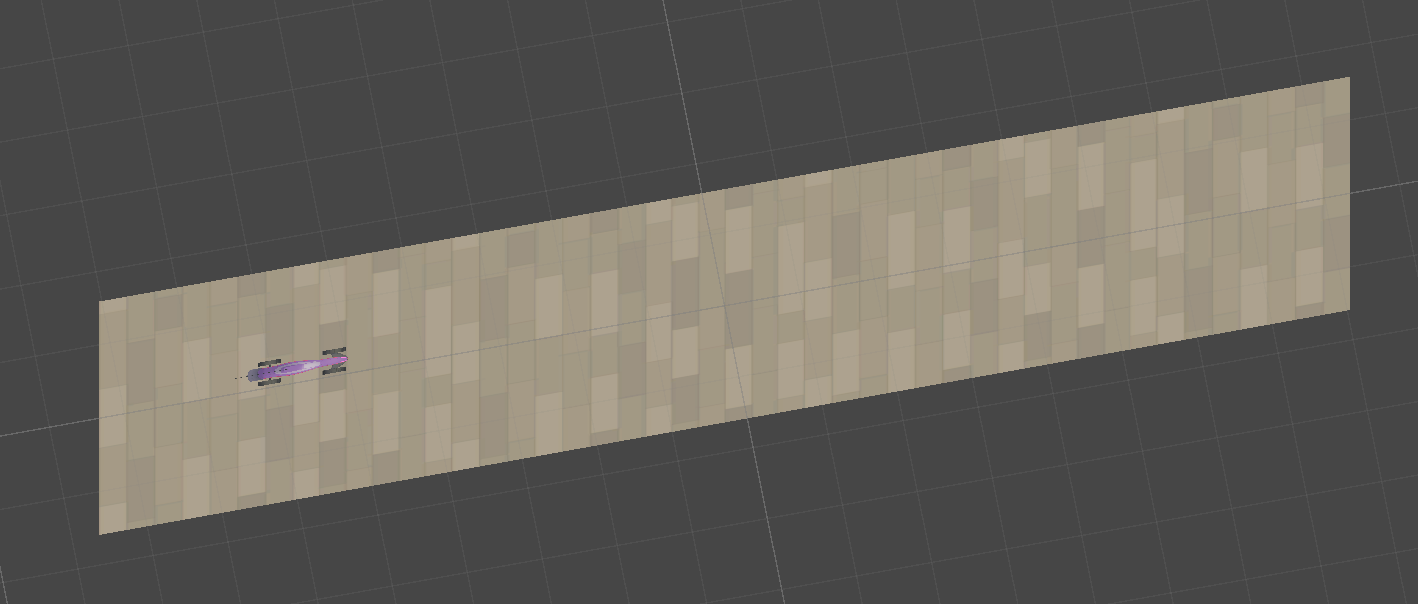
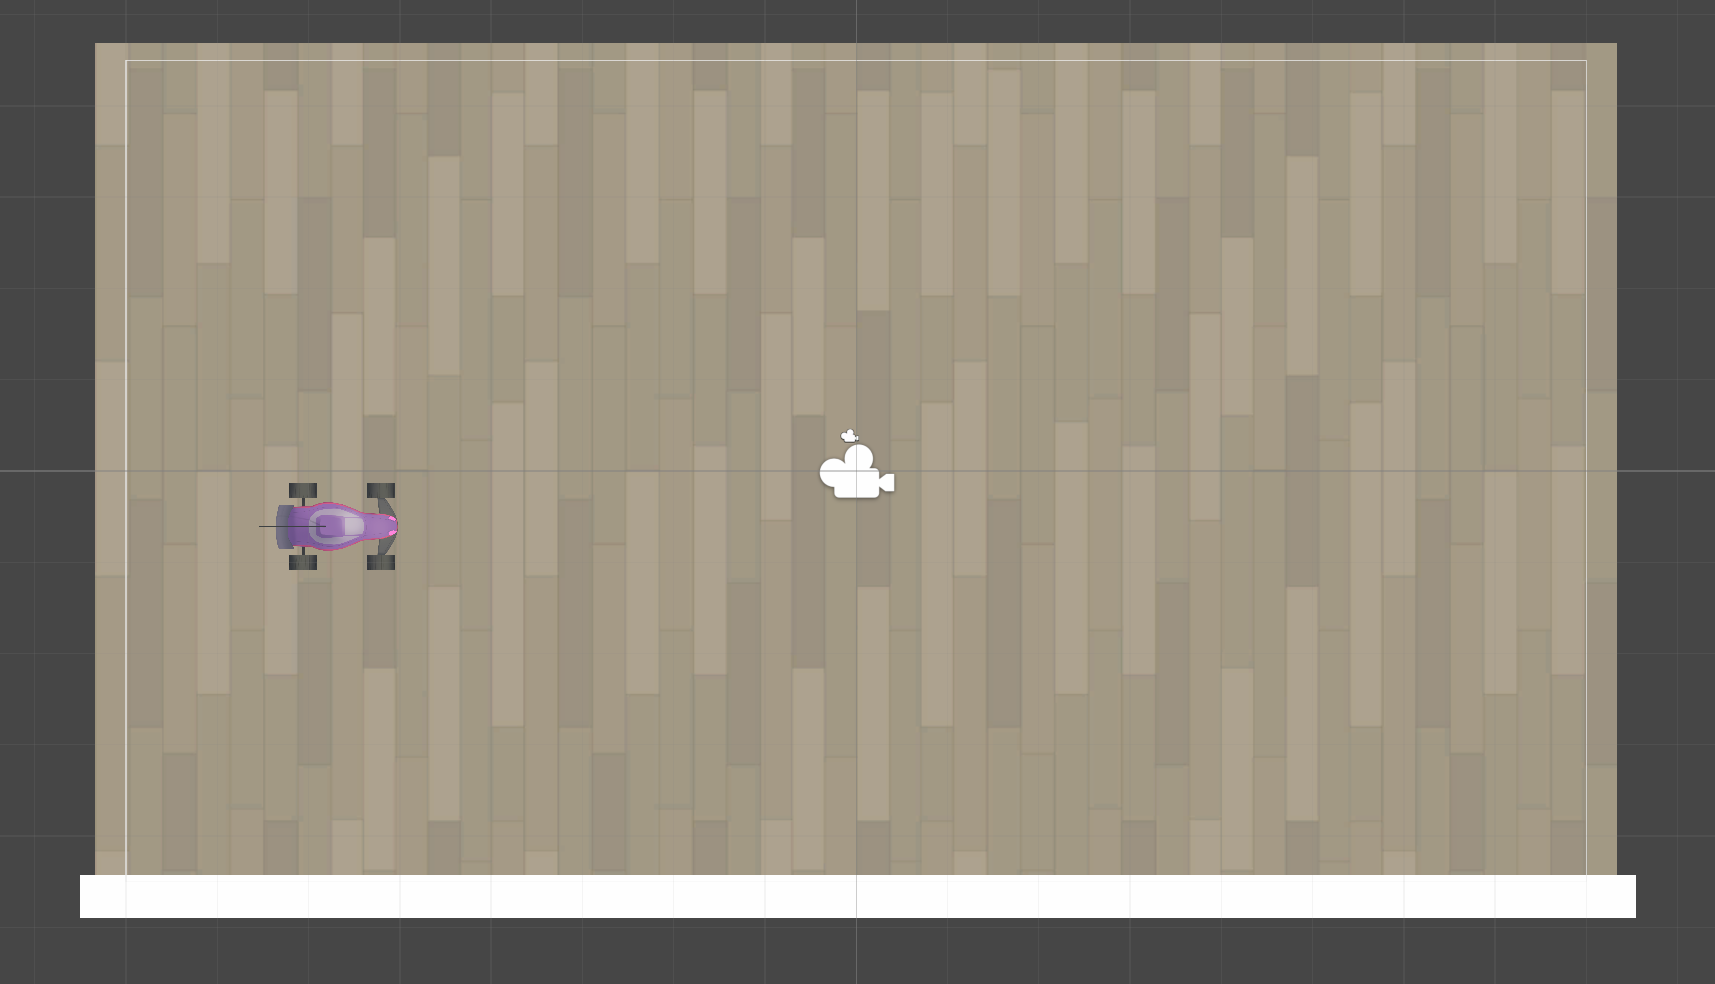
The scene that you’ll start with represents a basic 2D room setup, viewed from a top-down perspective. In top-down games, the camera angle is positioned above the action, pointing straight down. This genre often emphasizes strategic thinking, exploration, and puzzle-solving, as players can see more of the game world compared to first-person or side-scrolling perspectives.
In the Project window, go to _Unity Essentials > Scenes.
Double-click 5_TopDown_2D_Scene to open it.
Browse through the Hierarchy window to identify the GameObjects in the scene:
A Main Camera configured to use Orthographic mode instead of the default 3D Perspective mode, which is necessary for 2D gameplay.
A Floor: This is an image of an empty wood floor, which will be seen from a top-down perspective.
In the Hierarchy window, double-click the Floor GameObject to frame it in the Scene view.
Orbit around the floor using Alt+left-click to see that it is completely flat.
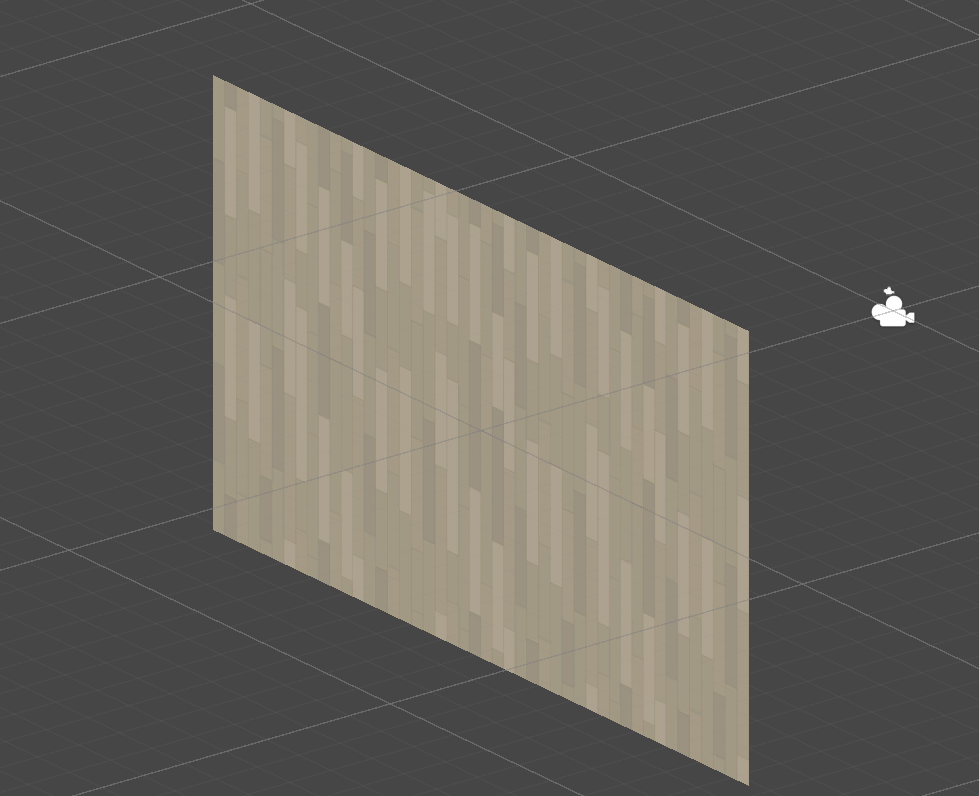
Locate and select the 2D button at the top of the Scene view:

This action switches the view from 3D to 2D, optimizing the Scene view for 2D development.
Try to look around the scene like you would in 3D by right-clicking and dragging within the Scene view.
Notice that unlike in 3D view, the view does not rotate; instead, it only pans across the scene.
Note that the Scene view gizmo has disappeared from the upper-right corner of the Scene view.
Adding sprite
You’ll now add a player character to the scene, but this time it will be a 2D sprite instead of 3D model. Sprites are 2D image used to represent characters, objects, and other elements within a game.
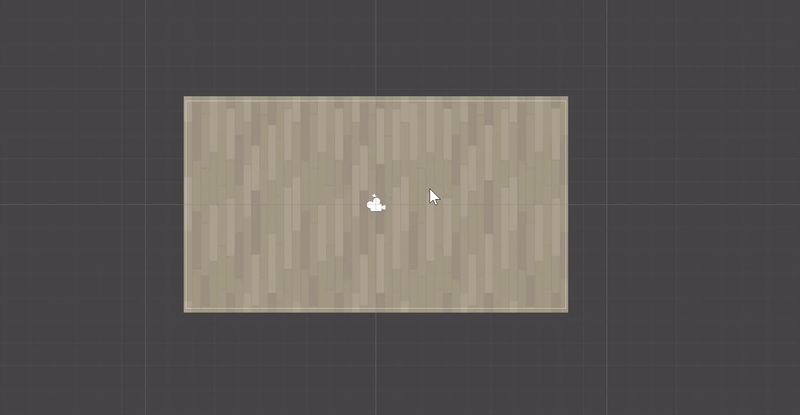
In the Project window, navigate to _Unity Essentials > Sprites > Characters and browse the available character sprites.
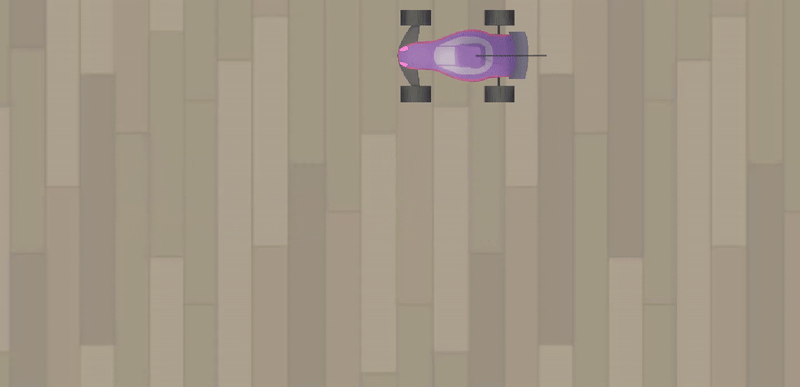
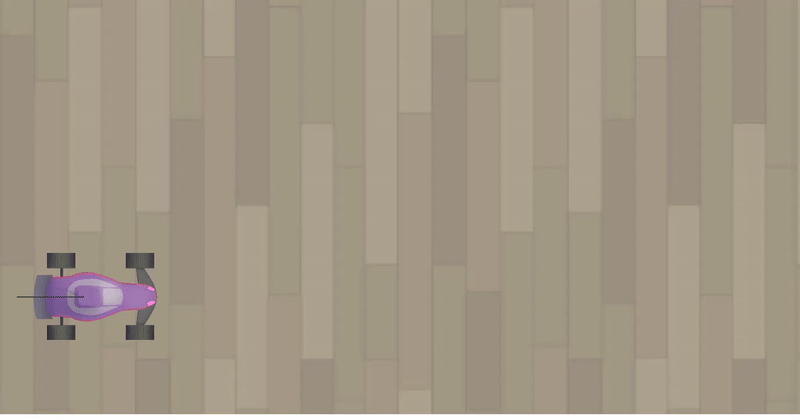
Click and drag your desired character sprite into the Scene view, positioning it towards the left side of the room.
With the sprite selected, ensure its Z position is set to 0 in the Transform component
This way, we keep it aligned with the other objects in the 2D plane.
Briefly switch out of 2D mode and orbit to see how the sprite sits flat directly on the background floor object.
In the Hierarchy window, rename the sprite “Player” for clarity and future reference.
Rigidbody 2D
Unlike the Rigidbody component used for 3D objects, the Rigidbody 2D component is optimized for 2D physics. This component enables your objects to obey the laws of physics, such as gravity and force, within a 2D space.
In the Hierarchy window, select the Player GameObject.
In the Inspector window, select Add Component and search for Rigidbody 2D.
Select it to add it to your player character.
Enter Play mode to see the Player GameObject fall out of the bottom of the screen.
This type of gravity might make sense in a 2D side scroller, but it doesn’t make sense in a top-down game.
Exit Play mode and, in the Rigidbody 2D component, adjust the Gravity Scale property to 0.
This will stop gravity from affecting the player.
Enter Play mode again to ensure the player character now stays put in the room, then exit Play mode.
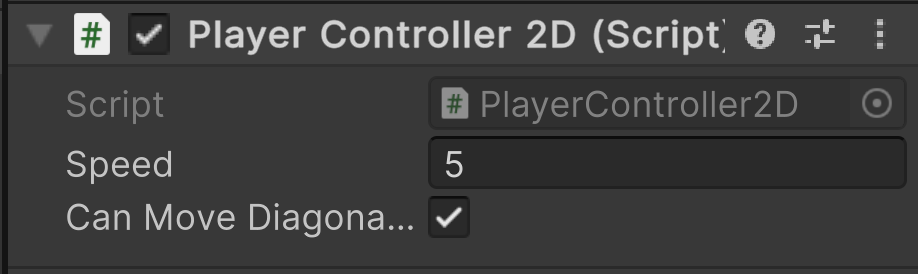
PlayerController2D script
Unlike Unity’s built-in components, such as the Rigidbody 2D component, PlayerController2D is a custom script we’ve provided for you designed to manage player inputs and movements within a 2D environment.
In the Project window, navigate to _Unity Essentials > Scripts > Provided Scripts, then locate the PlayerController2D script.
If interested, feel free to open the script, it has a lot of comments that should help you out.
Select the Player GameObject to show its components in the Inspector window.
Drag the PlayerController2D script directly into the Inspector window to add it as a component to the Player GameObject.
You can now configure its properties, including its speed and whether or not you want the player to be able to move diagonally.
Test the player controls in Play mode.
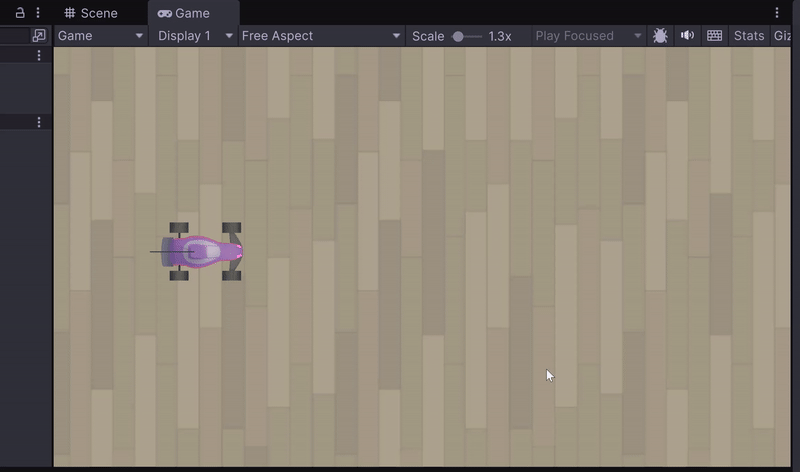
Aspect ratio
Aspect ratio describes the relationship between the width and the height of a screen. Old-fashioned TVs and the very first films, for example, used a 4:3 aspect ratio. That means that the screen was 4 units wide and 3 units high. However, modern widescreen TVs and most modern films use a wider 16:9 aspect ratio.
The Game view aspect ratio menu allows you to simulate how your game will look on different screen sizes and shapes during development.
Up to this point, you have been using a Free Aspect ratio in the Game view, which means that the aspect ratio depends on the Editor window’s size. However, while you’re developing a game, it can be helpful to use the aspect ratio that your game’s users will see on their devices. You can even set an aspect ratio that is best for your game regardless of the device so that you don’t have to accommodate every screen shape, such as vertical portrait mode.
Enter Play mode.
Find the aspect ratio dropdown, usually located in the top bar of the Game view.
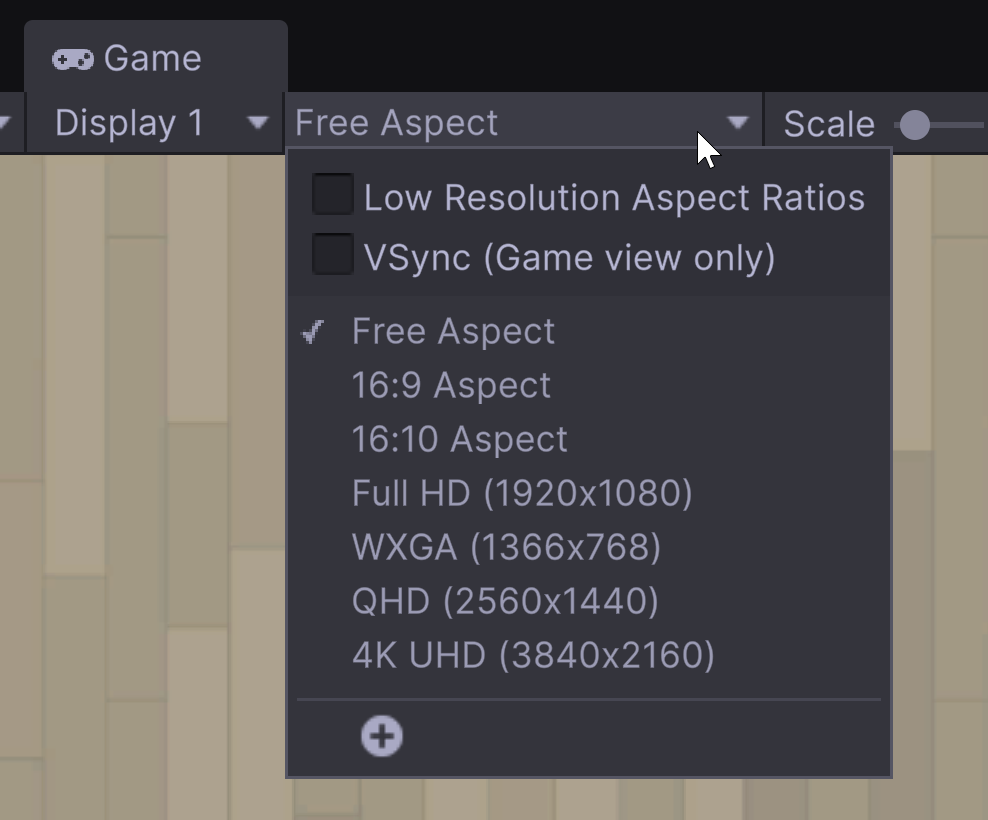
Your view should be set to Free Aspect by default, but if it’s not, set it to Free Aspect now.
Resize the Game view.
Notice that you can no longer see the entire floor, and the player can exit the viewable area.
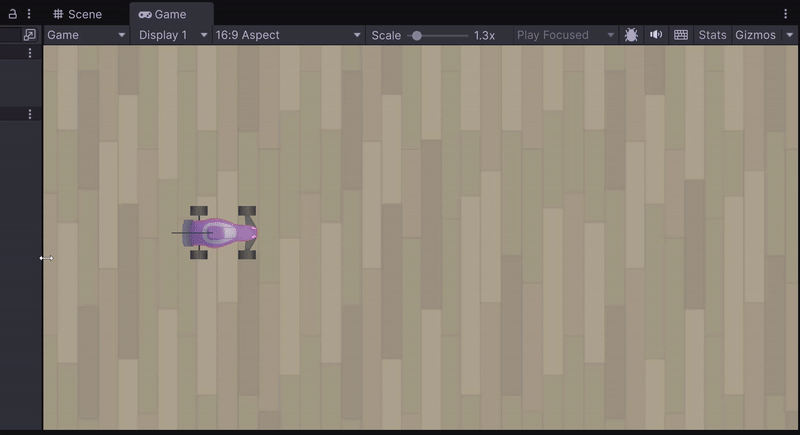
Select 16:9 from the aspect ratio dropdown to set the Game view to a widescreen aspect ratio.
This ratio matches the dimensions of the floor, so the entire floor will always be in view.
Resize the Game view again.
Notice that the entire floor now stays consistent even while the window changes size.
Exit Play mode when you’re done testing.
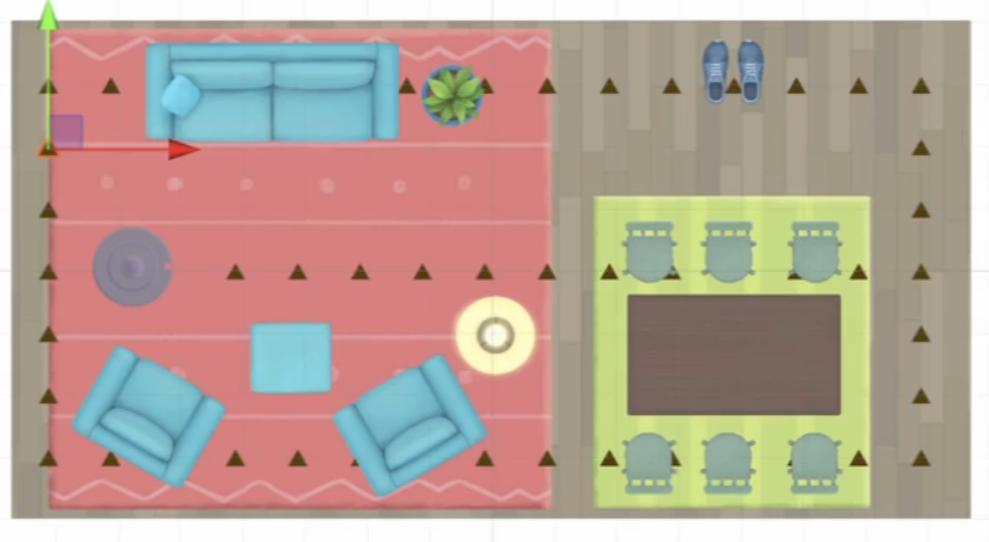
Creating wall
Now that you have your player in the room, you need walls to prevent that player from moving off-screen. In the same way that you used a primitive cube to create your building blocks in the kid’s room, you’ll use Unity’s provided 2D sprite shapes to make this wall. You’ll also use a new tool in the Scene view toolbar — the Rect tool — to quickly and easily move and reshape the sprite.
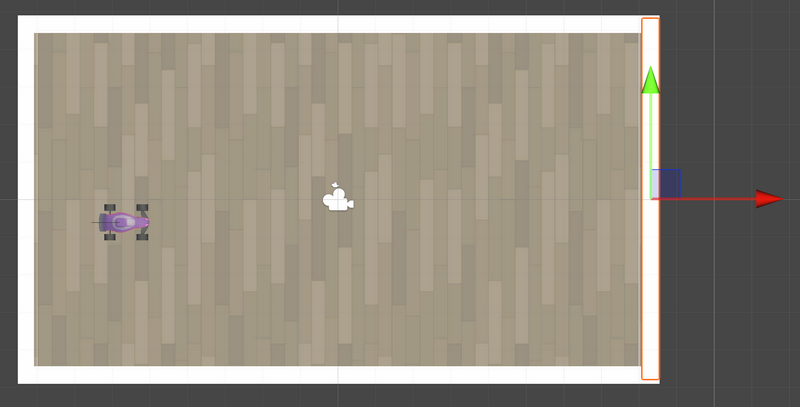
In the Hierarchy window, right-click and select 2D Object > Sprite > Square to create a new square sprite.
Rename the sprite “Wall_Bottom” for clarity.
Make sure that the object’s Z position value is set to 0 so that it’s on the same Z plane as the floor object.
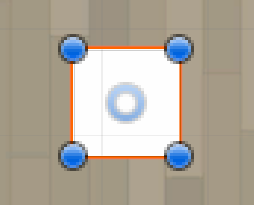
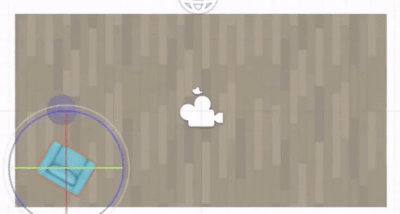
With the square sprite selected, switch to the Rect tool from the toolbar.
You should see four blue circles at the corners of the square and a donut-shaped blue circle at its center (the object’s pivot point).
Note
You could also press the T key on your keyboard to access the Rect tool.
Click and drag the corners or sides to stretch it across the desired edge of your room.
The white wall should overlap the bottom edge of the floor.
Enter Play mode to see how your bottom wall looks.
The wall won’t actually work yet; the player can go right through it! You’ll fix that next.
2D collider
As you probably remember, colliders define the physical boundaries of objects, allowing them to interact with each other. Just like Unity has a 2D version of a Rigidbody component, it also has 2D versions of colliders. You’ll use colliders to stop the player from passing through the wall.
Select the Wall GameObject in the Hierarchy window.
In the Inspector window, select Add Component, then search for and select Box Collider 2D to add it to the wall.
Select your player character in the Hierarchy window.
Depending on the shape of your character, add either a Box Collider 2D or a Circle Collider 2D component.
Enter Play mode to test.
Your player character should now collide with the wall, unable to pass through it.
Select the Wall GameObject you’ve already created in the Hierarchy window.
Duplicate the wall object by pressing Ctrl+D.
Rename this duplicate to indicate its position (For example, “Wall_Top”).
Use the Move tool to adjust the duplicate’s position to the opposite side of the original wall.
Don’t worry — the placement doesn’t have to be perfect. It just has to overlap the edge of the play area.
Duplicate the top wall.
Use the Rect tool and Move tool to create Wall_Left and Wall_Right.
To organize the Hierarchy window, select all wall objects and right-click one of the selected objects and select Create Empty Parent.
This action groups the walls under a single GameObject, which you can name “Walls” for clarity.
Test the scene to ensure all walls are correctly positioned and prevent the player from moving beyond the designated game area.
Save your scene!
Adding collectibles
Fill the room
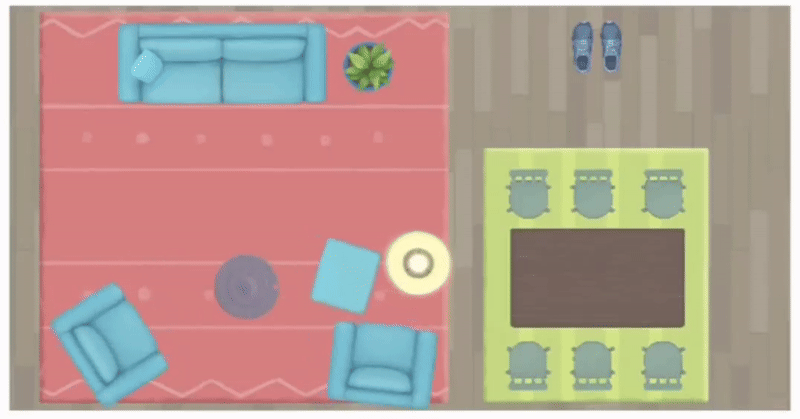
The next step is to add some furniture to the room. The player will eventually be able to push this furniture around, making the room much more interactive and fun.
In the Project window, go to the _Unity Essentials > Sprites > Furniture folder.
Select furniture sprites you want to add to your room and drag them into the Scene view.
Important: Don’t add any rugs to the room yet! You’ll do that in the next step.
Important: Do not put one piece of furniture on top of another: they collider / rigidbody will react !
Avoid putting furniture right in a corner — this will allow you to push them around more easily.
Use the Move tool (W key) and Rotate tool (E key) to position and orient your furniture.
Add a rug on the correct layer
If you put a rug in your scene right now, it might sit on top of the furniture. Rugs don’t usually do that. You’ll need to use the Order in Layer property of the Sprite Renderer component to control exactly how your objects are stacked in 2D space. This will allow you to strategically place the rug beneath furniture and other movable objects, but still above the floor.
In the Project window, navigate to the _Unity Essentials > Sprites > Rugs folder.
Drag one of the rug sprite prefabs into your scene.
Notice that it goes on top of your furniture.
In the Hierarchy window, use the Shift key to select all the Furniture objects.
Then, in the Sprite Renderer component, set the furniture’s Order in Layer to 10.
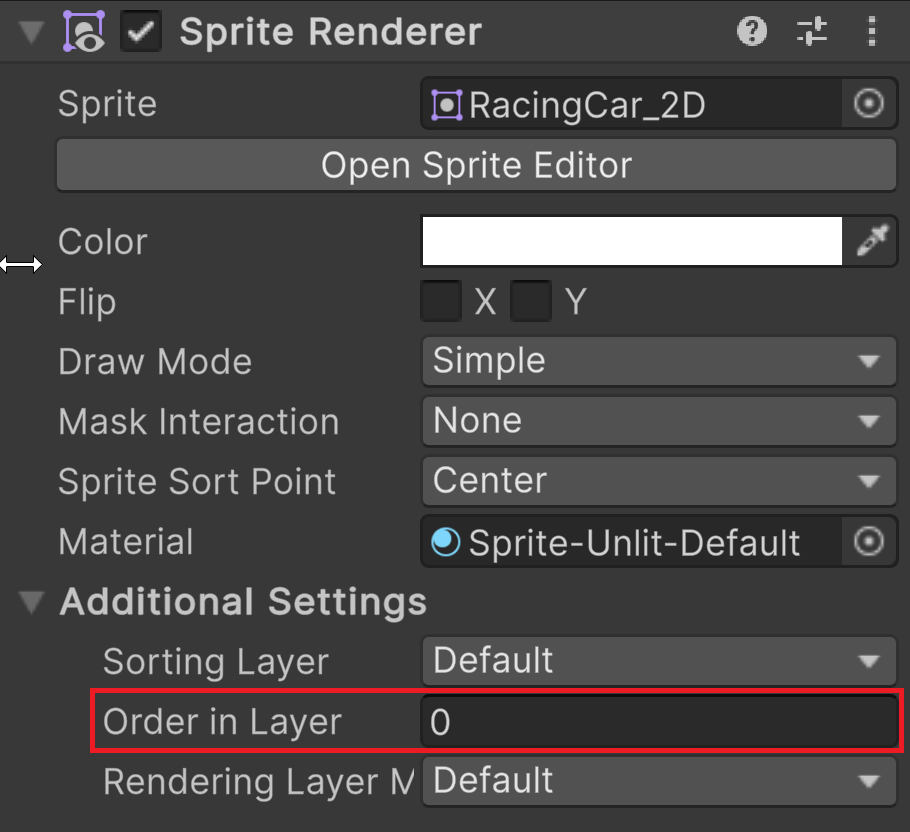
Repeat this process for the Player GameObject, setting its Order in Layer to 10.
Now select any rugs you have in the scene and set the Order in Layer to 5.
Use the Rect tool to stretch the rug’s corners to the position you want.
Pushable furniture
If you test your scene now, the player will be able to go through the furniture like a ghost. Just like with the player, these physical furniture objects need 2D Collider and 2D Rigidbody components to collide and move around as expected.
In the Hierarchy window, select all furniture objects, not including the rugs, by holding Shift.
With all furniture selected, go to the Inspector window and select Add Component. Search for and add a Rigidbody 2D component to each selected object.
Set the Gravity Scale of each Rigidbody 2D component to 0 to prevent the furniture from falling to the bottom of the scene.
With all the furniture still selected, select Add Component again and search for Box Collider 2D. Add this component to introduce collision detection to each piece of furniture.
If you added any circular furniture (like the lamp or plant), you’ll need to replace the Box Collider 2D component with a Circle Collider 2D component that more accurately represents its shape.
In such a situation, select one of your circular furniture sprites and locate its Box Collider 2D component. Right-click the component’s name and select Remove Component, then add a new Circle Collider 2D component instead.
Test the scene by entering Play mode.
Notice how the objects now collide with each other and the player, but they slide like they’re on ice. You’ll fine-tune their physical properties in the next step to make things feel more realistic.
Increase the furniture’s drag
The furniture movement is not very realistic. Let’s make the furniture behave more appropriately when the player pushes it. The Rigidbody 2D component’s linear and angular damping values simulate resistance that objects encounter when moving.
In the Hierarchy window, select all the pushable furniture objects again.
Remember, don’t select the rugs!
In the furniture’s Rigidbody 2D component, set the Linear Damping to a value between 5 and 10.
Enter Play mode to test the new linear damping.
The furniture should no longer slide across the floor, but it will still rotate endlessly like a spinning top.
Exit Play mode.
With the furniture still selected, set the Angular Damping to a value between 5 and 10.
Enter Play mode again to test the new angular damping.
The furniture should no longer spin.

Feel free to experiment with those damping values to get the furniture sliding the way you want.
Increase the furniture’s mass
The furniture is coming to a stop once it’s pushed, but there’s one thing that still feels off: it’s just as difficult for the player to move a shoe as it is to move a couch. Adjusting the mass of heavier items will add another layer of realism, making larger pieces more challenging to move, which will make the entire experience more fun and immersive.
In the Scene view, adjust the mass of heavier furniture items to make them harder to move.
For example, set the mass of a heavy couch to 10, which makes it ten times more difficult to move than the default value of 1.
Test the scene to observe the changes.
Set the mass of all the furniture objects until they feel appropriately difficult to push around, especially relative to each other.

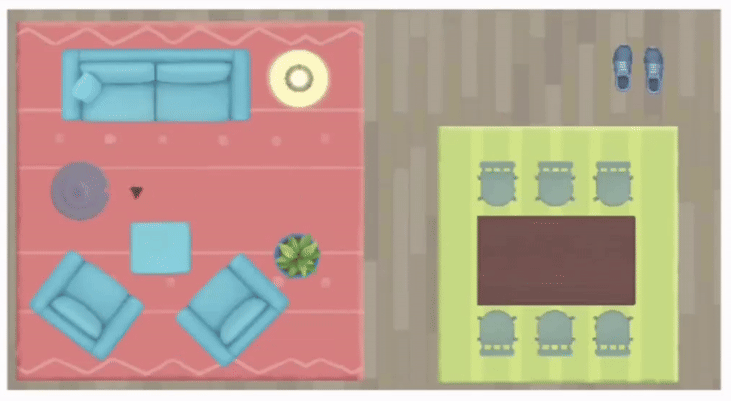
Add a collectible
We provide 2D collectible sprite prefabs that already include the following components:
A 2D Collider component (either Box or Polygon) with Is Trigger enabled so that the player can detect it but not bump into it, just like the 3D collectible.
A Collectible 2D script component, which is very similar to the Collectible script you wrote earlier — it rotates the collectible and spawns a particle effect when it’s collected.
With these components already set up, the collectible should work properly as soon as you drag it into the scene.
In the Project window, navigate to the _Unity Essentials > Sprites > Collectibles folder.
Drag your desired sprite prefab into your scene in front of the player.
Enter Play mode and get the collectible.
More collectibles
Select the collectible object you’ve already added to your scene.
This will be your template for the others.
Duplicate the collectible by pressing Ctrl+D (macOS: Cmd+D).
Nothing will appear to happen, but a new duplicate object will appear in the Hierarchy window.
To ensure even spacing between collectibles, hold Ctrl. This action enables Unity’s snapping feature, which helps to maintain consistent spacing.
Continue duplicating the collectible and placing the copies throughout the room.
Arrange them in a manner that encourages exploration and interaction.
Test your level by playing through it, ensuring that all collectibles are accessible.
Save your scene.
Group objects
Select all pushable furniture objects in the Hierarchy window using the Shift or Ctrl.
Right-click one of the selected objects and select Create Empty Parent, then name it something like “Pushable Objects” for clarity.
Select all your collectibles and create an empty parent GameObject for them named “Collectibles”.
UI prefab
In this step, you’ll introduce a User Interface (UI) that displays the number of remaining collectibles in the scene. A UI is any set of on-screen elements, like buttons and menus, that allow players to interact with the game and receive information. Since this is not a learning experience about creating UI’s, you’ll use a provided prebuilt UI prefab, but there are lots of resources available for you to learn more about creating a UI in Unity if you’re interested!
In the Project window, navigate to _Unity Essentials > Prefabs > UI.
Drag the Remaining_Collectibles_UI prefab into the Hierarchy window.
You won’t see anything change in the Scene view.
Test your game to see how the UI tracks and updates the number of collectibles as you collect them.
If you’re interested, expand the Remaining_Collectibles_UI GameObject in the Hierarchy window to see how it’s set up.
By selecting some of the objects, you may be able to figure out how to change the color, font, or position of the UI elements. Remember, you can always undo any unwanted changes with Ctrl+Z.
Tip: You can preview any changes you make to the UI in the Game view.
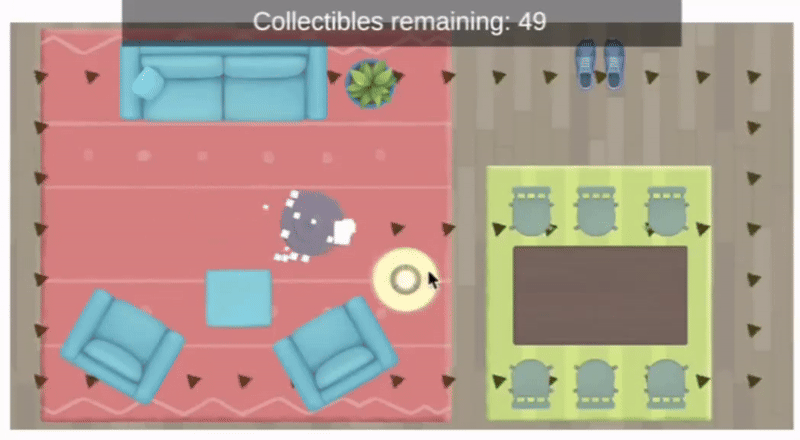
Animated sprite
In this tutorial, you’ll use the Sprite Editor to make an animated 2D cat or dog, then add your new pet to the living room. This more dynamic element will help bring your scene to life a bit more.
Sprite Editor
2D sprites are often animated using sprite sheets. A sprite sheet is a large image containing many smaller images (sprites). As you might know, an animation is just a series of image frames played one after the other — and a sprite sheet is useful for holding all of those individual frames in one place. Unity has a built-in tool called the Sprite Editor that helps you work very efficiently with sprite sheets.
In the Project window, navigate to _Unity Essentials > Sprites > Animated.
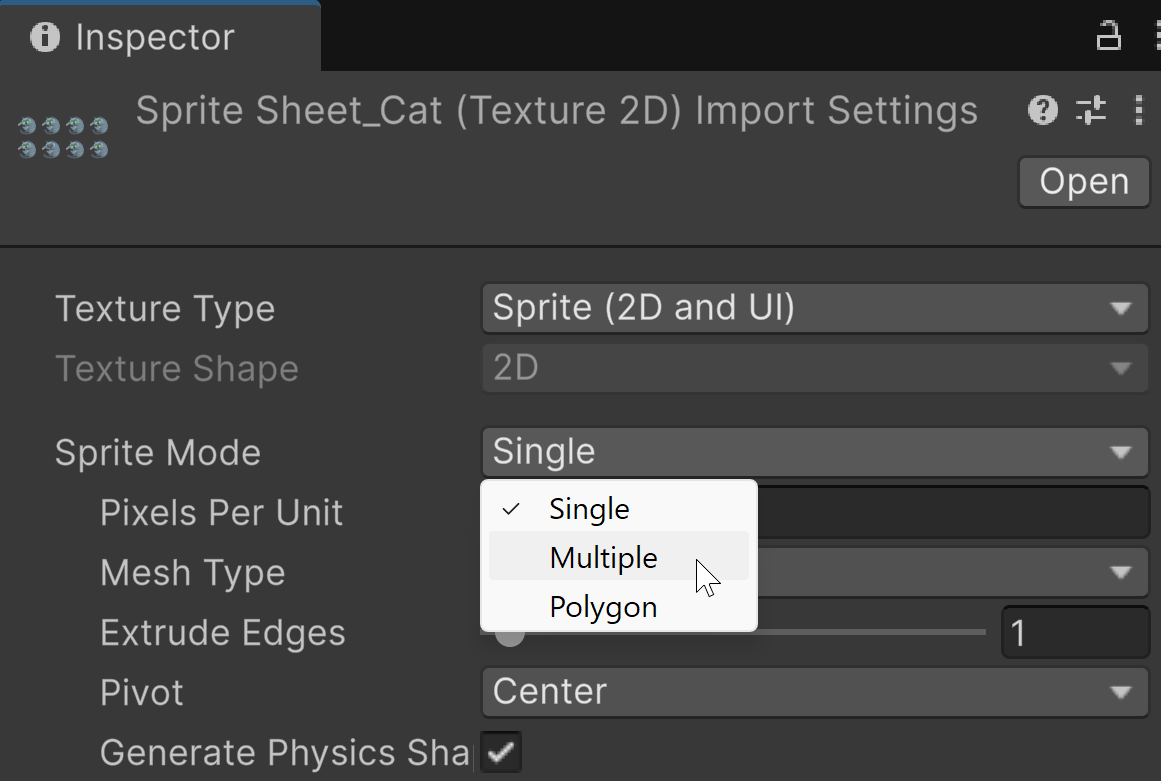
Select Sprite_Sheet_Cat or Sprite_Sheet_Dog to preview the sprite sheet at the bottom of the Inspector window.

In the Inspector window, change the Sprite Mode property from Single to Multiple, then select Apply.
This will allow you to slice the sprite sheet into multiple individual sprites.
Select Open Sprite Editor to view the sprite sheet in the Sprite Editor window.
From the Slice dropdown, keep the default Automatic options
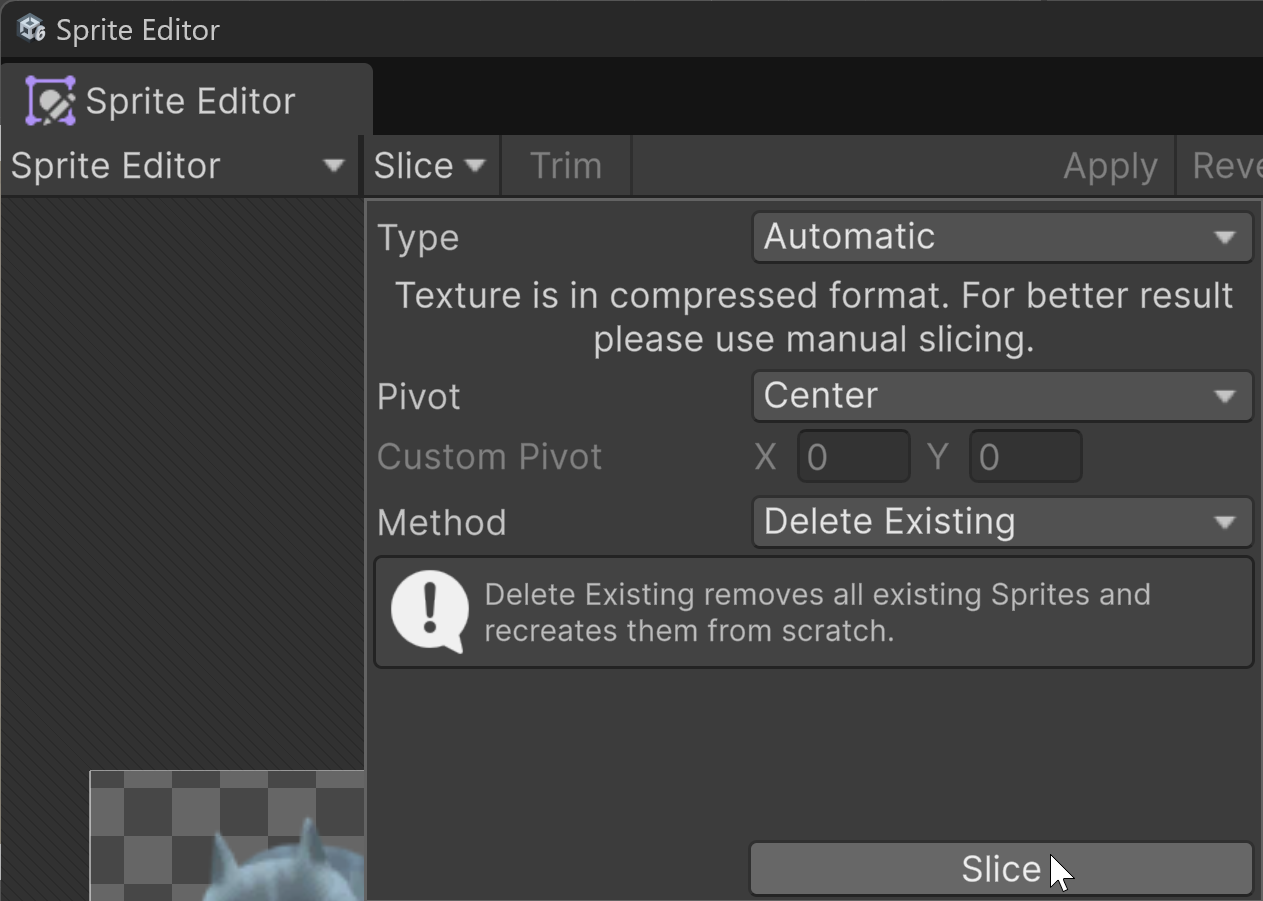
Select Slice.
Note: If you get a warning about a Potential loss of Sprite data, don’t worry. Select Yes to continue.
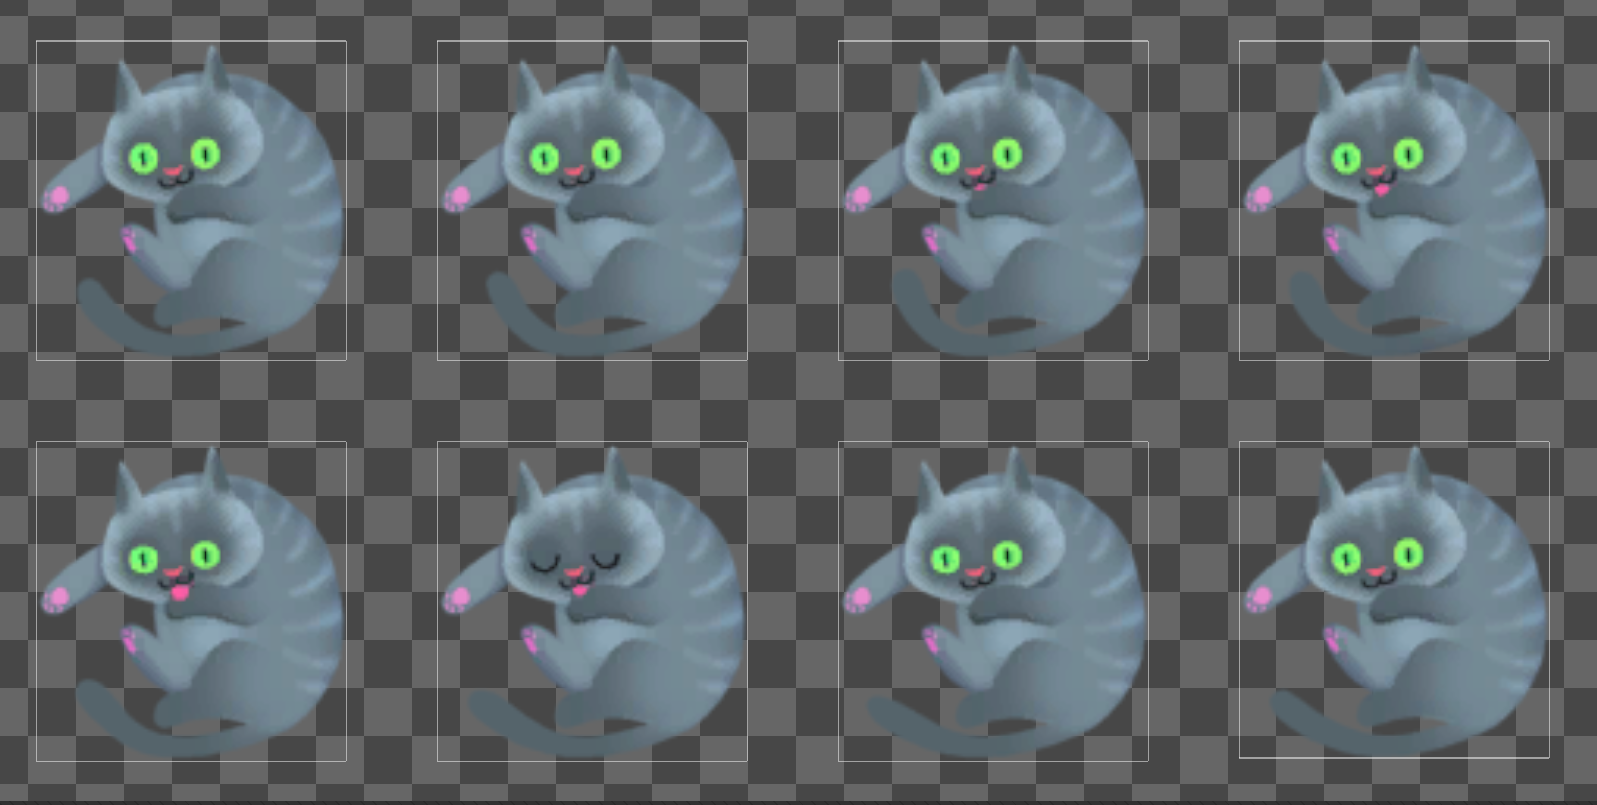
You’ll see new gray rectangles around the individual sprites.
Note: If the Slice dropdown is grayed out, you might have missed the instruction in the last step to set the Sprite Mode to Multiple.
Select Apply to save your changes, then close the Sprite Editor window.
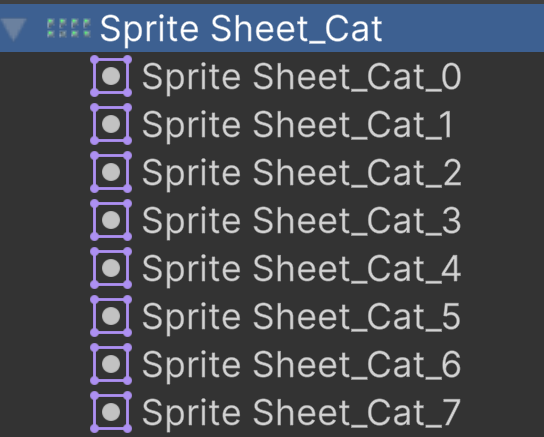
In the Project window, expand the Sprite_Sheet_Cat or Sprite_Sheet_Dog assets to reveal the individual sprites that make up the sprite sheet.
Use the arrow keys to flip through the sprites to get a sense of the animation in the Inspector preview window.
Animate the sprite sheet
With your sprite sheet now neatly sliced into individual images, you just need to create an animation file that controls how these frames will be animated in the scene.
Use the Shift or Ctrl keys to select all eight of the individual sprites for either the dog or cat (0 through 7).
Drag them together into the Hierarchy window.
A dialog will open that asks you to save a new Animation file in your assets. Name the new animation file either “Dog.anim” or “Cat.anim”, then select Save.
This file controls how to cycle through the frames of the sprite sheet.
In the Hierarchy window, rename Sprite_Sheet_Cat or Sprite_Sheet_Dog to “Cat” or “Dog”.
Move the animated pet to an open spot in the living room.
Just like with the furniture, set Order in Layer to 10 so the pet is always on top of the rugs.
Enter Play mode to see your animated pet in action.
Make the pet interactable
Just like you did with the furniture, you’ll need to configure the physics on this animal so you can push it around.
With the pet selected, add a Circle Collider 2D component and Rigidbody 2D component so that the player can interact with it.
Configure the Rigidbody 2D properties appropriately:
Increase the Mass.
Increase the Linear Drag and the Angular Drag.
Set the Gravity Scale to 0.
Enter Play mode again to test the interactivity.
Quizzz
What happens when you turn on 2D mode in the Scene view?
Turns off perspective and orients the camera to look towards positive Z, with the X-axis pointing right and the Y-axis pointing up.
Automatically converts all 3D models in the scene to 2D sprites.
Locks the Scene view camera to a fixed position, preventing any movement or rotation.
Enables the physics simulation to run in two dimensions, disabling the Z-axis.
Which of the following are actually built-in Unity components optimized for 2D development?
Rigidbody 2D
Square Renderer 2D
Circle Collider 2D
Layer Adjuster 2D
Which of the following are true about the Rect tool in Unity?
It’s designed for creating and editing physical materials for 2D objects.
It adjusts the transparency and color settings of UI elements.
It is used for manipulating the position and scale of 2D objects in the scene.
The Rect tool can be activated using the T key as a shortcut in the Scene view.
What does the Order in Layer property do in the Sprite Renderer component?
Sets the physical layer the sprite belongs to for collision detection purposes.
Controls the level of detail that the sprite is rendered with, improving performance for distant objects.
Adjusts the sprite’s color intensity based on its position in the scene.
Determines the rendering order of sprites, allowing some to appear in front of or behind others.
Which of the following is true about writing scripts for 2D GameObjects in Unity?
Writing scripts for 2D GameObjects is largely the same as for 3D, but there are some methods optimized for 2D development, such as OnTriggerEnter2D instead of OnTriggerEnter.
All scripting methods and components used for 3D GameObjects are incompatible with 2D GameObjects, requiring separate libraries.
Unity will not allow you to apply a script that has references to 2D components or methods onto a 3D object.
To work with 2D GameObjects in Unity, you must create a special kind of script asset from the Project window’s create menu named a “Script2D”, which is distinct from those used in 3D development.