Scripting Intro
Principle
In this first tutorial, you’ll add your first lines of C# code to your Unity project.
Setup
In the Project window, navigate to _Unity_Essentials > Scenes.
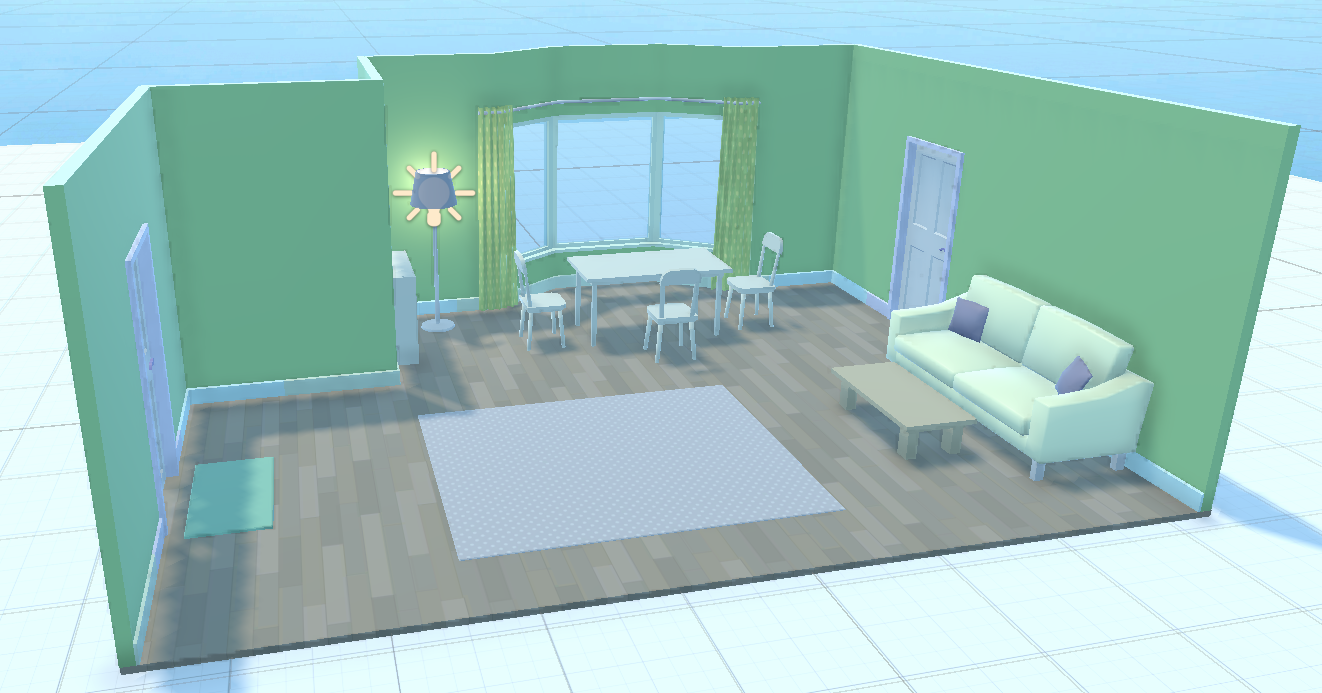
Find 4_LivingRoom_Programming_Scene and double-click to open it.
In the Project window, navigate to _Unity Essentials > Prefabs > Characters.
Browse the different options.
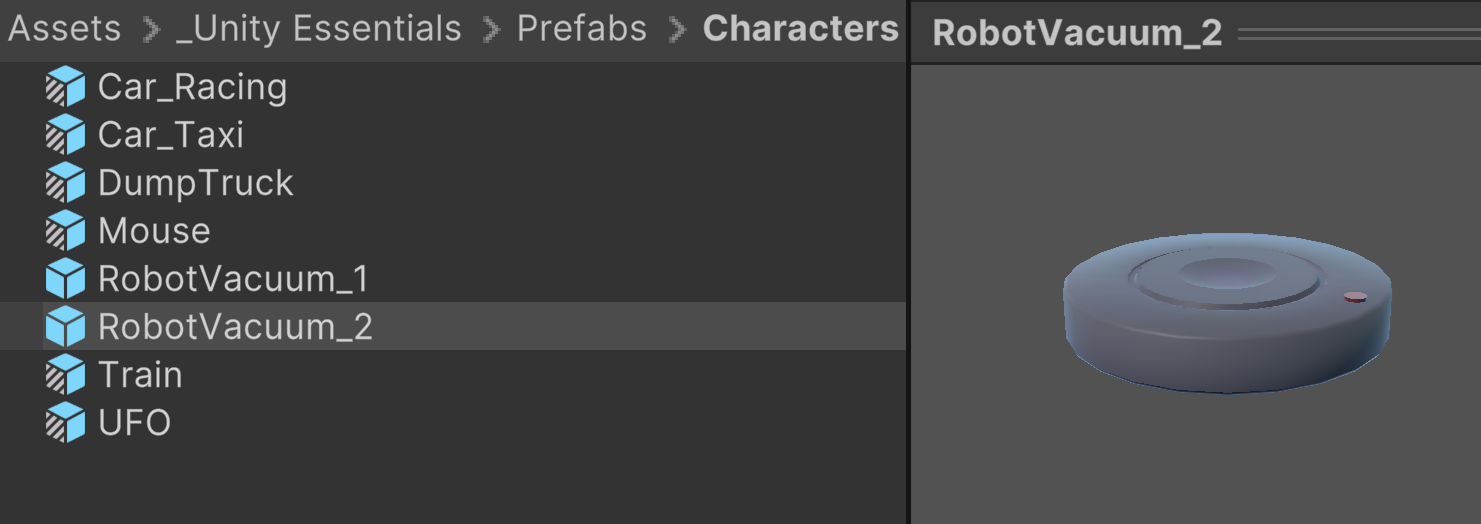
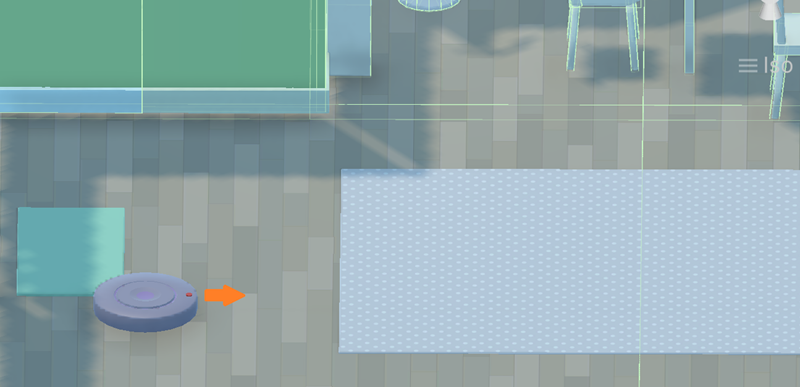
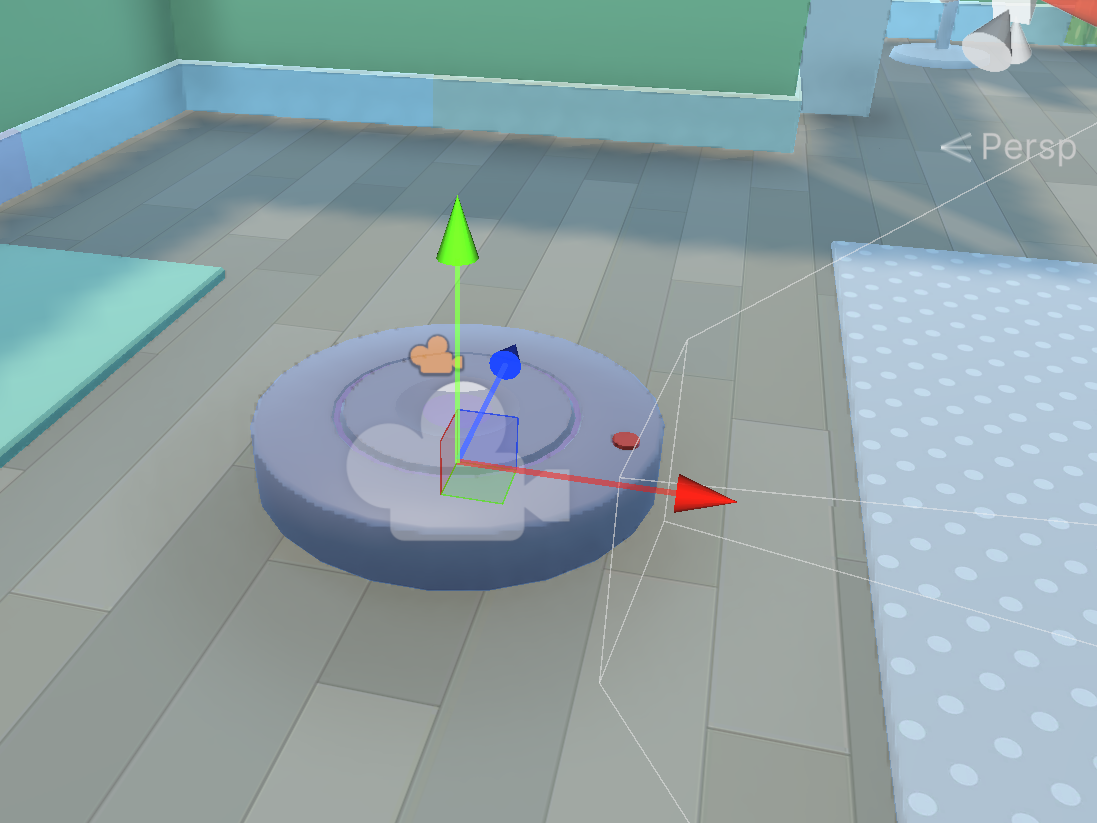
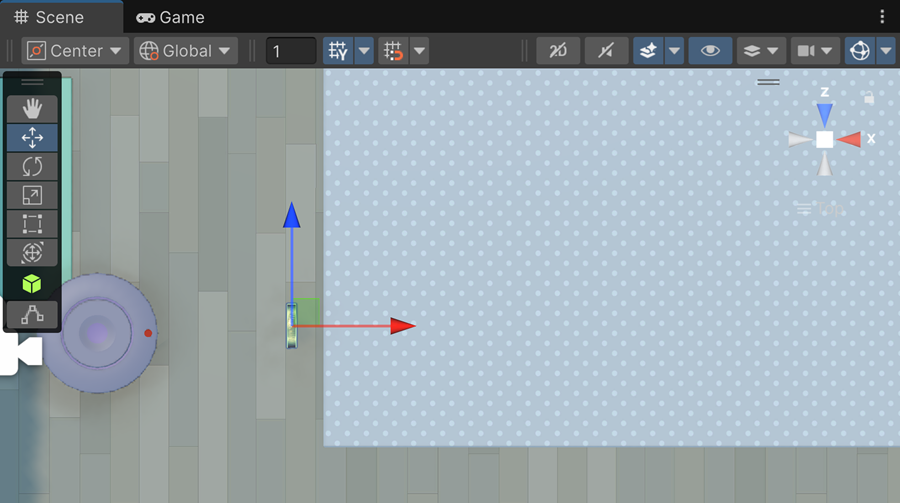
Click and drag RobotVacuum_2 into the scene, near the main door on the left.
Avertissement
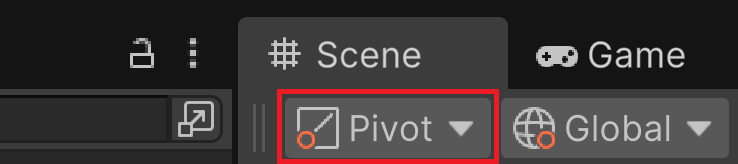
Unity uses two reference points for an object: the center and the pivot. Since the Position, Rotation, and Scale values in the Transform node are defined relative to the pivot, PLEASE configure your tools to use the pivot as the reference point:
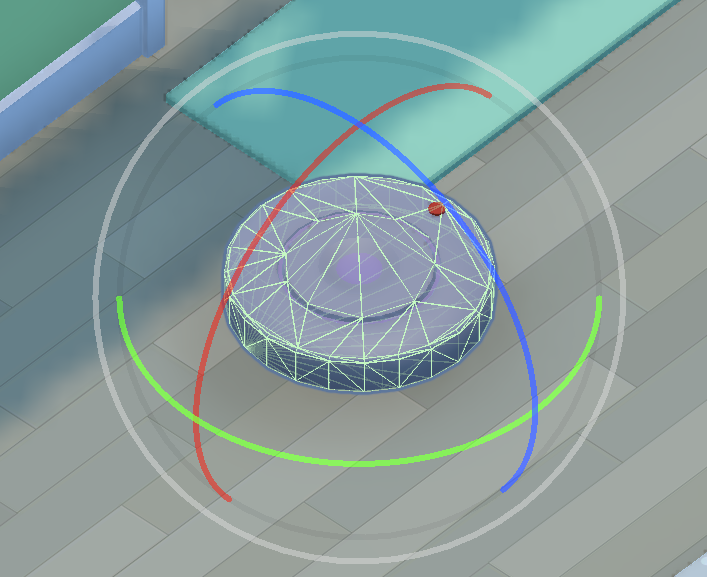
Rotate the player by 90 degrees on the Y-axis so that it’s facing the center of the room. Focus on the red spot on the top of the robot.
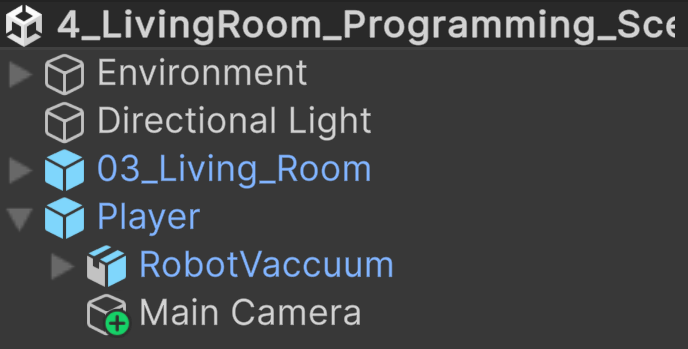
In the Hierarchy window, rename your chosen character “Player” for clarity.
Create a PlayerController script
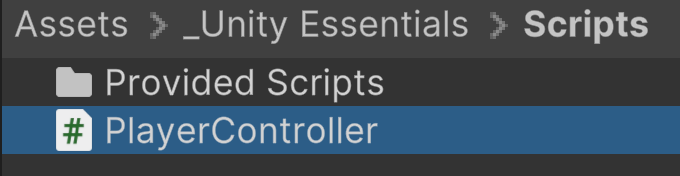
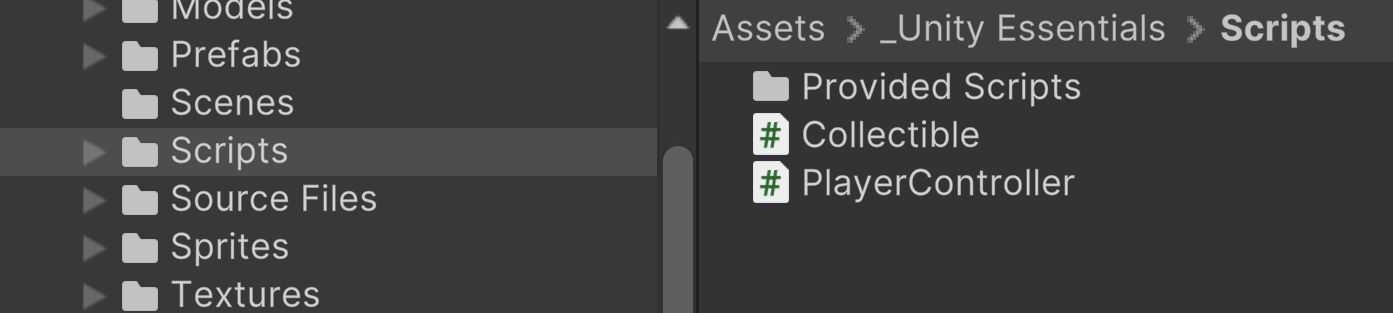
In the Project window, navigate to _Unity Essentials > Scripts.
Right-click in an empty part of the Scripts folder and select Create > MonoBehaviour Script.
Rename this new script « PlayerController »
It’s important to get the name correct right now — renaming it later can cause problems.
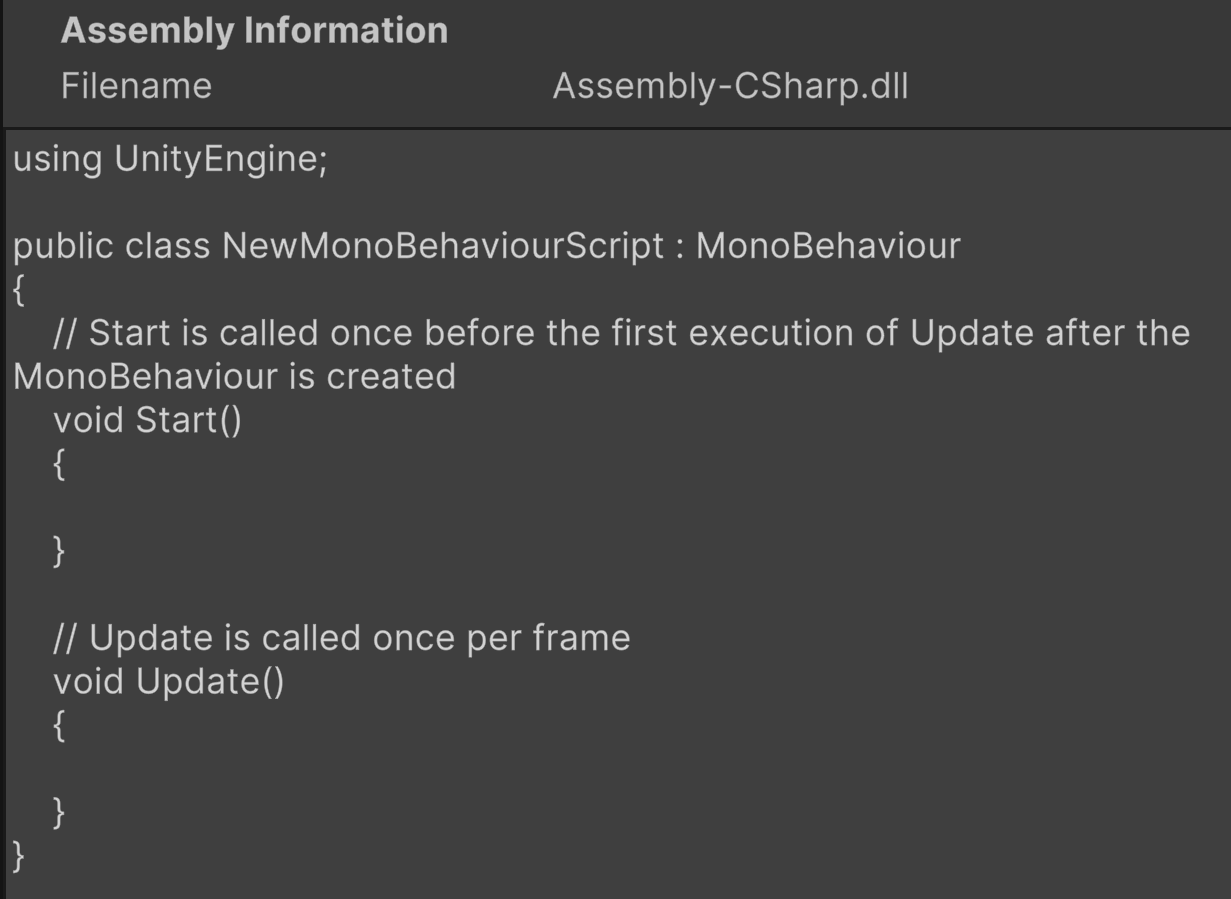
You’ll see the code of the new blank script in the Inspector window. Notice that the name of the file is included in the code. That’s why it’s important to spell the file name correctly.
Double-click the script file to open it in your default script editor, such as Visual Studio.
It may take a while to open the application the first time.
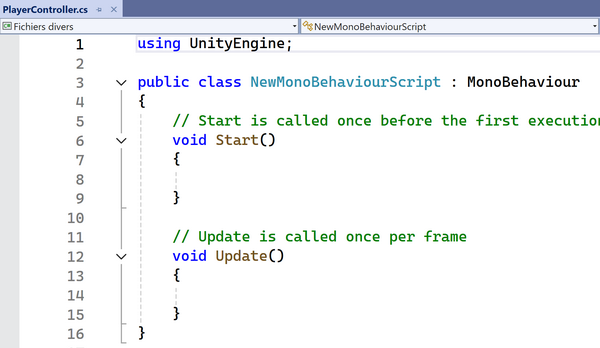
Copy and paste all the code below, overwriting the code already in your script in its entirety.
using UnityEngine;

// Controls player movement and rotation.
public class PlayerController : MonoBehaviour
{
        public float speed         =   5.0f; // Set player's movement speed.
        public float rotationSpeed = 120.0f; // Set player's rotation speed.

        private Rigidbody rb;                // Reference to player's Rigidbody.

        // Start is called before the first frame update
        private void Start()
        {
                rb = GetComponent<Rigidbody>();  // Access player's Rigidbody.
        }

        // Update is called once per frame
        void Update()   { }

        // Handle physics-based movement and rotation.
        private void FixedUpdate()
        {
                // Move player based on vertical input.
                float moveVertical = Input.GetAxis("Vertical");
                Vector3 movement = transform.forward * moveVertical * speed * Time.fixedDeltaTime;
                rb.MovePosition(rb.position + movement);

                // Rotate player based on horizontal input.
                float turn = Input.GetAxis("Horizontal") * rotationSpeed * Time.fixedDeltaTime;
                Quaternion turnRotation = Quaternion.Euler(0f, turn, 0f);
                rb.MoveRotation(rb.rotation * turnRotation);
        }
}
Save the script in Visual (CTRL+S)
Go back to the Unity Editor.
You may notice that Unity editor is compiling the new version of the script.
Associate script to object
In the Project window, find the PlayerController in the Scripts folder.
Click and drag this script onto your player character in the Scene view.
Nothing will appear to happen after you do this.
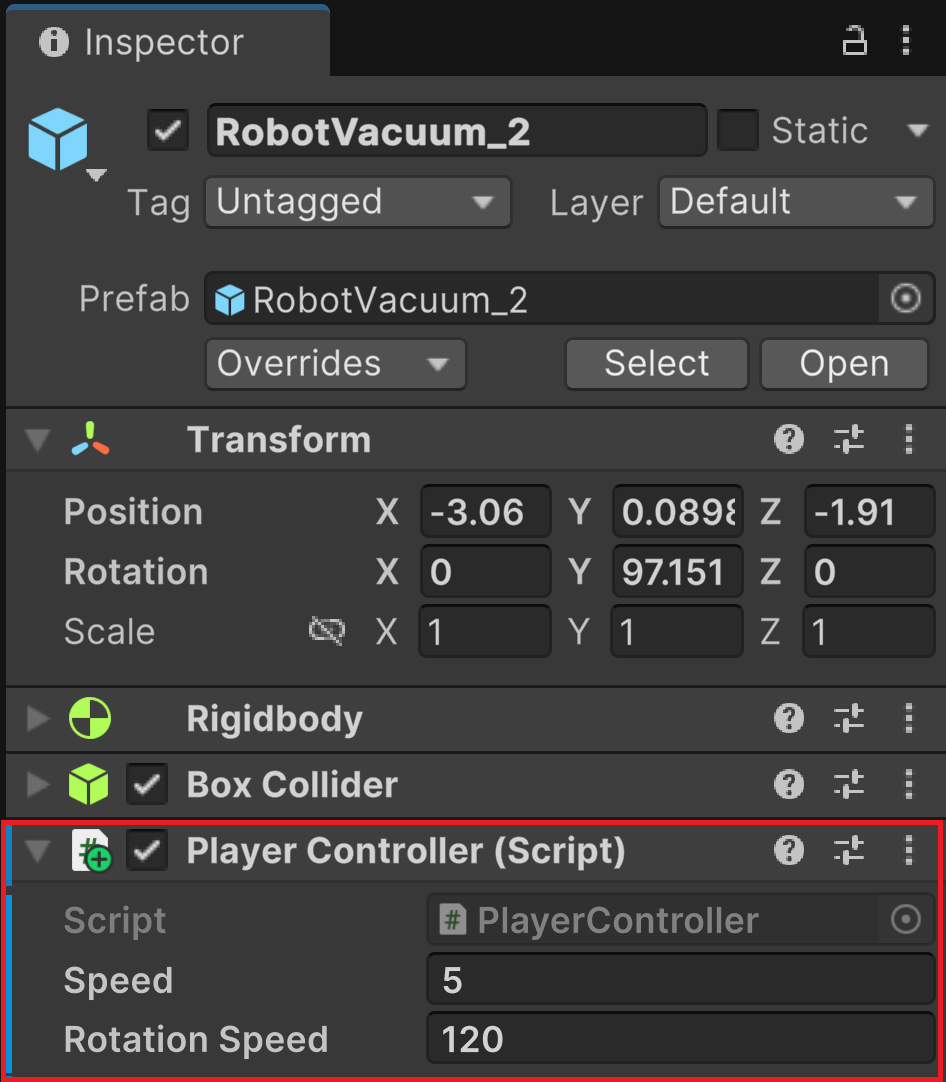
In the Hierarchy window, select your player GameObject.
Verify that your PlayerController script has been added at the bottom of the Inspector window.
Enter Play mode.
Move the player with the arrow keys or the WASD keys.
Test in Play mode
Test different values of Speed / Rotation Speed in Inspector while in Play mode.
You can test new values live !
Exit play mode, values will revert back !
Change Speed / Rotation Speed and save your scene.
FPS Cam
Right now, the camera is stationary and potentially confusing for the actual control of the player character. We will position the camera to follow the player in a third-person view, which will be more immersive and intuitive. For this, we make the camera a child GameObject of the player GameObject in the Hierarchy window.
In the Hierarchy window, locate the Main Camera GameObject.
Click and drag the Main Camera GameObject onto your player character in the Hierarchy window, making it a child GameObject.
You’ll see the Main Camera GameObject indented under the player character in the Hierarchy window.
Now the Main Camera is a child GameObject, its position and rotation are relative to its parent GameObject.
Select the Transform component of the Main Camera GameObject:
Reset all of the position and rotation values to 0.
After that, notice that:
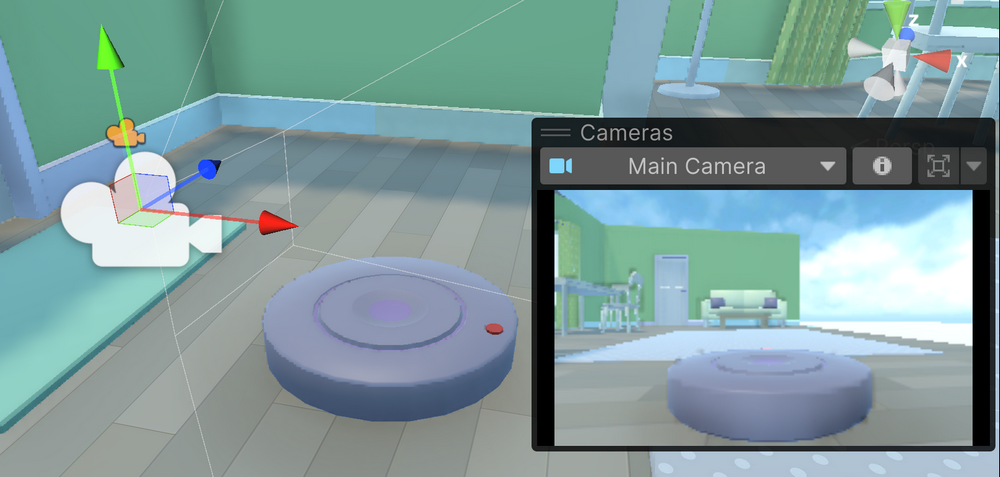
The main camera is now centered on the robot
The camera is looking in the direction of the red point.
Activate the camera Preview panel.
In the Scene view, adjust the camera’s position to be slightly above and behind the player.
Enter Play mode.
Use the arrow or WASD keys to play and test.
Have fun !
Script Structure
Set up
We want to script a collectible object to automatically rotate in the scene.
In the Project window, navigate to _Unity Essentials > Prefabs > Collectibles.
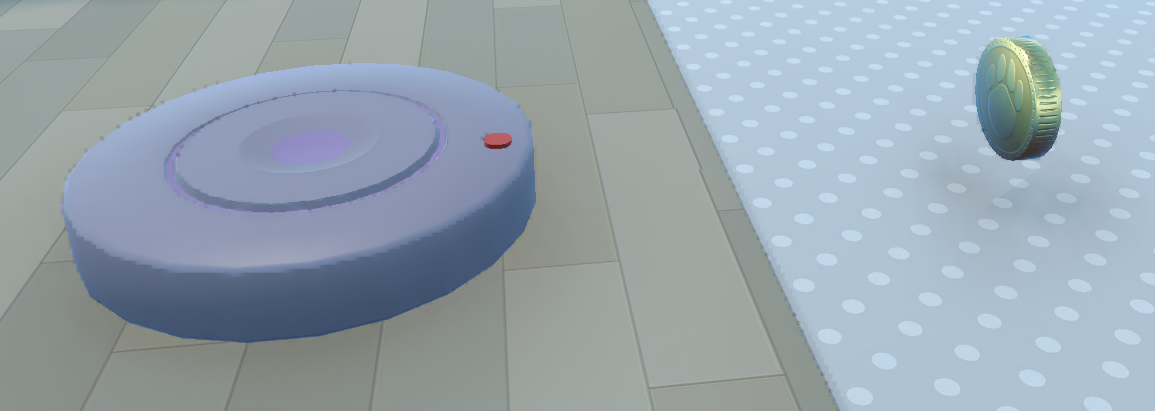
Drag and drop Collectible_coin prefab into the scene.
Adjust the coin’s position, rotation, and scale in the Scene view to ensure that it is easily visible and reachable by the player.
In the Project window, navigate to the _Unity Essentials > Scripts folder
Within the Scripts folder, right-click and select Create > MonoBehaviour Script.
With the script’s name automatically highlighted, immediately rename this new script « Collectible ».
Just like last time, the spelling of the name is important because it becomes part of the script.
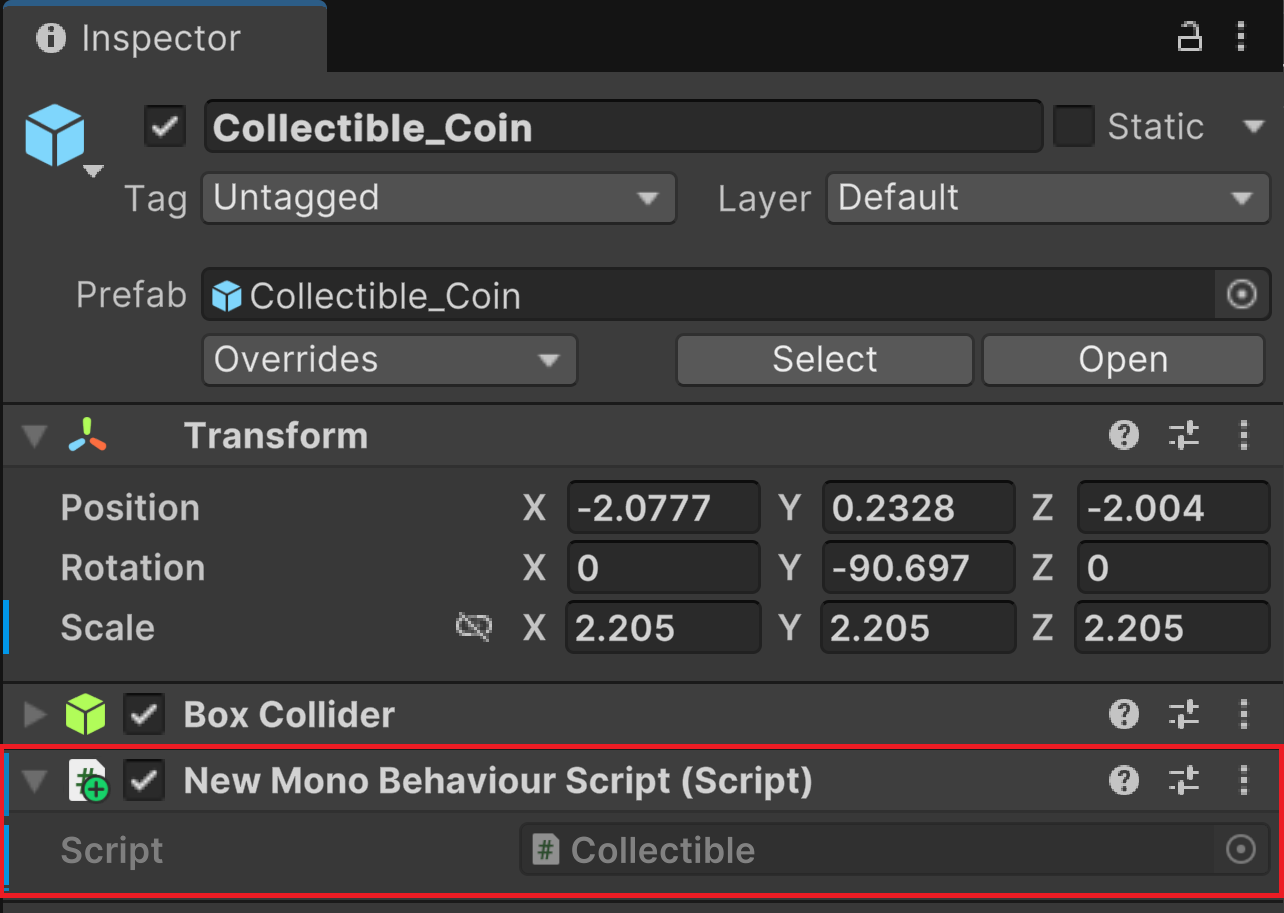
In the Hierarchy, select the Collectible GameObject.
Drag and drop the new script into an empty space of the Inspector window for the Collectible GameObject.
Script structure
In the Project window, double-click the Collectible script to open it in the script editor.
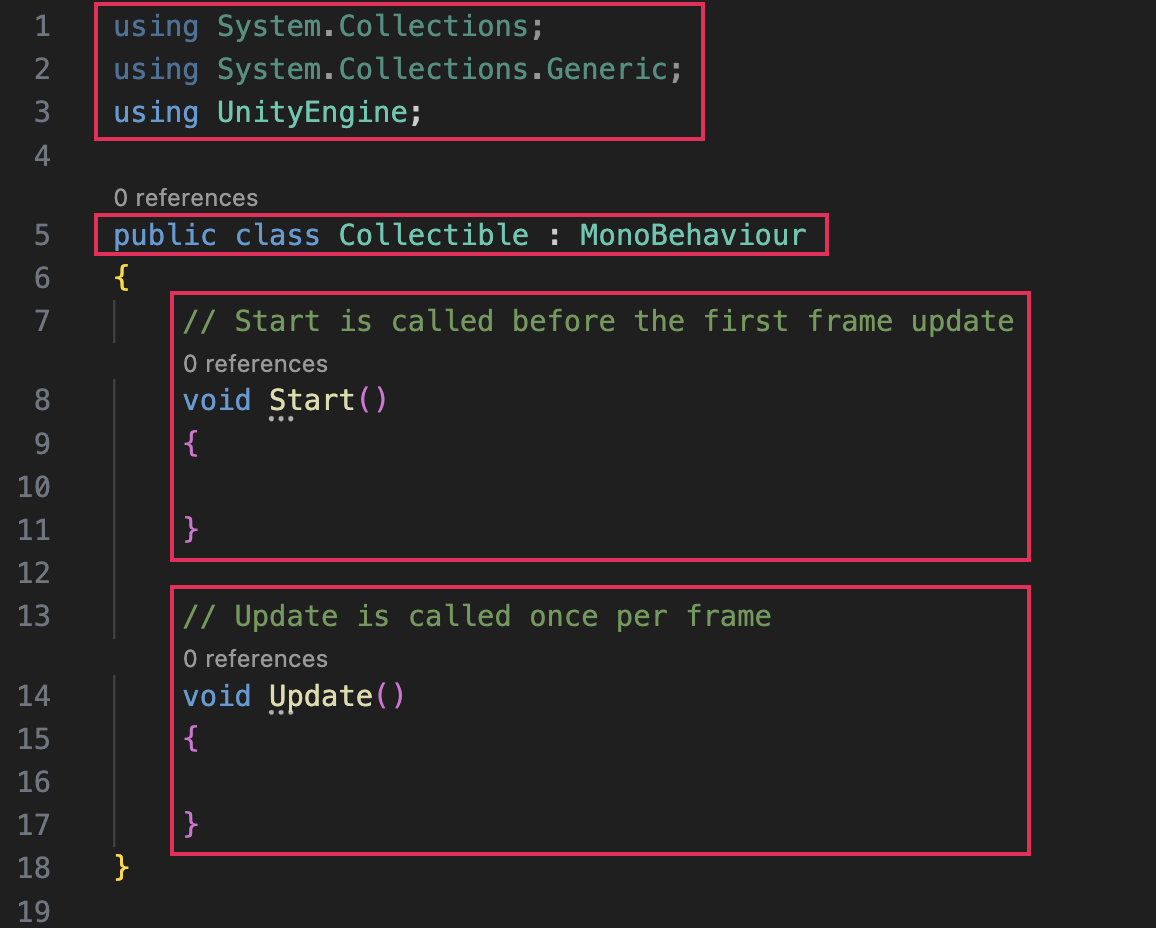
using UnityEngine: this line imports the internal Unity libraries and their classes.
public class Collectible : MonoBehaviour: This defines the script as a public class named « Collectible ». Moreover, this new class inherits from Unity’s MonoBehaviour class.
Start(): This function is executed once at the beginning of the game.
Update(): Unity runs this function several times per second.
In Unity, Scripts inherit from MonoBehaviour and this inheritance allows us to add scripts as components to GameObjects.
Code in the Update() function is executed many times continuously throughout the game, making it suitable for ongoing actions and animations. This is where you’ll put your rotation code so that the collectible will rotate continuously.
Analyze rotation
Select the collectible object and frame it in the Scene view.
Select rotation tool.
Rotate the collectible relative to the vertical axis, for this use the gizmo in the scene view.
Meanwhile, look for the rotation value that is changing in the transform node.
Write the script
It’s time to add continuous rotation from your Collectible script. For this, we use the transform.Rotate method, a built-in Unity function that makes an object rotate in three dimensional space. We call this function inside the Update function, thus the collectible will rotate a little bit each frame, making it appear to continuously rotate.
Open the Collectible script in the script editor.
Write the following code inside Update function:
transform.Rotate(0, 2*360*Time.deltaTime, 0);
Save the script.
Go back to Unity Editor.
Enter Play mode.
Adjust the speed
Avertissement
The transform.Rotate() function requires float values:

Thus, do not forget to add the f after each decimal number: 0.4f, otherwise, you will get an error message.
In the last script, we write: 2*360*Time.deltaTime, explanations:
Time.deltaTime is the time elapsed between the current and last call of the update function, making the rotation frame-rate independent, ensuring a smooth and natural movement.
The transform.Rotate function in Unity uses degrees as the unit of rotation.
Thus, writing 360 * Time.deltaTime makes the object perform 1 rotation per second.
The value 2 acts as a multiplier making the object complete 2 rotations per second.
Now:
Change the multiplier to reduce the speed to half a rotation per second.
Save the script and return to the Unity Editor.
Play your scene to observe the slower rotation of the collectible.
Create script variable
Open the Collectible script in your script editor.
The line before the Start() method, but after the first opening curly bracket of your script, declare a new public float variable by adding the line:
public float rotationSpeed;
Note
The keyword « public » makes this value editable in the Inspector window.
Now, replace the hard-coded rotation value in the Update() method with this new variable:
transform.Rotate(0, rotationSpeed, 0);
Save the script and switch back to the Unity Editor.
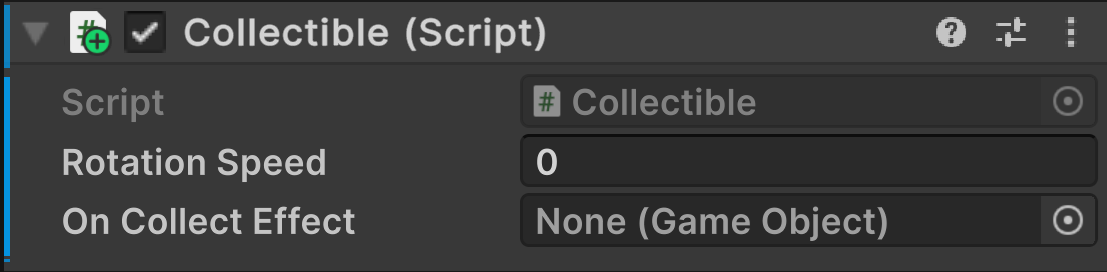
In the Inspector window, you now see the rotationSpeed variable in the Inspector window when you select the collectible object, which is set to zero by default:

Note
Notice that Unity has changed your camelCase rotationSpeed variable to Rotation Speed in the Inspector window.
In the Inspector window, set the Rotation Speed value to a number like 0.2 to control the speed of rotation.
Play your scene to observe the slower rotation of the collectible.
Note
Now, if you want to adjust that value, you don’t need to open a script! You can make the change in the Inspector window.
Event Trigger
Currently, the coin behaves like a scene object. When the robot hits it, it bumps into it and nothing else happens.
Enter Play mode and try to collide with the coin — notice what happens.
Exit Play mode when you’re done testing.
We would like the robot to pass through the coin, making it disappear at that moment.
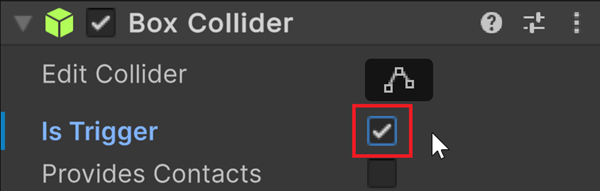
IsTrigger property
We use the is Trigger property of the Collider component thus it tells the collider component to act as a trigger instead of a physical collider. This way, the coin will no longer have a solid barrier, but it can still detect entry by the player or other GameObjects.
Make sure that the collectible is positioned in your scene so that the player can run into it.
Select the collectible object, then locate its Collider component.
In the Collider component, enable the Is Trigger property. This transforms the physical collider into a trigger area.
Enter Play mode and verify that the player can move through the collectible without any physical resistance.
Exit Play mode when you’re done testing.
Avertissement
To detect when the robot makes contact with the collectible, we need two things: write an OnTriggerEnter function in the script of the collectible and check that the robot has a Rigidbody component attached to it (already set).
Reopen the Collectible script in your script editor.
After the the Update method, add this new function:
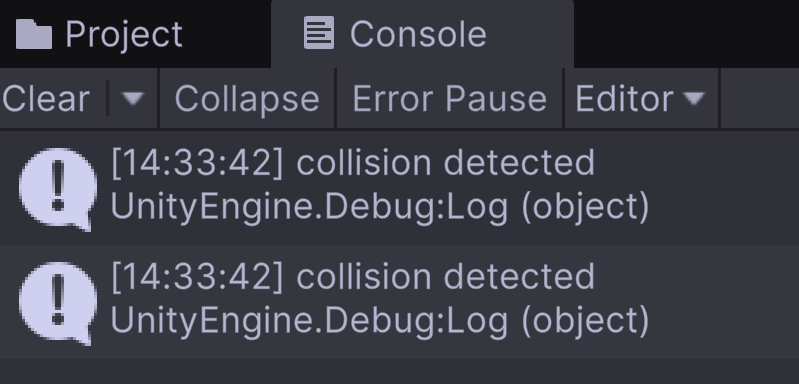
private void OnTriggerEnter(Collider other)
{
        Debug.Log("collision detected");
}
Enter Play mode and traverse the coin with the robot.
Notice that debug messages have appeared in the console:
Note
Strangely, you can notice that two events have been triggered for one traversal !
In the OnTriggerEnter fonction : write “Destroy“ and the intellisense may provide autocomplete suggestions.
Then complete the line of code like this :
private void OnTriggerEnter(Collider other)
{
        Destroy(gameObject);
}
Note
The “gameObject” here refers to the GameObject the script is attached to, which in this case, is your collectible. Also, note that “gameObject” starts with a lowercase letter here.
Save the script, return to Unity, and enter Play mode.
Visual Effects
In Unity, you can use particle systems to simulate complex visual effects such as fire, smoke, or a burst of sparks. In this step, you’ll select a particle system to provide visual feedback when you collect a coin.
In the Project window, navigate to _Unity Essentials > Prefabs > VFX folder.
This folder contains pre-made 3D visual effects that you can use in your scene.
Double-click the various 3D particle system prefabs to preview them in editing mode.
You should see a Particles panel that allows you to restart and preview the particle effect.
Take note of which one you want to use for your collectible.

Exit prefab editing mode using the small back arrow at the top of the Hierarchy window.

In this step, you’ll create a variable of the type GameObject to reference your chosen particle effect prefab. Later on, you’ll be able to reference this variable to spawn your particle effect in the scene.
Open your Collectible script in your script editor.
Below your rotationSpeed variable, add a new line that declares a new public variable of type GameObject:
public GameObject onCollectEffect;
Save your script and switch back to the Unity Editor.
In the Unity Editor, select the collectible GameObject that your script is attached to.
You should now see the new On Collect Effect variable with a None value assigned to it.
In the Project window, drag your chosen VFX prefab onto the On Collect Effect variable box in the Inspector window.
This links your VFX prefab with the variable in your script:

Note
If you enter Play mode now, the particle effect still won’t generate, you need to write some code for that.
Avertissement
In Unity, instantiating means copying !! In fact, instantiating an object means creating a copy of its prefab during runtime, this way you are making a new instance of that prefab in your scene.
The Instantiate method also requires certain information to execute:
Which object to instantiate.
The position of the instantiated object.
The rotation of the instantiated object.
Inside the OnTriggerEnter method, after the Destroy, add the Instantiate code as below:
Instantiate(onCollectEffect, transform.position, transform.rotation);Avertissement
Keep in mind that since this code defines properties of the collectible, « transform » refers to the transform (position, scale, rotation) of this particular GameObject.
Save your script, return to Unity, and enter Play mode.
You’ll see the particle effect appear when you collide with the collectible. This visual feedback is much more satisfying!
Populate your scene
In the Scene view, make sure you are using Global coordinates so that you can move objects in a straight line relative to the world’s coordinates, regardless of which way each object is facing.

Use the Scene view gizmos to switch to the Top view to get a better perspective for arranging the collectibles.
Select the Move tool, then select your collectible.
Press Ctrl+D (macOS: Cmd+D) to duplicate the collectible.
The duplicate collectible will be at the same position — so you won’t see it in the Scene view
You will see a copy appear in the Hierarchy window.
Move the duplicated collectible along a specific axis.
To ensure that the collectibles are evenly spaced, hold down Ctrl (macOS: Cmd) while you move the collectible.
That way, you can place the collectible at fixed increments along the chosen axis.
Repeat the process: duplicate / move to create a series of collectibles, forming a path or pattern.
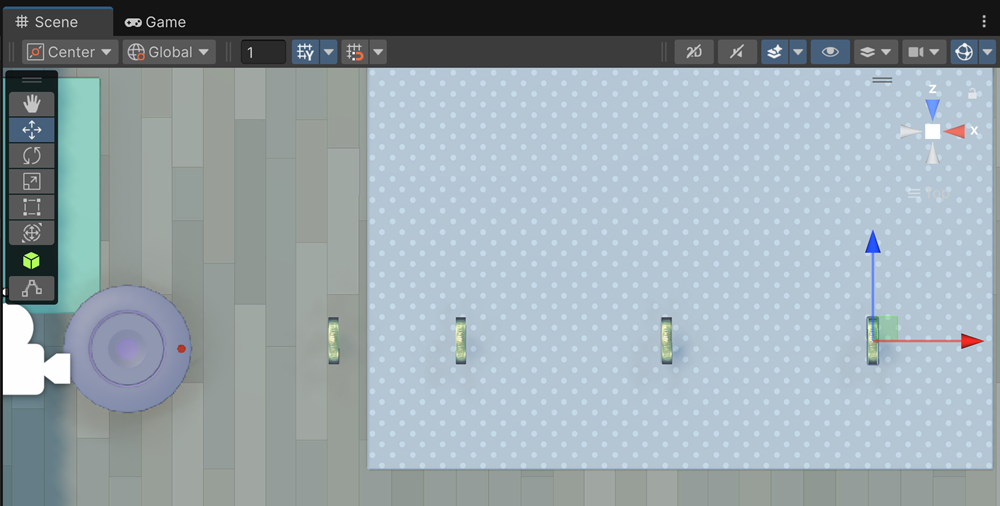
Make an interesting path through the environment so that the user of your game will explore and interact with the entire living room.
Test your living room scene in Play mode and try to collect all the collectibles — it should be pretty satisfying gameplay now that you have some visual feedback on each collision!
Improve collision
You may have noticed something strange: collectibles disappear when they collide with one of the chairs:
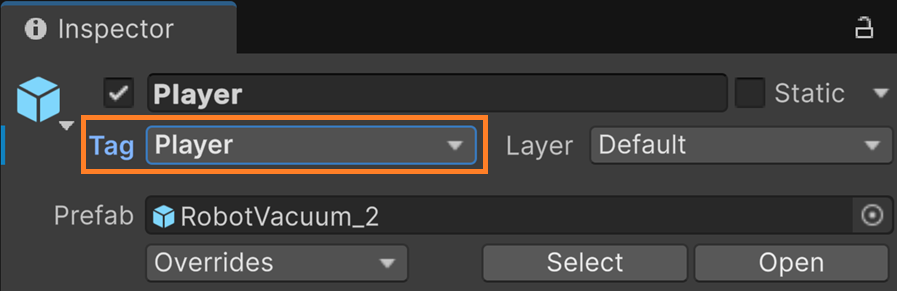
To fix this, you’ll need to adjust the logic in the code so that only the player triggers these events. For this, you’ll use a feature in Unity called tags used to identify GameObject.
Select the player GameObject, open the Tag dropdown at the top of the Inspector window, and select Player to apply that tag.
In the Collectible script, add the following if-statement code:

Avertissement
“other” refers to the other object that has collided with this one. With that in mind, here’s how you can read the code above: If the “other” GameObject that collided with me has the Player tag, then execute the code inside the brackets.
Note
Consider that the tag is a string attached to each object. These tags can be an easy way to create categories or group of object in the scene. For example, all the coins can share the tag « coin » to express that they are part of the same group.
Save your script and return to Unity.
Enter Play mode to test your scene.
Group collectibles
You now have a lot of collectible objects in your scene, and the Hierarchy window is getting very cluttered.
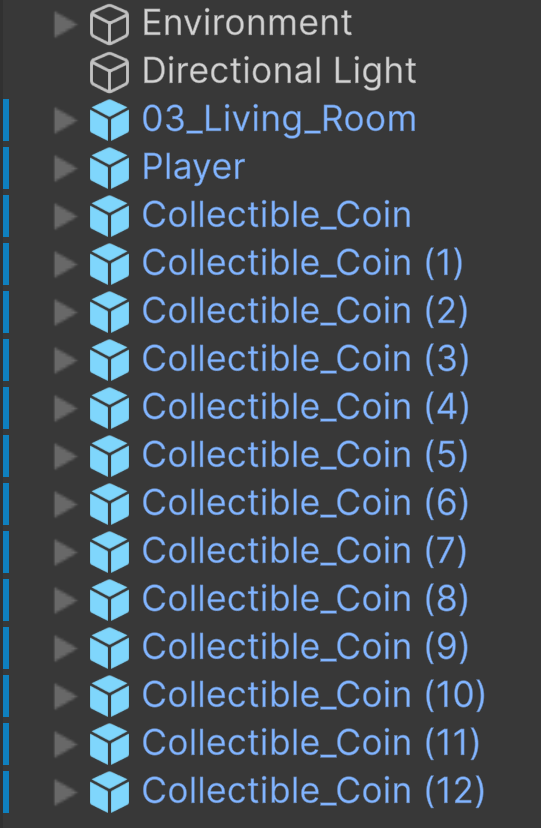
Select the first collectible GameObject
Hold down the Shift key and select the last collectible object in your list to select all GameObjects in between.
Right-click the selected objects and select Create Empty Parent.
This action creates a new GameObject with the collectible GameObjects indented as child GameObjects.
Rename this new GameObject to something descriptive, like “Collectibles” (press F2).
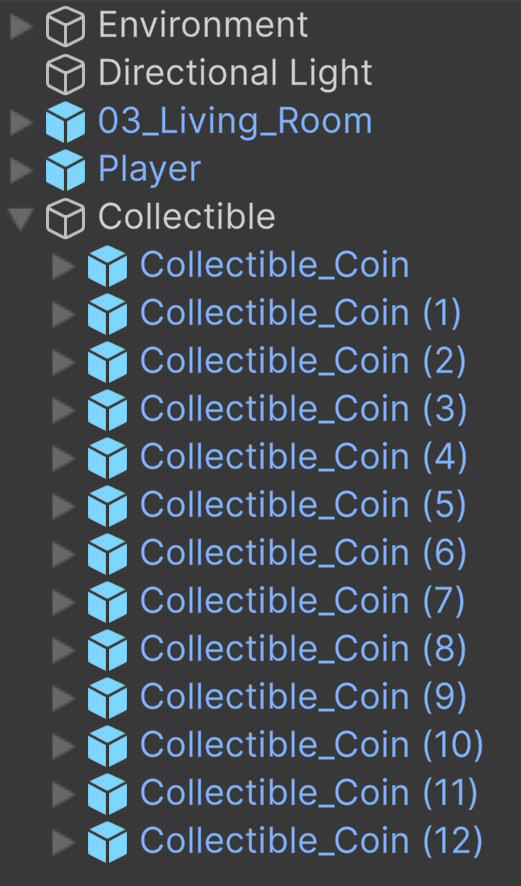
You can now expand and collapse that parent GameObject in the Hierarchy to keep things nice.
Extra
Add a jump ability
The ability for a player character to jump unlocks limitless additional gameplay possibilities and mechanics.
Open the PlayerController script in your script editor.
Add the following variable declaration statement:
public float jumpForce = 5.0f;
Inside the Update() function, add the following code:
if (Input.GetButtonDown("Jump"))
{
        rb.AddForce(Vector3.up * jumpForce, ForceMode.VelocityChange);
}
if (Input.GetButtonDown(« Jump »)): Checks if the Jump button is pressed. Jump is configured in Unity’s Input Manager to correspond to a key or button press. By default, the Jump action corresponds to the Spacebar.
rb: a reference to the GameObject’s Rigidbody component, used to apply physics.
rb.AddForce(Vector3.up * jumpForce, ForceMode.VelocityChange): Applies an upward force to make the object jump.
Vector3.up indicates the upward direction, and jumpForce sets the force magnitude.
ForceMode.VelocityChange changes velocity directly, making the jump instant.
Save your script and return to Unity.
Enter Play mode and press Spacebar to test the new jump. Adjust the Jump Force variable as you see fit.
Open the door
We will allow the player to open the door.
Create a new script in the Unity Essentials > Scripts folder named “DoorOpener”.
In the Scene view, select the door on the right side of the living room,
In the Hierarchy window, make sure you have selected the parent Door GameObject — and not the child DoorPanel or DoorHandle GameObjects.
With the Door GameObject selected, select Add Component, then search for and add your new DoorOpener script.
Open the DoorOpener script in your script editor and replace it by copying and pasting the code below:
using System;
using UnityEngine;

public class DoorOpener : MonoBehaviour
{
        int doorState = 0; // 0:closed 1:opening 2:opened 3:closing
        float T0;

        private void OnTriggerEnter(Collider other)
        {

                // Check if the object entering the trigger is the player (or another specified object)
                if (other.CompareTag("Player") && doorState == 0) // door_closed
                {
                        T0 = Time.realtimeSinceStartup;  // timestamp of animation starting point
                        doorState = 1;
                }
        }

        private void Update()
        {
                if (doorState == 1)  // opening door animation
                {
                        if (Time.realtimeSinceStartup - T0 < 2)  // duration: 2s
                        {
                                transform.Rotate(0, -0.25f * 360 * Time.deltaTime, 0);
                        }
                        else doorState = 2; // now door is opened

                }
        }
}
Save this script and return to the Unity Editor.
With the Door GameObject still selected, add a new Box Collider component, then enable the Is Trigger property.
In the Box Collider component, select Edit Collider.
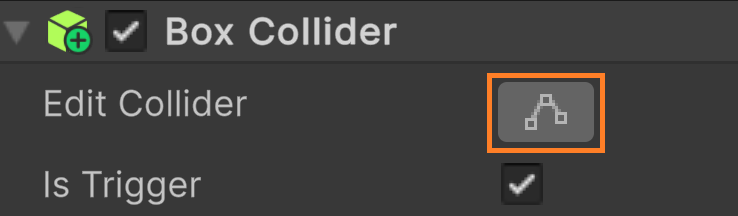
Use the Scene view collider controls to set the size and position of the trigger zone.

Avertissement
Be careful, editing the collider drawn in wireframe is difficult. The collider can be positioned differently from what you see, such as below the floor. For better positioning, rotate the camera to get a better view of the box’s 3D position.
Enter Play mode to test your game.
Exercise
Modify DoorOpener script to manage the closure of the door:
When the door has been opened and if the player hits the collider, launch an animation to close the door.
When the door is closed, it can be opened again, and closed again :)
Quizzz
Which of the following are true about scripting in Unity?
C# is the default scripting language used in Unity for creating game logic and interactions.
Unity only supports JavaScript for game development and interaction logic.
Scripts attached to GameObjects can control their behavior, animations, and interactions within the game.
An external script editor must be used for coding, since you can’t write code directly inside the Unity Editor.
What is the purpose of the Update() function, which appears by default in any new script you create in Unity?
To handle actions that need to occur on a frame-by-frame basis.
To save game data when exiting the game or application.
To initialize variables and set up game state before the game starts.
To manage the loading and unloading of game assets and scenes dynamically.
There are two errors in the line of code below. What are the errors?
transform.Rotate(0, 0.25, 0) >
The line of code should end with a semicolon (;) instead of a greater than sign (>).
The transform object needs to be capitalized (Transform) to be correctly referenced in Unity.
The Rotate method does not accept three arguments.
The number 0.25 should have an « f » suffix to explicitly indicate it is a float (0.25f).
Which statements are true about variables in C# programming?
Variables must be declared within the Start() function of a script.
Variables can appear in the Unity Inspector window if they are declared as public within the script.
Variables in C# often use camelCase notation.
Variables in C# can be of any data type, including integers, floats, and even GameObjects.
You have the code below in a Collectible script, but for some reason, when the Player GameObject collides with the collectible, the collectible doesn’t disappear. What could explain this?
private void OnTriggerEnter(Collider other) {
        if (other.CompareTag("Player")) {
                Destroy(gameObject);
        }
}
The Player GameObject does not have the Player tag applied.
Instead of “OnTriggerEnter”, it should say “OnPlayerEnter”.
There is a missing semicolon in the code snippet above.
The collectible object with this script attached does not have Is Trigger enabled in its Collider component.
What does the Instantiate() method do in a Unity script?
It compiles the script at runtime, allowing for dynamic code changes.
It deletes a specified GameObject from the scene after a delay.
Pauses the execution of the script for a specified amount of time.
It creates a new GameObject or a copy of an object at runtime, including all its components and properties.