Basics
Interface
In the Unity HUB, select the project to open it in the Unity Editor.
The most commonly used windows of the Unity Editor:

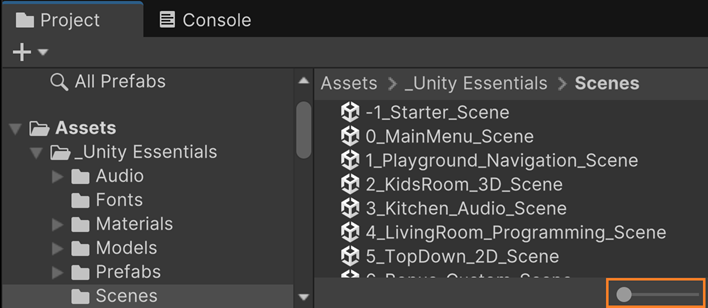
At the bottom, in the Project Window, you can find all the assets of the project presented in two modes: on the left with a tree structure and on the right using a thumbnail view.
Navigate through: Assets > _Unity Essentials > Scenes.
In the bottom-right corner of the Project Window, drag the slider all the way to the left to see the assets in a list.
Note
An Asset corresponds to any file or resource that is used in your project: 3D models, 2D sprite, audio file, script, shader, prefab, texture, animation… These files are generally stored in the asset folder of your project.
In the Assets window, double-click on -1_Starter_Scene to open it.
In the scene view, you will see a robot and a collection of other objects:
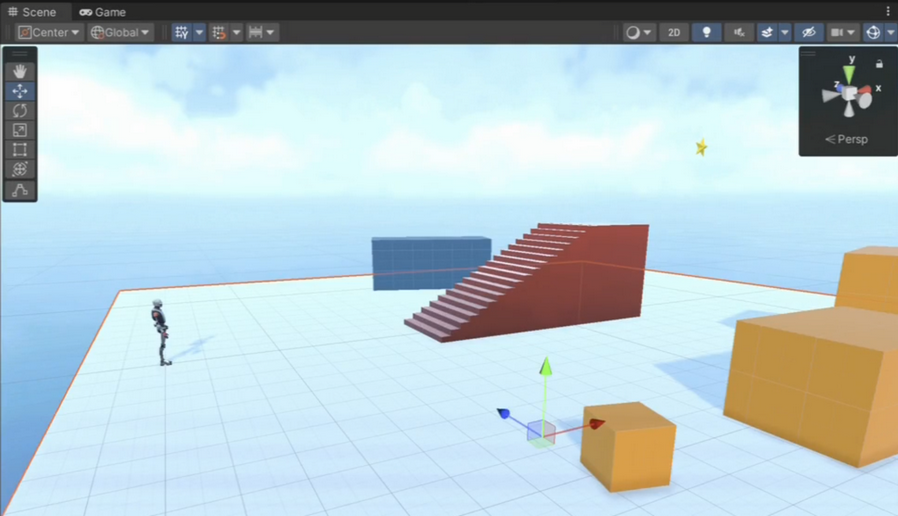
On the left, the Hierarchy window displays all the GameObjects (also called objects) in the current scene.
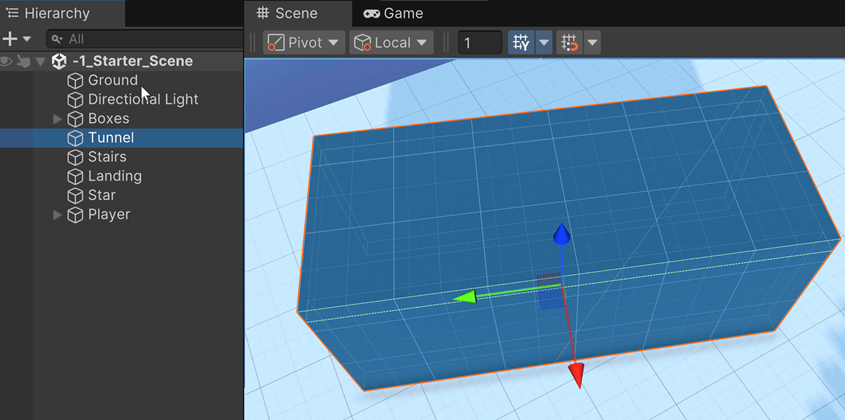
Frame an object
To frame an object: double-click the object in the Hierarchy Window to center it on the screen.
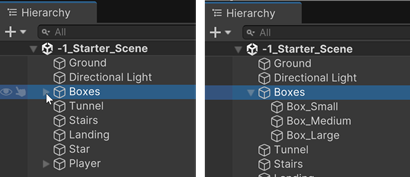
GameObjects Hierarchy
In the Hierarchy window, locate the GameObject called Boxes.
Use the foldout triangle on the left and expand it to explore the GameObjects within.
Note
GameObjects are typically organized in a hierarchical tree-like structure: a GameObject can have only one parent GameObject but it can contain multiple child GameObjects.
View Tool
Double-click the Ground GameObject to frame the entire ground in view.
Position your cursor over the Scene view.
Press the right mouse button without releasing it and drag the mouse.
The cursor turns into an eyeball icon, this is the View tool: moving the mouse, it’s like turning your head to look around in the real world.

Pan Tool
In the Hierarchy window, double-click the Stairs GameObject to frame it in the Scene view.
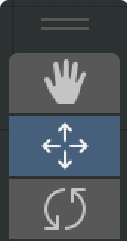
Select the top tool from the toolbar that looks like a hand, this is the Pan tool.
With the Pan tool selected, left-click and drag in the Scene view to pan side to side.
Note
Using arrow keys is equivalent
Play mode
The Scene view mode is like a movie set allowing you to craft your scene by adding, arranging, and positioning objects.
In Play mode, you launch the game and test it.
Avertissement
Any action performed in Play mode is canceled after going back to scene view mode. For example, if you move a rock, once the game ends, the rock reappears in its original position in the scene view. Only updates made in the scene view are permanent.
Next:
Click on the Play button at the top center of the Editor.
Test different game controls:
Press the arrow keys (WASD) to walk around.
Press the Spacebar to jump.
Move the mouse to rotate your view.
Hold the Shift key to run.
Try to jump to collect the star from the platform at the top of the stairs.
Press the Stop button to exit Play mode and return to the Scene view.
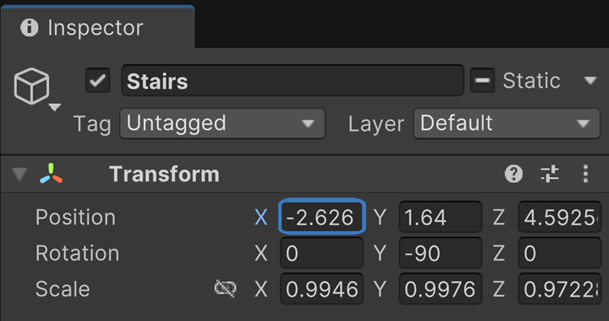
Inspector window
When you select a GameObject in the Scene view or in the Hierarchy window, its components and properties are listed in the Inspector window.
Select the Star GameObject to frame it in view
look at its Position, Rotation, and Scale values at the very top of the Inspector window.
Reduce the X Position value by 1 or 2 units to move the star closer to the platform
Reduce the Y Position value by 1 or 2 units to lower the star closer to the ground.
Enter Play mode again and try to jump and collect the star
Exit Play mode when you’re done.
Note
You can always undo any unwanted changes with Ctrl+Z (macOS: Cmd+Z).
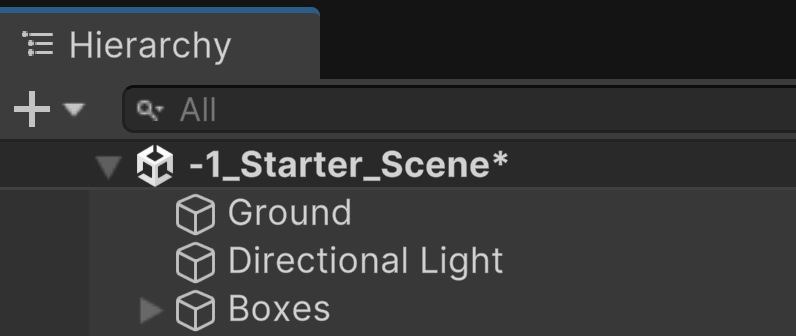
Save your scene
Unity doesn’t automatically save your scene. Make a habit of saving often so that you don’t lose any progress. If you have unsaved changes in your scene, there will be an asterisk (*) next to the name of the scene at the top of the Hierarchy window:
To save your scene, press Ctrl+S (macOS: Cmd+S).
After that, notice that the asterisk has disappeared.
3D scene navigation
Setup
In the Project window, open the scene named 1_Playground_Navigation_Scene.
In the Hierarchy window, locate the Playground_Areas GameObject.
Expand it.
Frame the four of the child GameObjects :
01_Swingset
02_Picnic_Area
03_Play_Structure
04_Firepit
Frame the parent Playground_Areas GameObject.
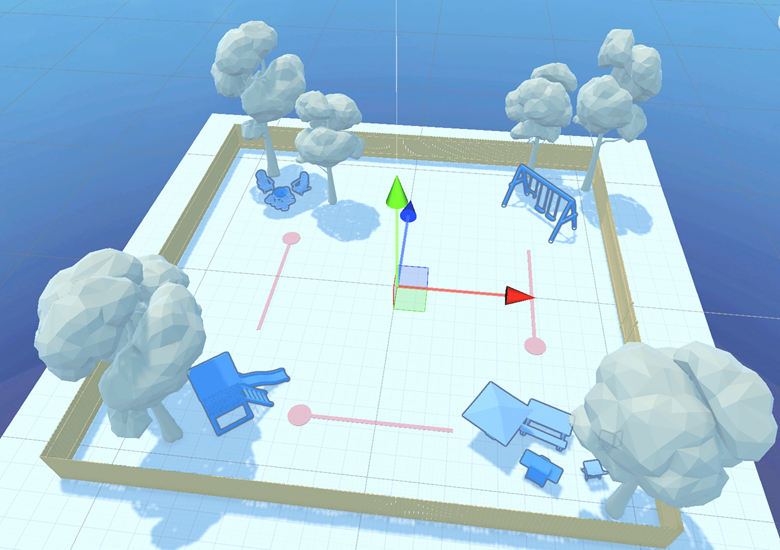
Objective
You have to do a scavenger hunt to find four hidden numbers that combine to form a four-digit secret code. If you enter the correct code in Play mode, you’ll be rewarded with some fireworks!
Flythrough mode
Use Flythrough mode in the Scene view by holding the right mouse button and using the WASD keys to navigate.
Locate the first hidden number on the back of the top bar of the swingset.
Framing in the Scene view
Select the Move tool in the toolbar. It’s the second tool, just after the View tool.
The Move tool allows you to select objects directly in the Scene view.
In the Scene view, select the grill by clicking directly on it.
Press F key to frame it. This is the same effect you’d get by double-clicking on it in the Hierarchy window.
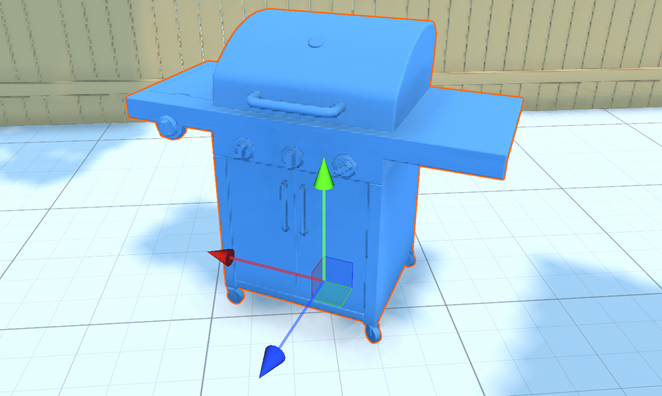
Press the F key a few more times: the view will alternate between a more zoomed in and zoomed out framing of that object.
Use your mouse’s scroll wheel to zoom in and find the second number hidden inside the grill.
Orbiting
Frame the play structure.
Hold Alt (macOS: Option), then left-click and drag with your mouse to orbit around the play structure.
Avertissement
Orbiting is different from using the View tool. Using the View tool and looking around is like moving your own head: your position stays in place but the rotation changes. Orbiting is like moving around an object while you stare at it — your focal point stays the same, but your position changes.
You will find the third hidden number on the bottom of the play structure.
Scene view gizmos
In game engines like Unity, the term gizmos refers to visual elements used in the editor to represent objects, tools, or concepts that are not visible in the actual game.
Frame the firepit. You might notice some strange black lines beneath it.
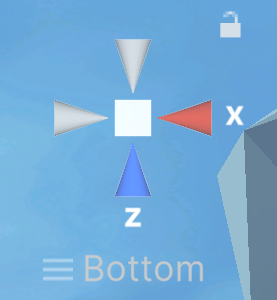
On the top-right corner, right-click the gizmo and disable Perspective to enter Isometric view (No distortion based on distance).
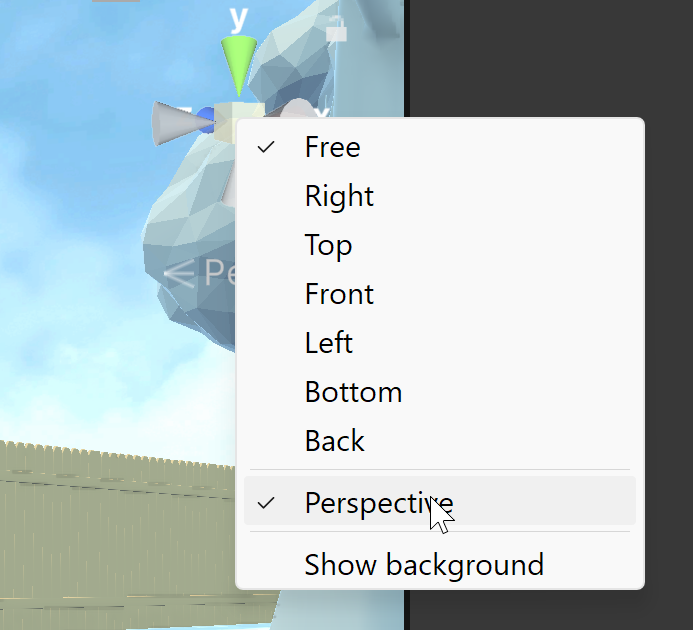
Click on the cone-shaped gizmos to view the firepit from: Back, Left, Right, Top or Bottom.
Find the the final digit.
Right-click the gizmos and re-enable Perspective
Enter code
Press the Play button.
Enter your code into the input box, you should see a fireworks.
The correct code is actually the year Unity was created.
Fly through
Recap: Frame, Orbit, Zoom
In the Hierarchy window, select the Rings GameObject.
Notice that it’s grayed out — this is because it is currently inactive.
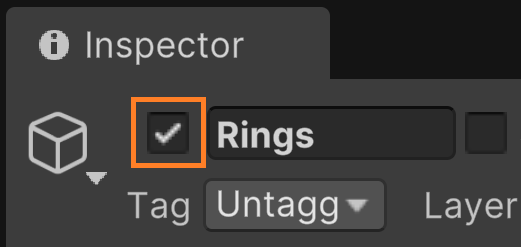
Look at the top of the Inspector and locate the checkbox next to the title Rings.
Enable the checkbox to activate the GameObject.
In the Hierarchy window, expand the Rings GameObject and frame Ring_1.

Perform the following operations to complete the race:
Hold Alt (macOS: Option) and left-click to orbit behind the ring.
Zoom through the center of the ring using the scroll wheel.
Select the next ring, then press F to frame it.
Flythrough
Try to complete the race again using Flythrough mode:
by right-clicking and using the WASD
by right-clicking and press Q to go straight down and E to go straight up.
In the Hierarchy window, select the Rings GameObject.
Disable the checkbox to deactivate the group of rings.
Transform tools
Setup
In the Hierarchy window, select the Mural GameObject.
At the top of the Inspector window, set this object as active.
Frame the Mural GameObject.
Use the Scene view gizmo cones to get into an optimal top-down view.
Tool shortcuts
To quickly change your tool, you can use QWERTY shortcuts:
Q: View tool
W: Move tool
E: Rotate tool
R: Scale tool
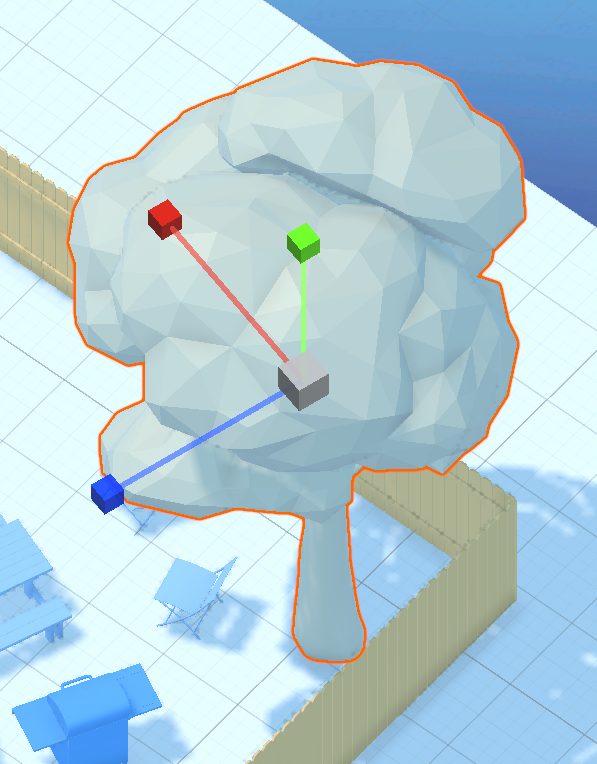
Move tool
Select the Move tool.
In the Scene view, select the large, red, triangular piece.
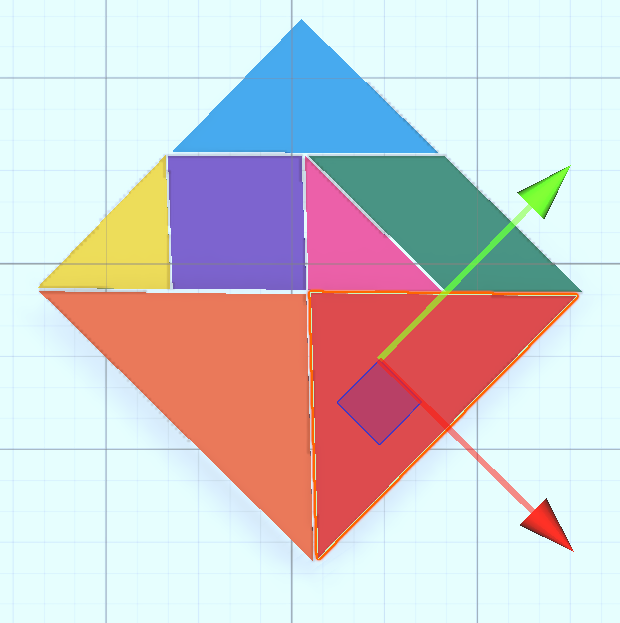
Notice that the 3 axes are oriented relatively the coordinate system of the selected object.
Change the axes by selecting global orientation:
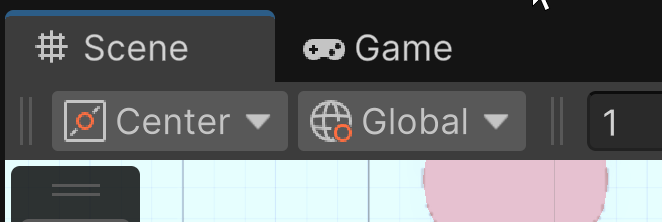
Notice that axes are now parallel to world axes.
Click and drag the red X-axis arrow to move your chosen triangular piece to the center of the playground.
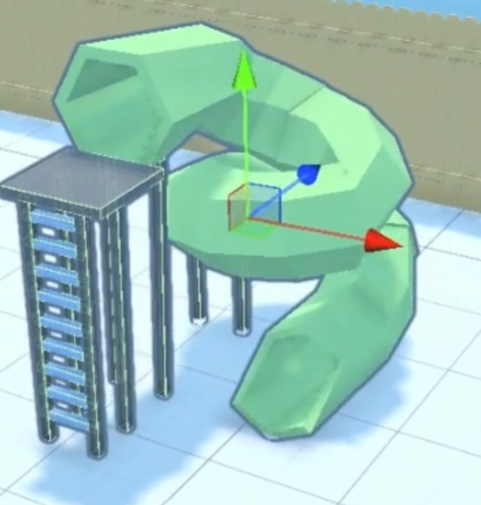
Rotate tool
Select the Rotate tool in the toolbox.
When an object is selected and framed, you should see colored rings around it.
Rotate the object around the Y-axis (green ring): select this ring and drag away.
Warning: don’t click and drag the ring as if you were turning a wheel. Instead, drag your mouse in one direction, as if you were drawing a straight line.
Adjust the rotation until the piece aligns with your mural’s design.
Isometric mode
On the top-right corner, right-click the gizmo and disable Perspective to enter Isometric view.
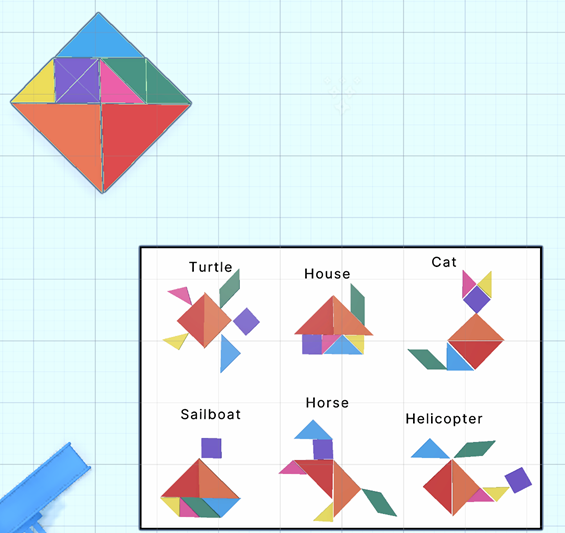
Go ahead and finish your mural.
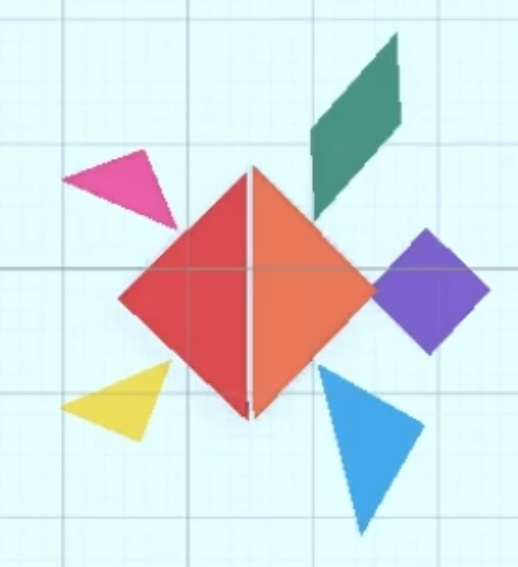
In the Hierarchy window, locate and select the Tangram_Reference GameObject.
In the Inspector window, disable it.
Right-click the gizmos and re-enable Perspective.
Note
You now have all the knowledge you need to complete your mural.
Scale Tool
Select the Scale tool in the toolbox.
Select a tree and frame it, you should see colored gizmos around it.
Scale the object in one direction: select the extremity of the gizmo and drag it away:

Remember that CTR+Z allow us to cancel last change.
Scale the tree using the gizmo in the center to scale in the three directions at the same time:
Avertissement
The Scale always work with local axes even if you are using global axes.
To go further
Make another mural.
Put together the tube slide:
Quizzz
Which of the following statements are true about the Unity Editor windows?
The Project window displays a list of the files and assets available to use in your Unity project.
The Hierarchy window shows the structure of the scene, including all GameObjects and their parent-child relationships.
The Inspector window provides detailed information about the selected GameObject and allows you to edit its properties.
The Scene view is where you can visually navigate and edit your game scene in a 3D space.
What is the Game view window?
A window that shows the organizational structure of all GameObjects in the current scene.
A window used for writing and debugging scripts in Unity.
A window that displays the game as it will appear to the player, allowing for real-time testing and gameplay preview.
A window that shows a list of all the assets and files in your Unity project.
Which of the following are true about how to navigate in Unity’s Scene view?
You can press the Shift key to orbit around to the opposite side of an object.
You can press the F key to frame the selected object in the Scene view.
You can orbit around an object by pressing Alt (macOS: Option) and clicking and dragging using the left mouse button.
You can use the right mouse button and WASD keys to enable the Flythrough mode for easy navigation.
What happens when you use the Scene view gizmo to disable Perspective and enter Isometric mode?
It activates a grid overlay on all objects in the scene, helping with alignment and proportion measurements.
Objects in the Scene view will turn black and white, making it easier to focus on their shape and position.
The Scene view switches to a non-perspective projection, where all objects are rendered at their actual size, regardless of their distance from the camera.
All of the objects are locked and no longer selectable.
Which of the following are true about the Move and Rotate tools in the Scene view?
The Rotate tool exclusively rotates objects in 90-degree increments rotation.
Pressing W activates the Move tool.
The Move tool can only position objects along the global X-axis.
Pressing E switches to the Rotate tool, which enables rotation of objects in 3D space.