Supplementary Content
Aspect ratio
We show how to simulate different screen aspect ratios to check what the end user will see. Because sometimes… things can get weird, and the programmer might go mad!
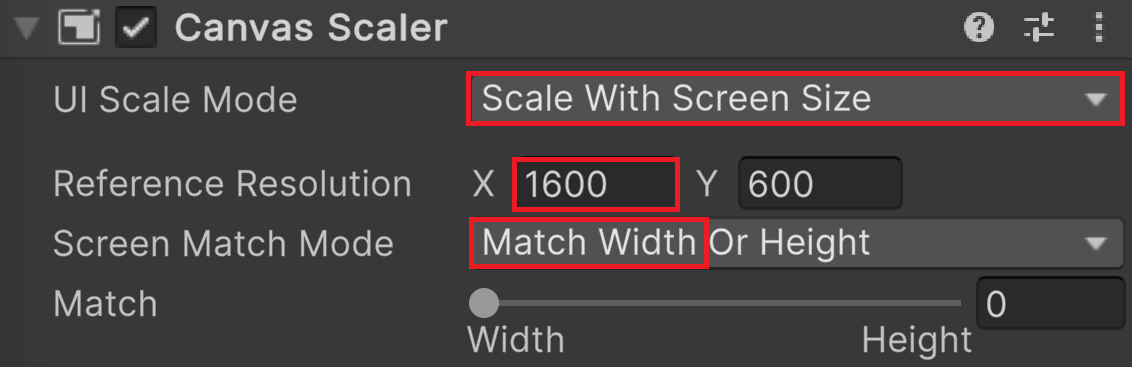
In the Inspector, change the UI Scale Mode for Scale With Screen Size
Set the Reference Resolution X parameter to 1600
The screen match mode is set to « Width or Height »
Select the Game view (do not enter Game mode)
In the top bar, select 16:10 Aspect

Select the Scene view
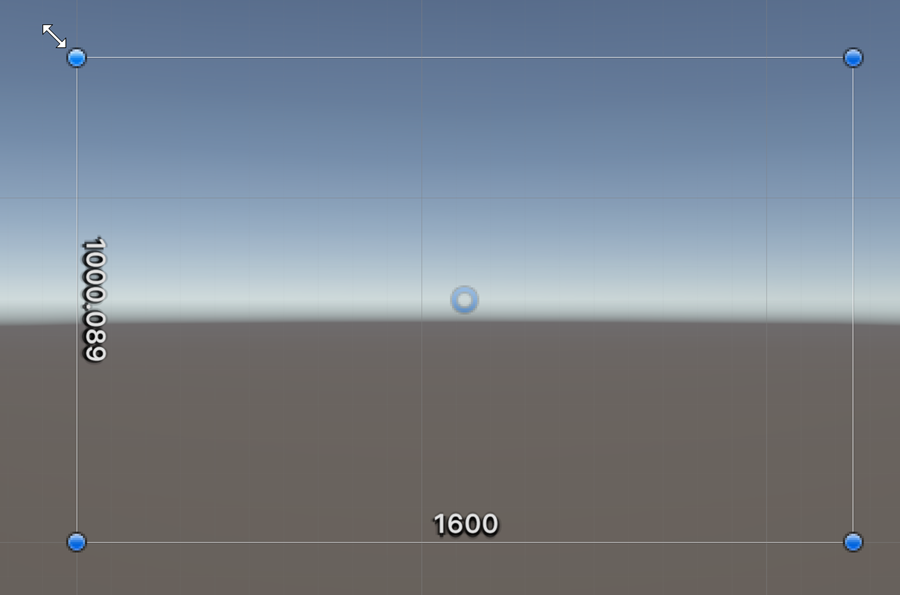
In the Hierarchy, select the Canvas and activate the Rect tool (not the Scale tool)
Select a corner of the rectangle and drag it away
Observe the dimensions of the canvas in pixels:
What is the logic?
We select a reference resolution of 1600 pixels wide
To simulate the screen of the end user, we chose a 16/10 aspect ratio
This implies, that the resolution of the screen of the end user is 1600x1000
Unity sets the size of the Canvas to 1600x1000
Since the canvas resolution matches the end user’s screen resolution, everything you draw on the canvas will appear exactly the same on its screen. Perfect!
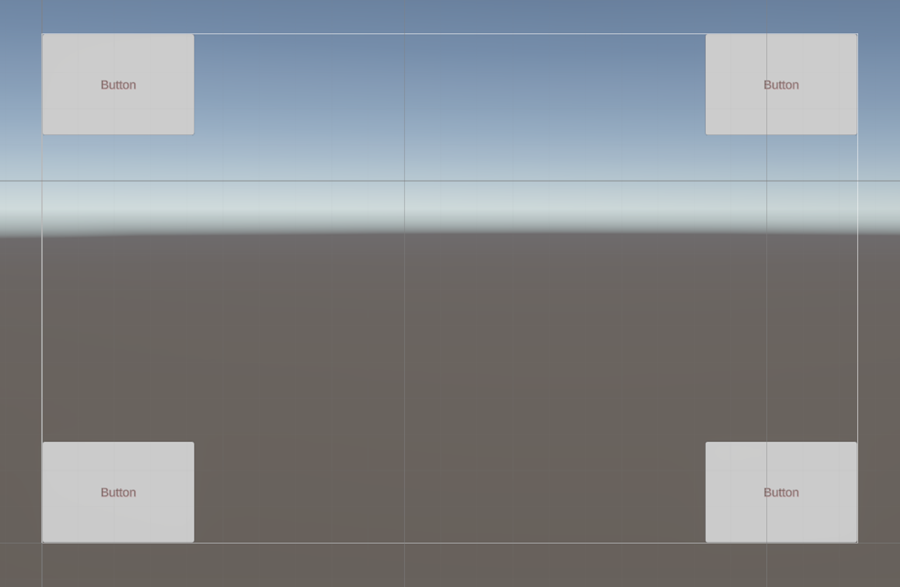
Right click in the Hierarchy and select UI > Button
Create 4 buttons, enlarge them, and place them in each corner of the canvas
Enter Play mode to see what the end user will see on its screen
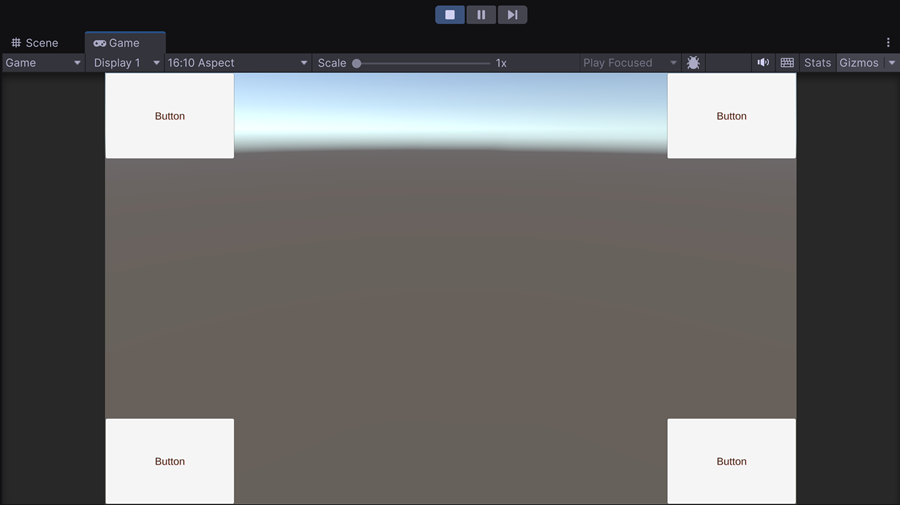
Notice that the Play mode window does not use 100% of the space. This is normal because the window emulates a 16:10 monitor. What you see is what the end user will see. Everything appears to be fine since the HUD matches exactly what was designed.
While in Play mode, change the screen ratio to 16:9
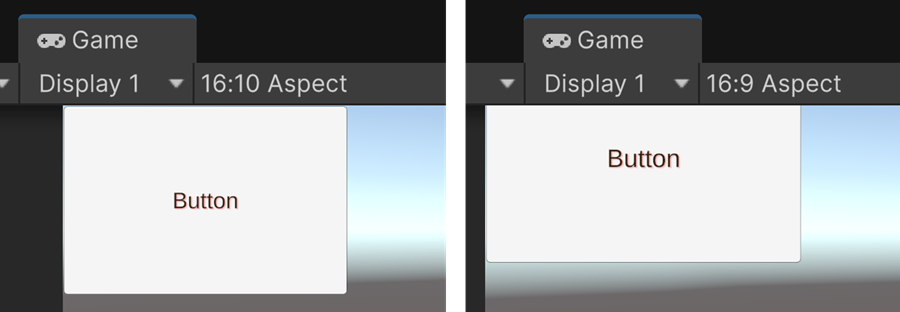
By selecting a 16:9 aspect ratio, the canvas resolution is now 1600x900. As a result, Unity shrinks the height of the canvas, causing anything outside to be cut off or hidden.
ScriptableObject
Intro
It is a good practice in Unity to prepare the HUD (Head-Up Display) in a separate scene for several reasons:
Modularity: By separating the HUD from the gameplay, you can reuse the same HUD across multiple scenes
Ease of Modification: You can work on the HUD independently from the rest of the game
Simplicity: You don’t have to edit your HUD while it’s mixed with objects from the 3D scene
So we need to share some information between the HUD scene and the current active scene.
A ScriptableObject is a reusable data object in Unity that allows you to store and share information across multiple scenes or objects without needing a GameObject. Unlike a MonoBehaviour, a ScriptableObject does not exist in the scene hierarchy but rather as an independent asset in the project.
Why use a ScriptableObject?
Store global data (e.g., settings, player progression, HUD variables)
Share values between multiple scenes
Separate data from gameplay logic for better architecture
Class
In the Interaction folder, right-click and select Create > Scripting > Scriptable object
Avertissement
Beware, you have just created a class, not an object
Rename the script to MyData
Double click the script icon to open it
Add two public variables:
using UnityEngine;

[CreateAssetMenu(fileName = "MyData", menuName = "Scriptable Objects/MyData")]
public class MyData : ScriptableObject
{
        public int battery = 70;
        public int health  = 40;
}
Instance
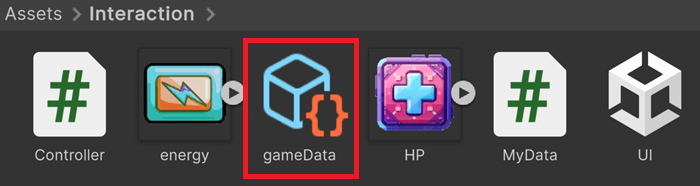
In Unity, go to Menu > Assets > Create > ScriptableObjects > MyData
Rename the asset to gameData
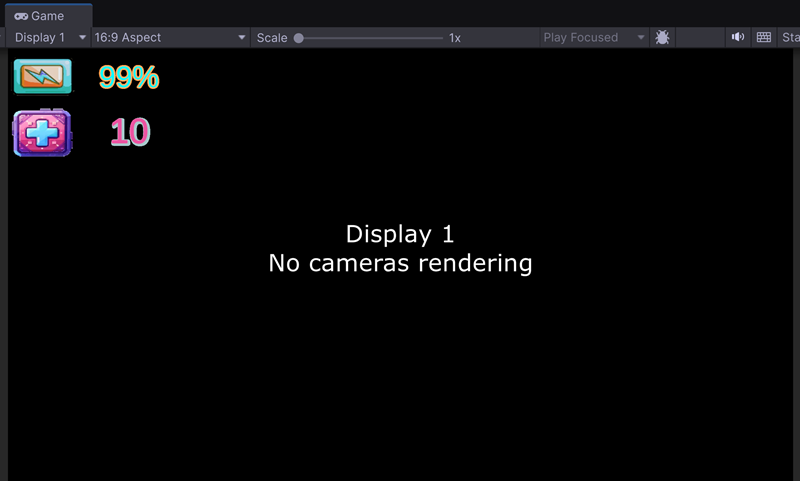
In the Inspector, change default values for 99 and 10

Controller
We need to create some code that will push the values into our text labels
In the Hierarchy, right click and create Empty
In the Interaction folder, create a MonoBehaviour script named Controller
Attach the script to the empty object
Edit the script
Add a public variable: public MyData data;
In the Inspector, link the ScriptableObject gameData to this variable by drag and drop
In the Update() function, transfer data to populate the textboxes
Enter Play mode to check that correct values are displayed on screen

Last step
To avoid any conflict, we remove the camera of the HUD scene
In the Hierarchy, select the main camera
Delete it
Enter Play mode
Button
A UI Button is essentially a label with a button-like texture that can handle mouse events.
In the Hierarchy window, right click and add a UI > Button - TextMeshPro
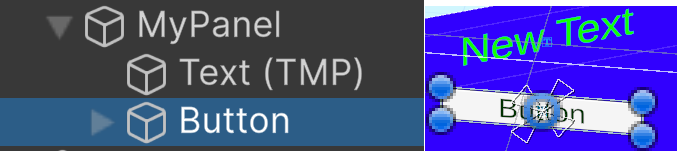
Use the Rect Tool to move/enlarge/shrink the button
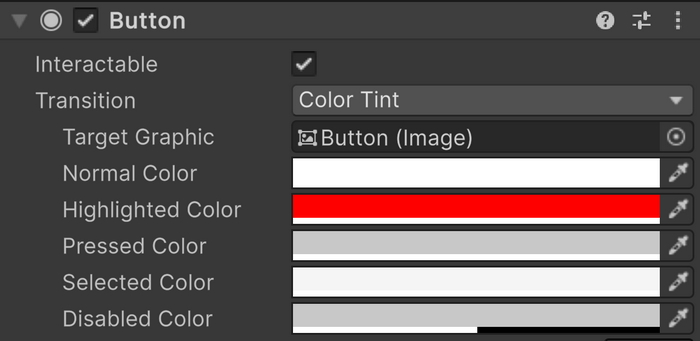
In the Inspector window, you can select colors for specific events:
In the Hierarchy, select the button
In the Inspector, find the On Click() Event section
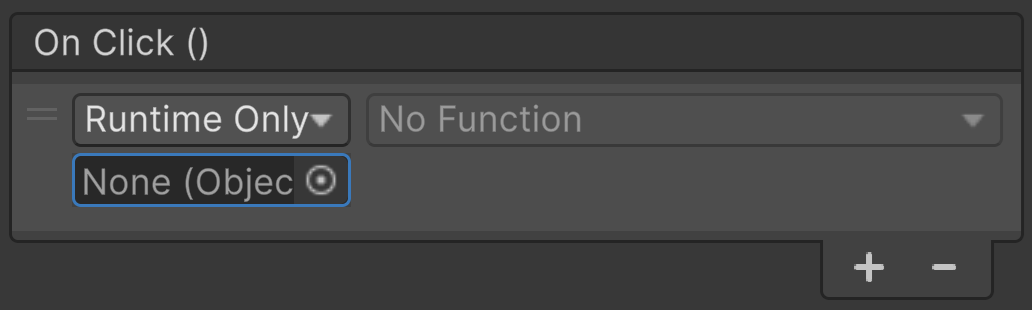
You need to link a GameObject and one of its internal function
This function will be called when the button is clicked
Variable qualifiers
class test
{

        [SerializeField] private float speed;    // show a private variable in the Inspector
        private const float maxspeed;                    // create const variable
        private static float nbinstances;               // class variable shared among instances, write test.nbinstances
        [range(0f,100f)] [SerializeField] float test;   // limit range values of the variable in the Inspector
}
Event Functions
FixedUpdate() { ... }  // called  at a regular pace, useful for applying forces independently of the framerate
Update(){...}
LateUpdate() { .. }  // called after the completion of all the update() calls, useful when scripting a follow camera

Awake() { ... }         // called immediately after instantiation, before any call of the start() function, useful to load resources
Start() { ... }     // called just before the first render on screen
Objects Pooling
Instead of instantiating and destroying lots of objects, it is more effective to create a pool of objects, activate them when needed, and deactivate them instead of destroying them.
For this, we need to:
Create a bunch of objects at the beginning
Set up a list of objects in the spawn manager