Lighting
Light or lamp
A light in a 3D engine is a source of light, yes, you know that! But what is implicitly stated is that it is only a source of light: a light has no shape and no physical existence in a 3D scene. If you want your light to correspond to a lamp, you need to add a 3D model of the lamp to your scene.
Directional light
Scene Setup
Navigate to Assets > Scenes
Create a new folder named « Rendering »
Inside this folder, create a new scene called « DirLight »
Double click to open it
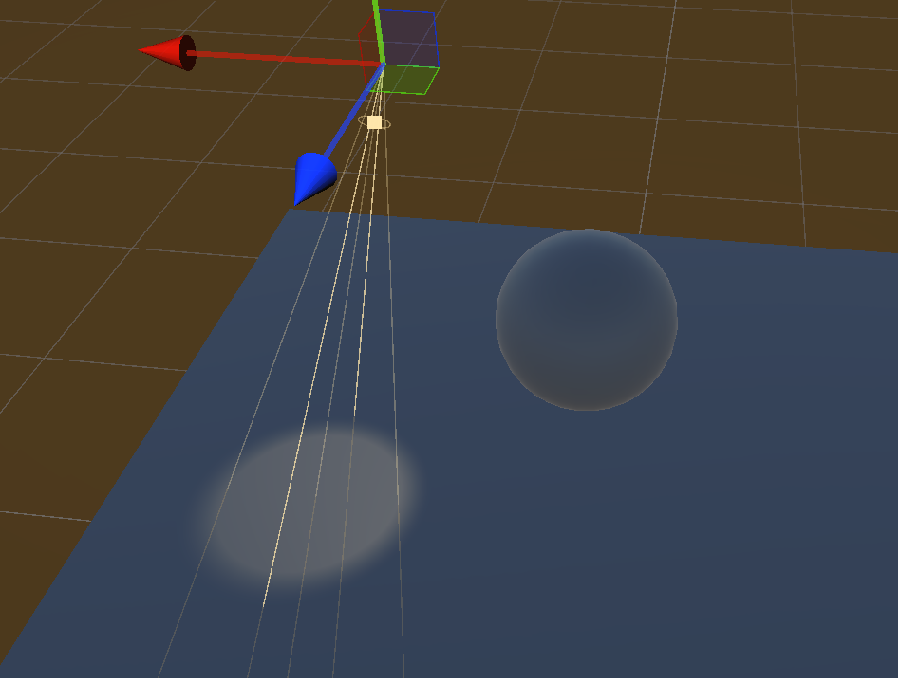
Create a floor using a Cube
Create a Sphere and push it upwards
The Sphere is casting a shadow on the floor
In the Hierarchy, select the Directional Light
Translation
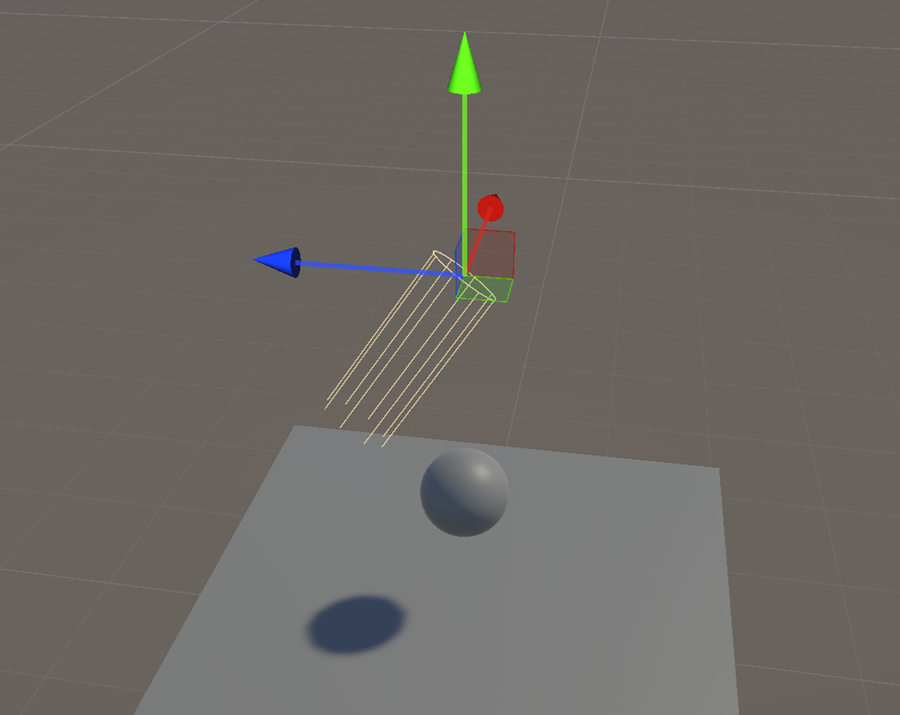
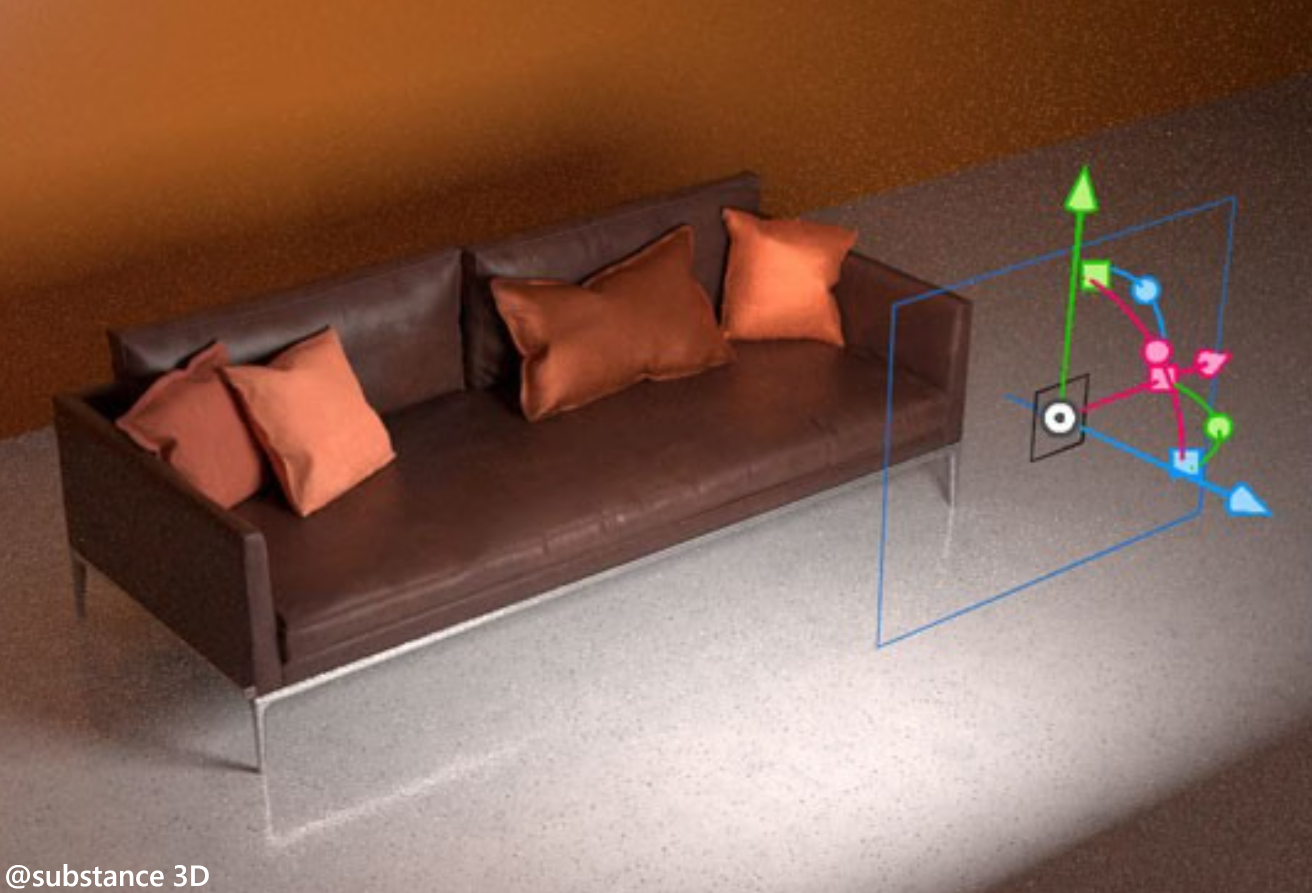
A Directional Light simulates sunlight or any other distant light source. It emits parallel rays in a single direction, illuminating all objects uniformly. Its position in the scene doesn’t matter—only its rotation defines the light’s direction. This makes it ideal for outdoor environments and global scene lighting.
Move the light in all three directions
No matter the position of the directional light in the scene, it has no impact on the shadows and on the illumination of the sphere. The position is not used in the calculations. A directional light should always be considered as being at infinity.
Rotation
Select the directional Light
Using Rotate tool, change the orientation of the light
Notice that the shadow moves dynamically

Shadow
Setup
In your scene, try to have the sphere, the floor and the directional light near from each others
Select the Directional Light
In the Inspector open the Light section

Hard and soft shadow
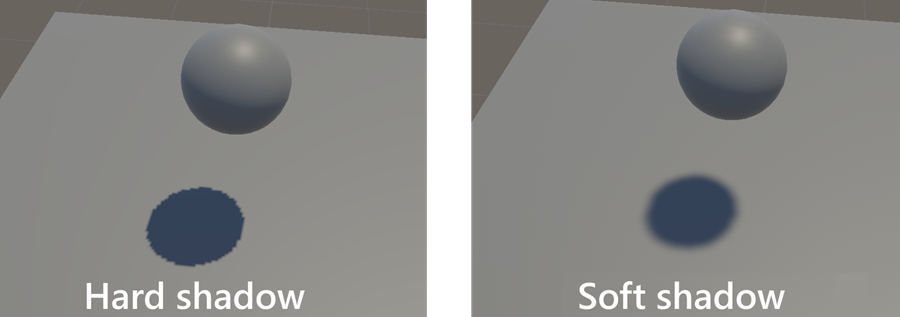
Test all Shadow Type parameters
Hard shadow: shadows with a sharp outline are produced (summer style shadow)
Soft shadow: shadows with a blurred outline are produced
Note
Zooming in on the hard shadow, you will notice that the border is pixelated. To create this shadow, the render engine computes the geometric projection of the sphere onto the floor. Then, it rasterizes this projection into a texture and applies it onto the floor surface. This shadow texture consumes GPU memory and must be limited in resolution and density, which results in this pixelated image. The Soft Shadow version appears to be a blurred version of the hard one, as the pixels are still visible.
Change the value of the strength to see what happens
Enable shadow
To obtain a shadow, all elements in the scene that contribute to the final shadow must have their shadow options activated:
The light (produce or not)
The occluding object (cast or not)
The shadow receiver (receive or not)
Light source
Select the Directional Light
In the Inspector, find the Shadow Type parameters
Select No shadow => the shadow disappears
Select Soft Shadow
The occluding object
Select the Sphere
Find the Lighting section
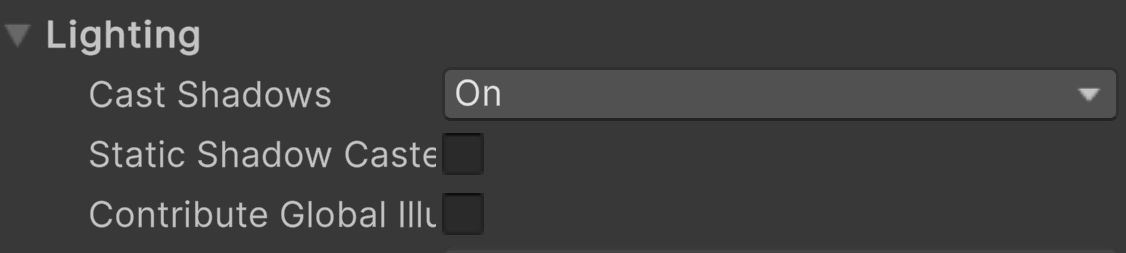
disable Cast Shadow: the shadow is no more computed
enable Cast Shadow
The shadow receiver
Select the floor, assign it the material 6Slate from the SolidColorMaterial folder
Select the 6Slate material to see it in the Inspector
In the Surface options, disable « Receive Shadows »
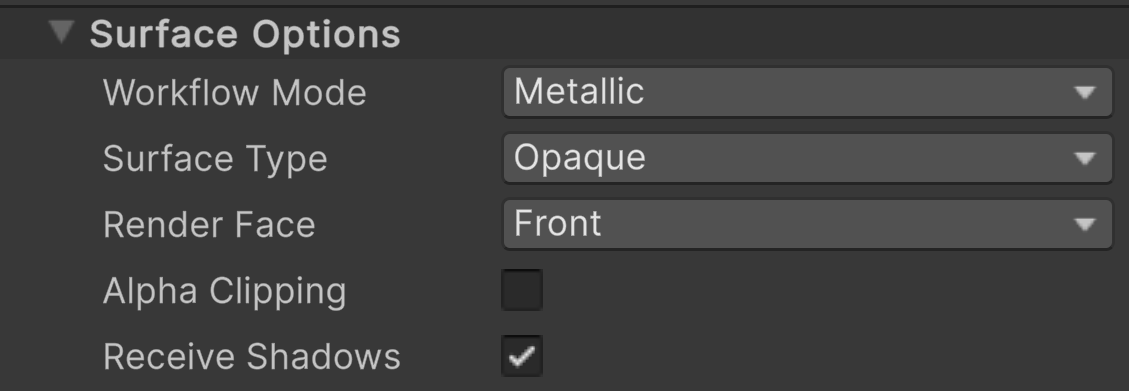
Notice that the shadow disappears
Enable the « Receive Shadows » again
Avertissement
If only one of three contributors is disabled, the final shadow disappears
Having multiple options to enable or disable shadows at the light, caster, and receiver levels is crucial for performance optimization. It allows developers to reduce unnecessary shadow calculations and memory usage in scenes where shadows aren’t visually important. This fine control helps balance visual quality with rendering cost, especially on limited hardware.
Avertissement
In a scene, you can set multiple directional lights. However, Unity will only compute shadows from the brightest directional light. All other directional lights will not produce any shadow. This is an internal rule of the rendering engine.
Spot Light
Setup
You can create a spotlight in the Hierarchy by right-clicking and selecting Light > Spot Light.
Strangely, we can also change the type of any light in the scene:
Select the Directional Light
In the Inspector, find the General section
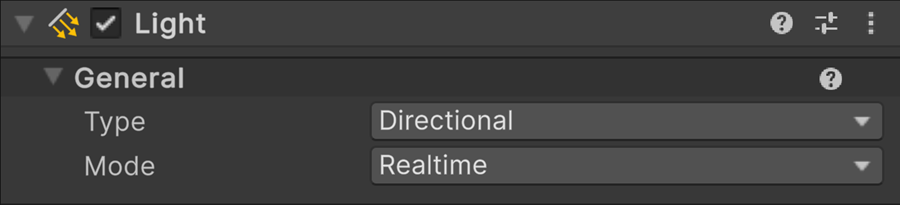
Change Type to Spot Light
Cone shape
In a Spot Light, the light is emitted in the shape of a cone. Let’s examine the key settings that control how this type of light behaves.
Inner Spot Angle: the angle inside the spotlight where the light is fully bright
Outer Spot Angle: The maximum angle of the spotlight cone.
Between the inner and outer angles, the light fades out gradually. Outside the Outer Spot Angle, no light is emitted.
Example:
If the Inner Angle is 30° and the Outer Angle is 60°
Full light up to 30°
Then smooth fade until 60°
Then no light
Change the shape of the cone:
Use the double sliders to control the inner and outer angle
Cone length
Change the depth parameter to increase/decrease the length of the cone
Shadow type
As for the Directional Light, you can choose between soft and hard shadows.
You can adjust the resolution of the shadow texture: the lower it is, the more pixelated the shadow will appear.

Note
The texture resolution is given as an indication only, as Unity automatically reduces their resolution to ensure that the combined shadow textures of all Spot lights do not exceed a fixed limit in GPU memory.
Different light types
Introduction
In video game with real-time constraints, each frame must be rendered in under 16ms to achieve 60 FPS. Considering all the tasks involved: physics, rendering, logic… only about 2 to 3ms can be allocated to shadow calculations. As a result, game developers can’t use dozens of lights with complex effects; choices must be made carefully.
Area Light
An Area Light is like a large ceiling light that creates soft and more realistic lighting. In practice, you can think of it as about 30 spot lights placed in a rectangular grid to make the light source smoother. This type of light creates more realistic soft edged shadows.
Avertissement
We don’t cover Area Lights because they are harder to set up and control in a scene. Moreover, this type of lights are more expensive in terms of computation and even more expensive when producing shadows.
Baked light
In some cases, when both the objects and the light source don’t move, we can precompute the shadow texture once and reuse it. This is common with a main directional light (like sunlight that doesn’t change during the game) and static environment objects. Of course, this doesn’t work for moving characters like the player. When possible, this method greatly reduces the cost of rendering shadows. Since the shadows are computed offline (before the game runs), we can take more time to make them softer and more realistic.
Avertissement
We do not introduce the baking process because it can take several hours of computation.
Point light
A Point Light is like a Spot Light without a cone: it shines in all directions. To model a Point light, six Spot lights are used, one for each direction (+x,-x,+y,-y,+z,-z). So, a Point light costs a bit more than a Spot light.
Avertissement
We do not cover this type of light, as it’s more efficient to work with spot lights: they’re cheaper and look better.
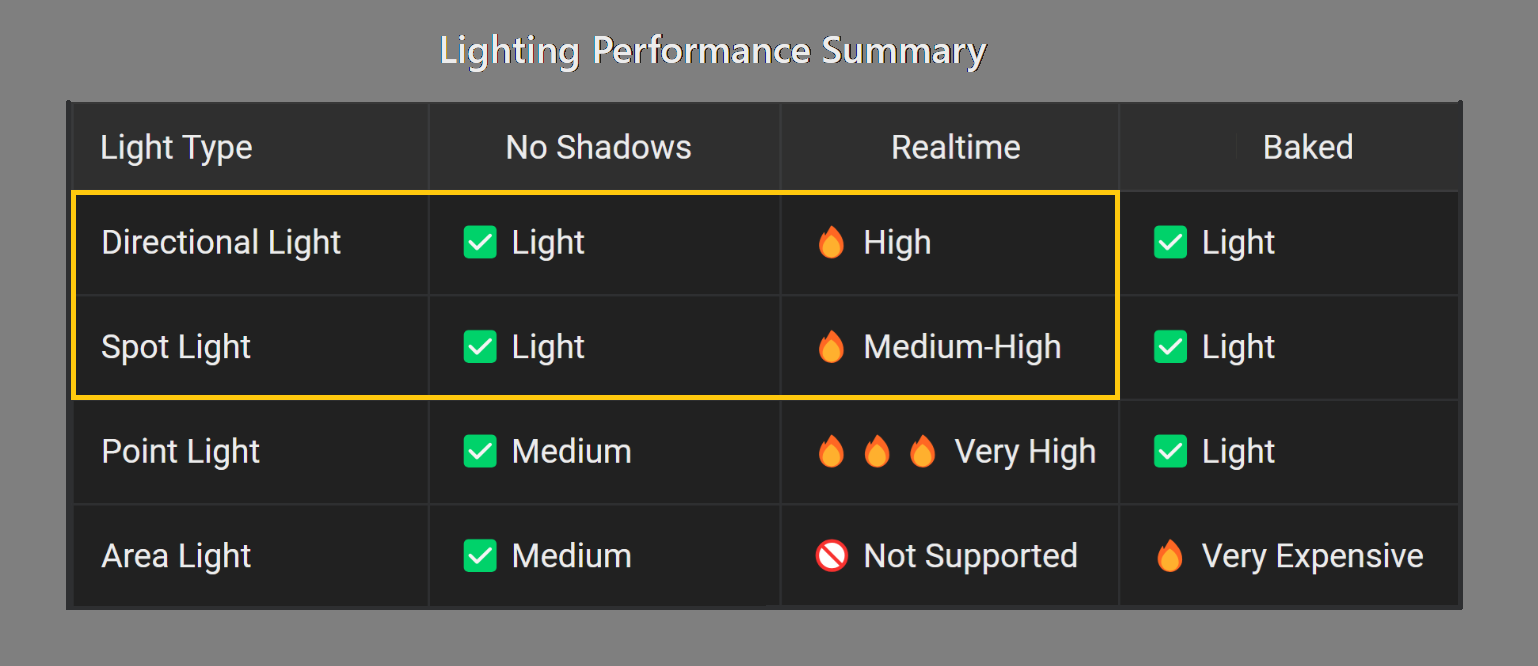
Summary
But which lights are expensive ? And how can you make the right decisions? Here’s a breakdown to help you see things more clearly.
Benchmarking
Scene Setup
In the Asset folder, select the Scenes > Rendering folder
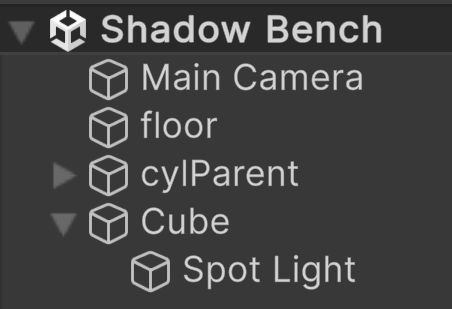
Create a new scene called « Shadow Bench »
Double click to open it
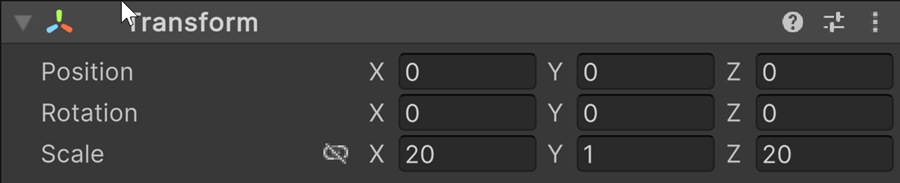
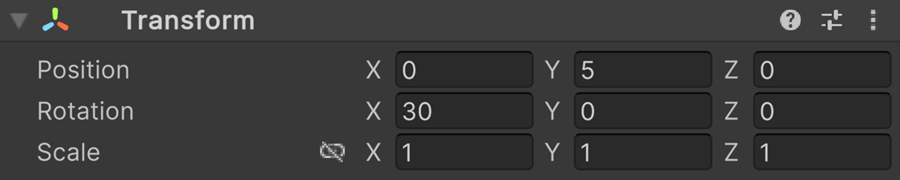
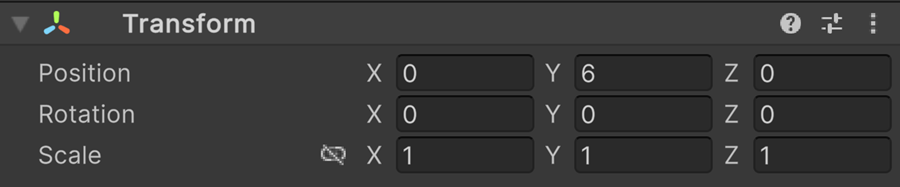
Create a floor using a Cube, here is its transform node:
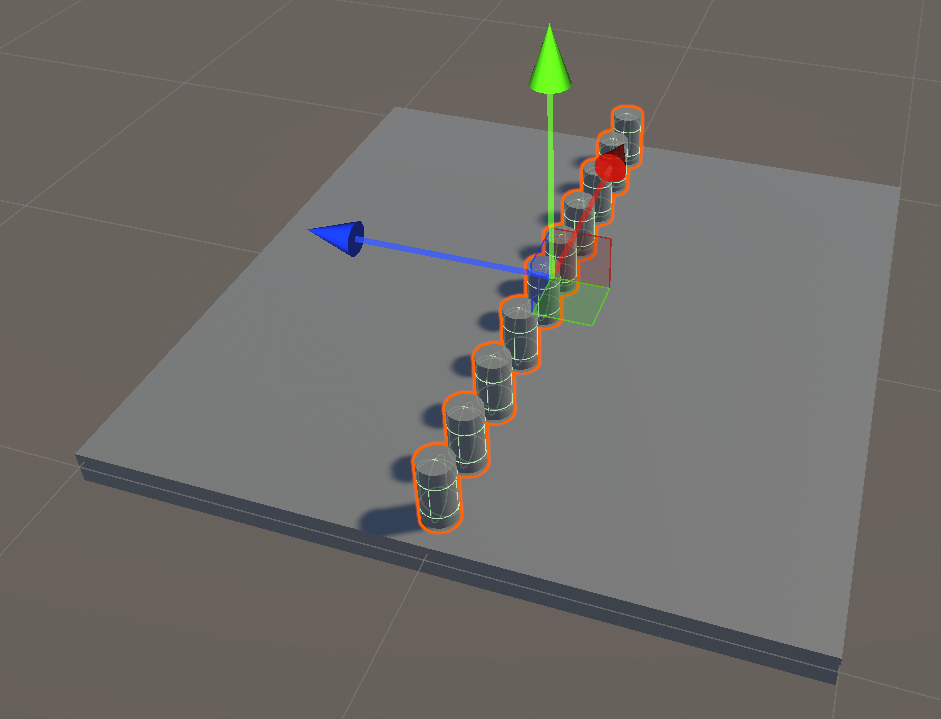
Create a cylinder
Duplicate this cylinder to create 10 aligned cylinders (CTRL-D may help)
In the Hierarchy, select all the cylinders (SHIFT-click may help)
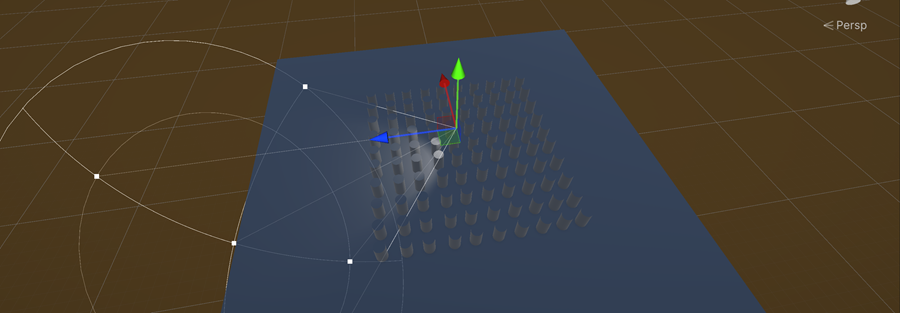
Duplicate this row of cylinders to build a 10x10 grid (CTRL-D may help)
In the Hierarchy, select all cylinders and create an empty parent
Select the floor
In the Inspector, change the scale factor to 40 for X and Z

Create a Spot light, here are the information:
Intensity: 20
Range: 30
Inner/Outer: 60/90
This way, the light produces shadows and lighten the floor
Remove the main Directional Light
Create a cube and move it upwards
Assign a solid Color to the cube
In the Hierarchy, drag and drop the Spot Light to make it a child of the cube
First shadows
Create a script named rotCube
Attach it to the cube
Double click to open it and copy paste this code
public Vector3 rotationAxis = Vector3.up; //
public float speed = 0.2f;

void Update()
{
        transform.Rotate(rotationAxis, speed * 360 * Time.deltaTime);
}
Enter Play mode, the Spot Light should rotate like a lighthouse:
Oups !! There are no shadows
Find and enable the correct option(s) to make shadows appear
Adding lights
Every 3 seconds, we’ll duplicate the first Spot Light, attach it to the cube, and give it a random rotation. This way, we gradually increase the number of lights and the complexity of the shadows. Using the Render Stats panel, we’ll observe how the FPS drops as more lights are added. Keep in mind that results vary depending on the machine.
In the script, add these variables
public GameObject spotLightToDuplicate;
Link this variable to our spot light
We duplicate the main Spot light every 3 seconds using the Invoke function, move it a bit from the cube and rotate it vertically:
void Start()
{
        // Start repeating the duplication every 3 seconds
        InvokeRepeating(nameof(DuplicateSpotLight), 0, 3);
}

void DuplicateSpotLight()
{
        GameObject newSpot = Instantiate(spotLightToDuplicate);

        newSpot.transform.SetParent(gameObject.transform);

        newSpot.transform.localPosition = new Vector3(Random.Range(-3, 3), 0, Random.Range(-3, 3));
        newSpot.transform.localRotation = Quaternion.Euler(30, Random.Range(0f, 360f), 0);
}
Enter Play mode
Benchmarking
Select the Game window
In its topbar, click on the Play focused dropdown and select Play maximized
Click on the Stats button

Enter Play mode
On a 4070 GPU, with a total of 180 rotating Spot Lights, we reach between 100 and 120 FPS in this example — with nothing else running besides shadow computation. This suggests that around 20/30 Spot Lights might be the upper limit for a real game, and possibly only 3 Spot Lights on an entry-level computer.
Note that during benchmarking, Unity automatically reduces the shadow texture size by a factor of 8 (see the info messages in the bottom status bar).