MiniGame1: GrandPrix Monaco
You will:
Read the doc
Manage Input
Control a car by translation/rotation
Create obstacles
Create a chase camera
End the race
Unity doc
How can we find information?
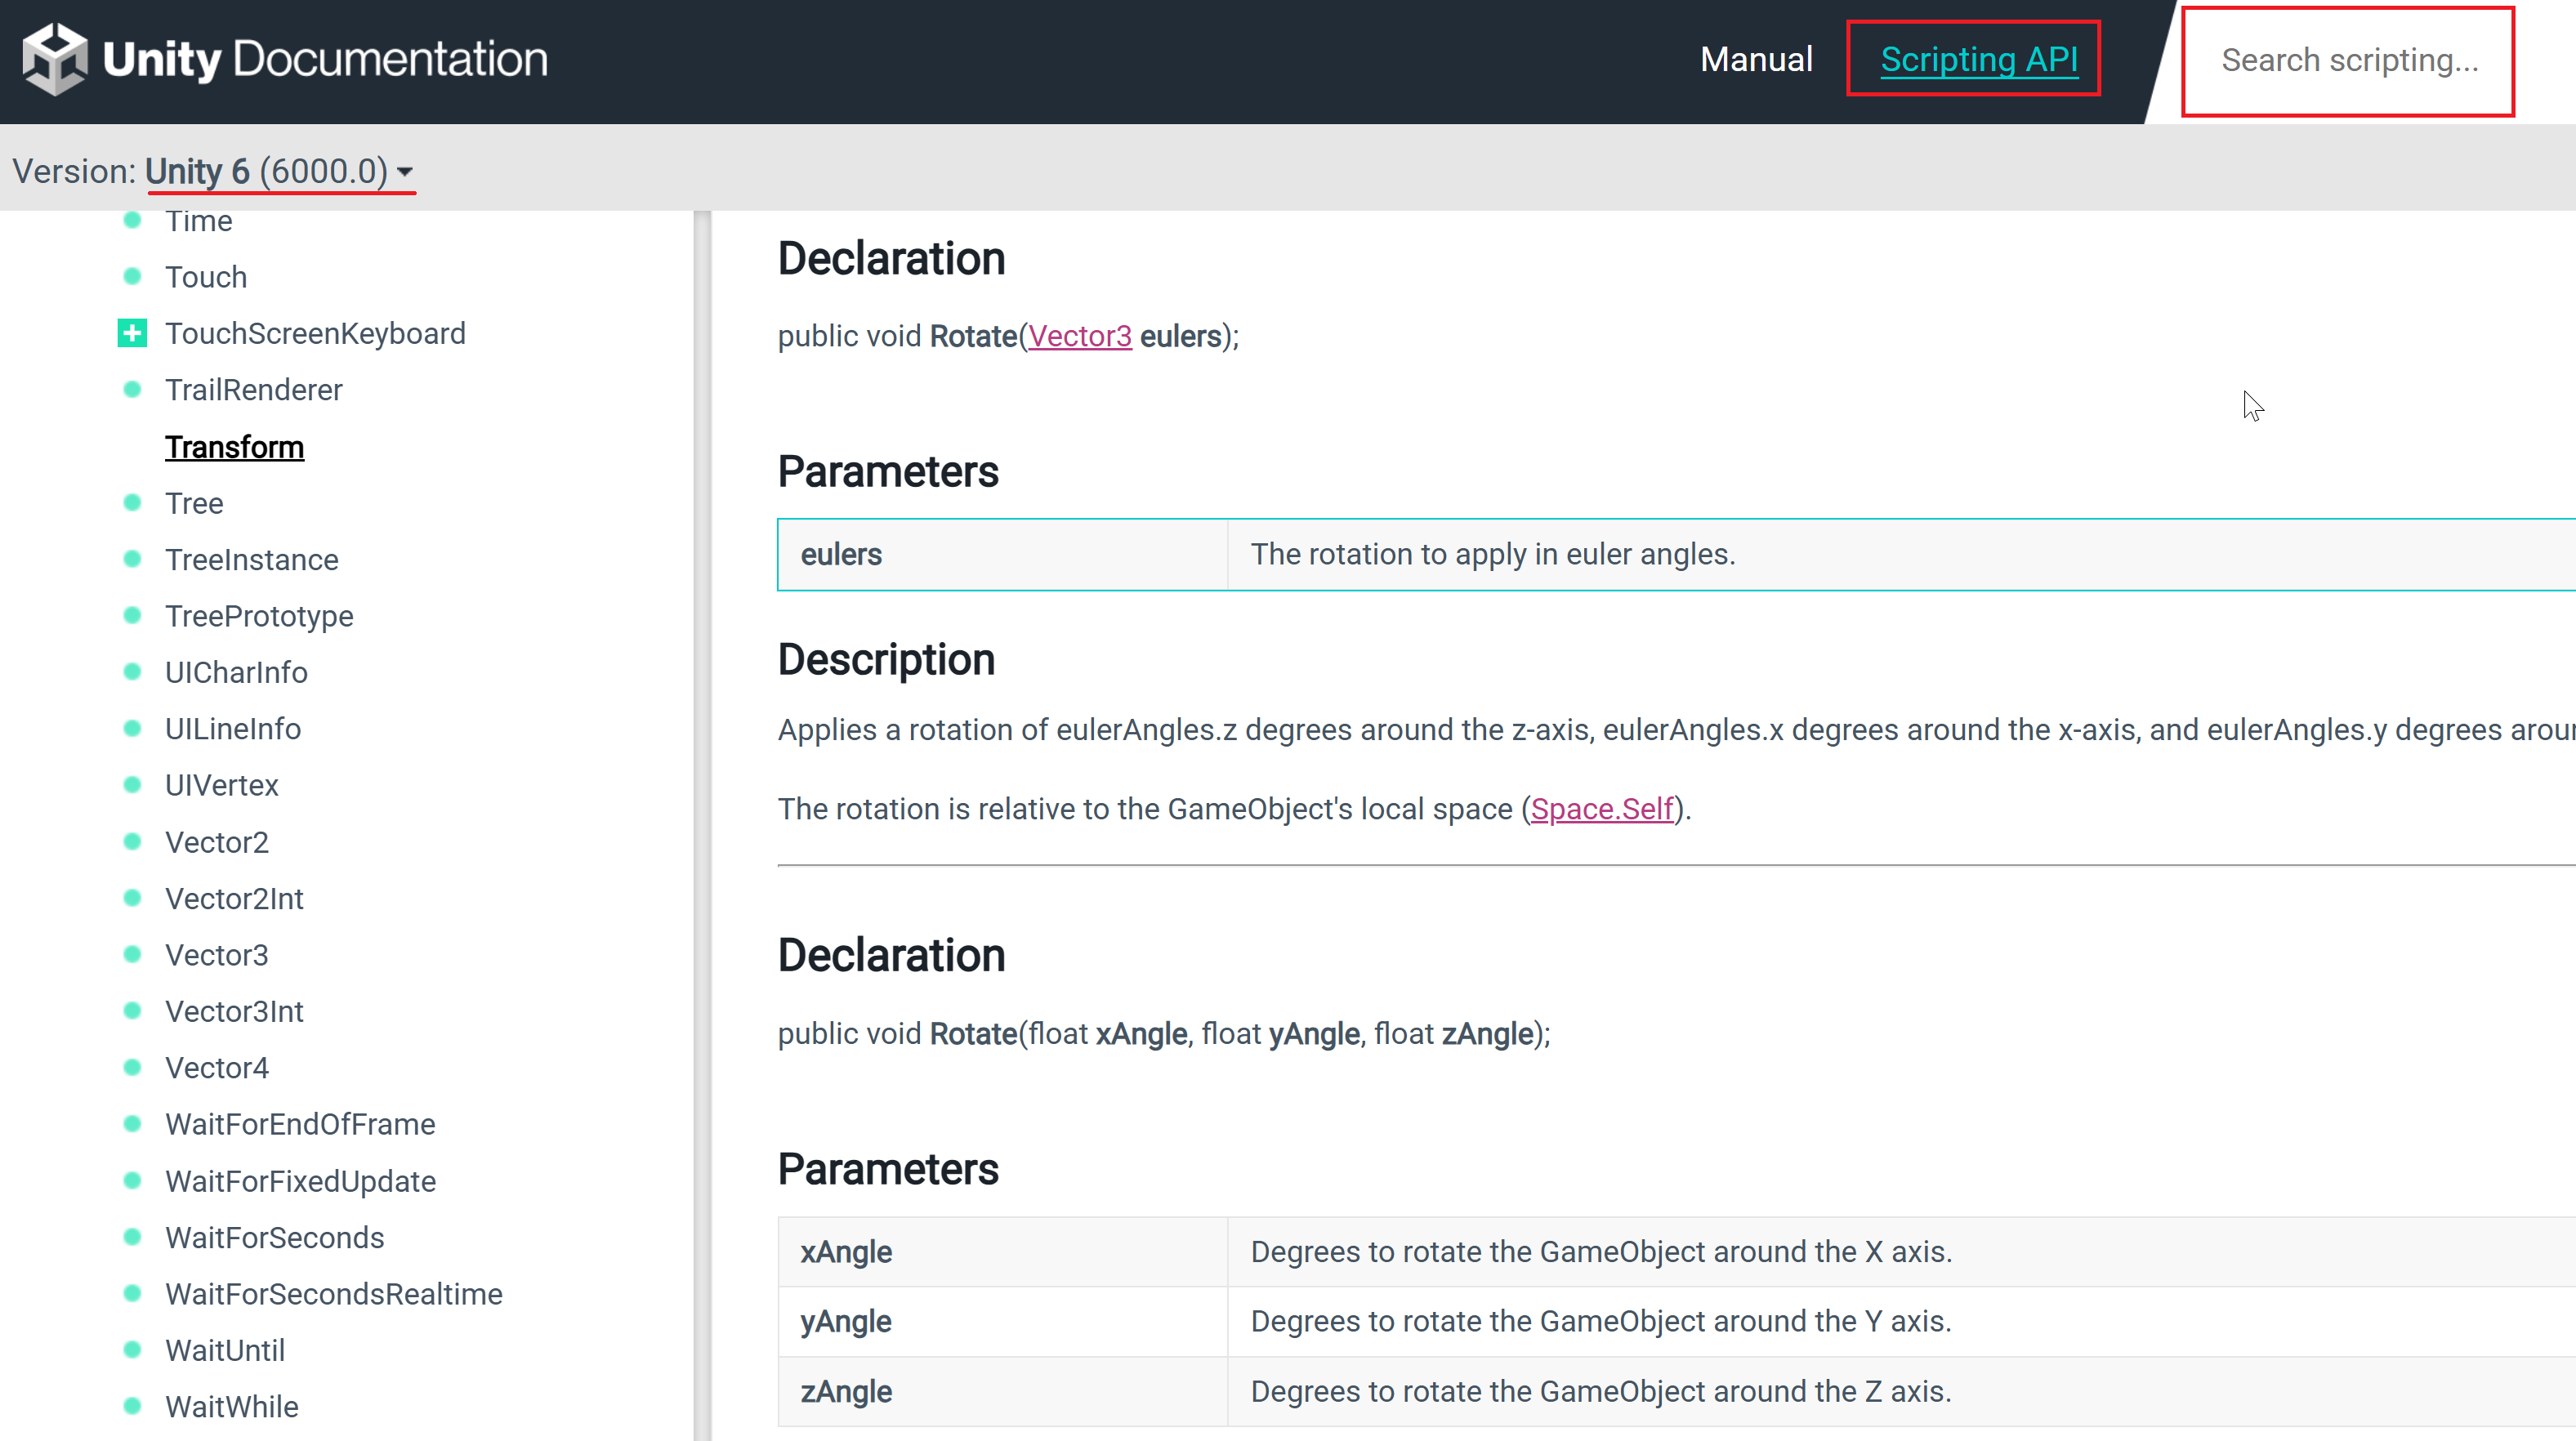
Rotate function
For example, if we want to learn more about the Rotate function, we can search in different ways:
Google search: « Unity Rotate function »
Search in Unity API
Search scripting: Rotate
Browse the class hierarchy
Unity Engine > Classes > Transform > Rotate
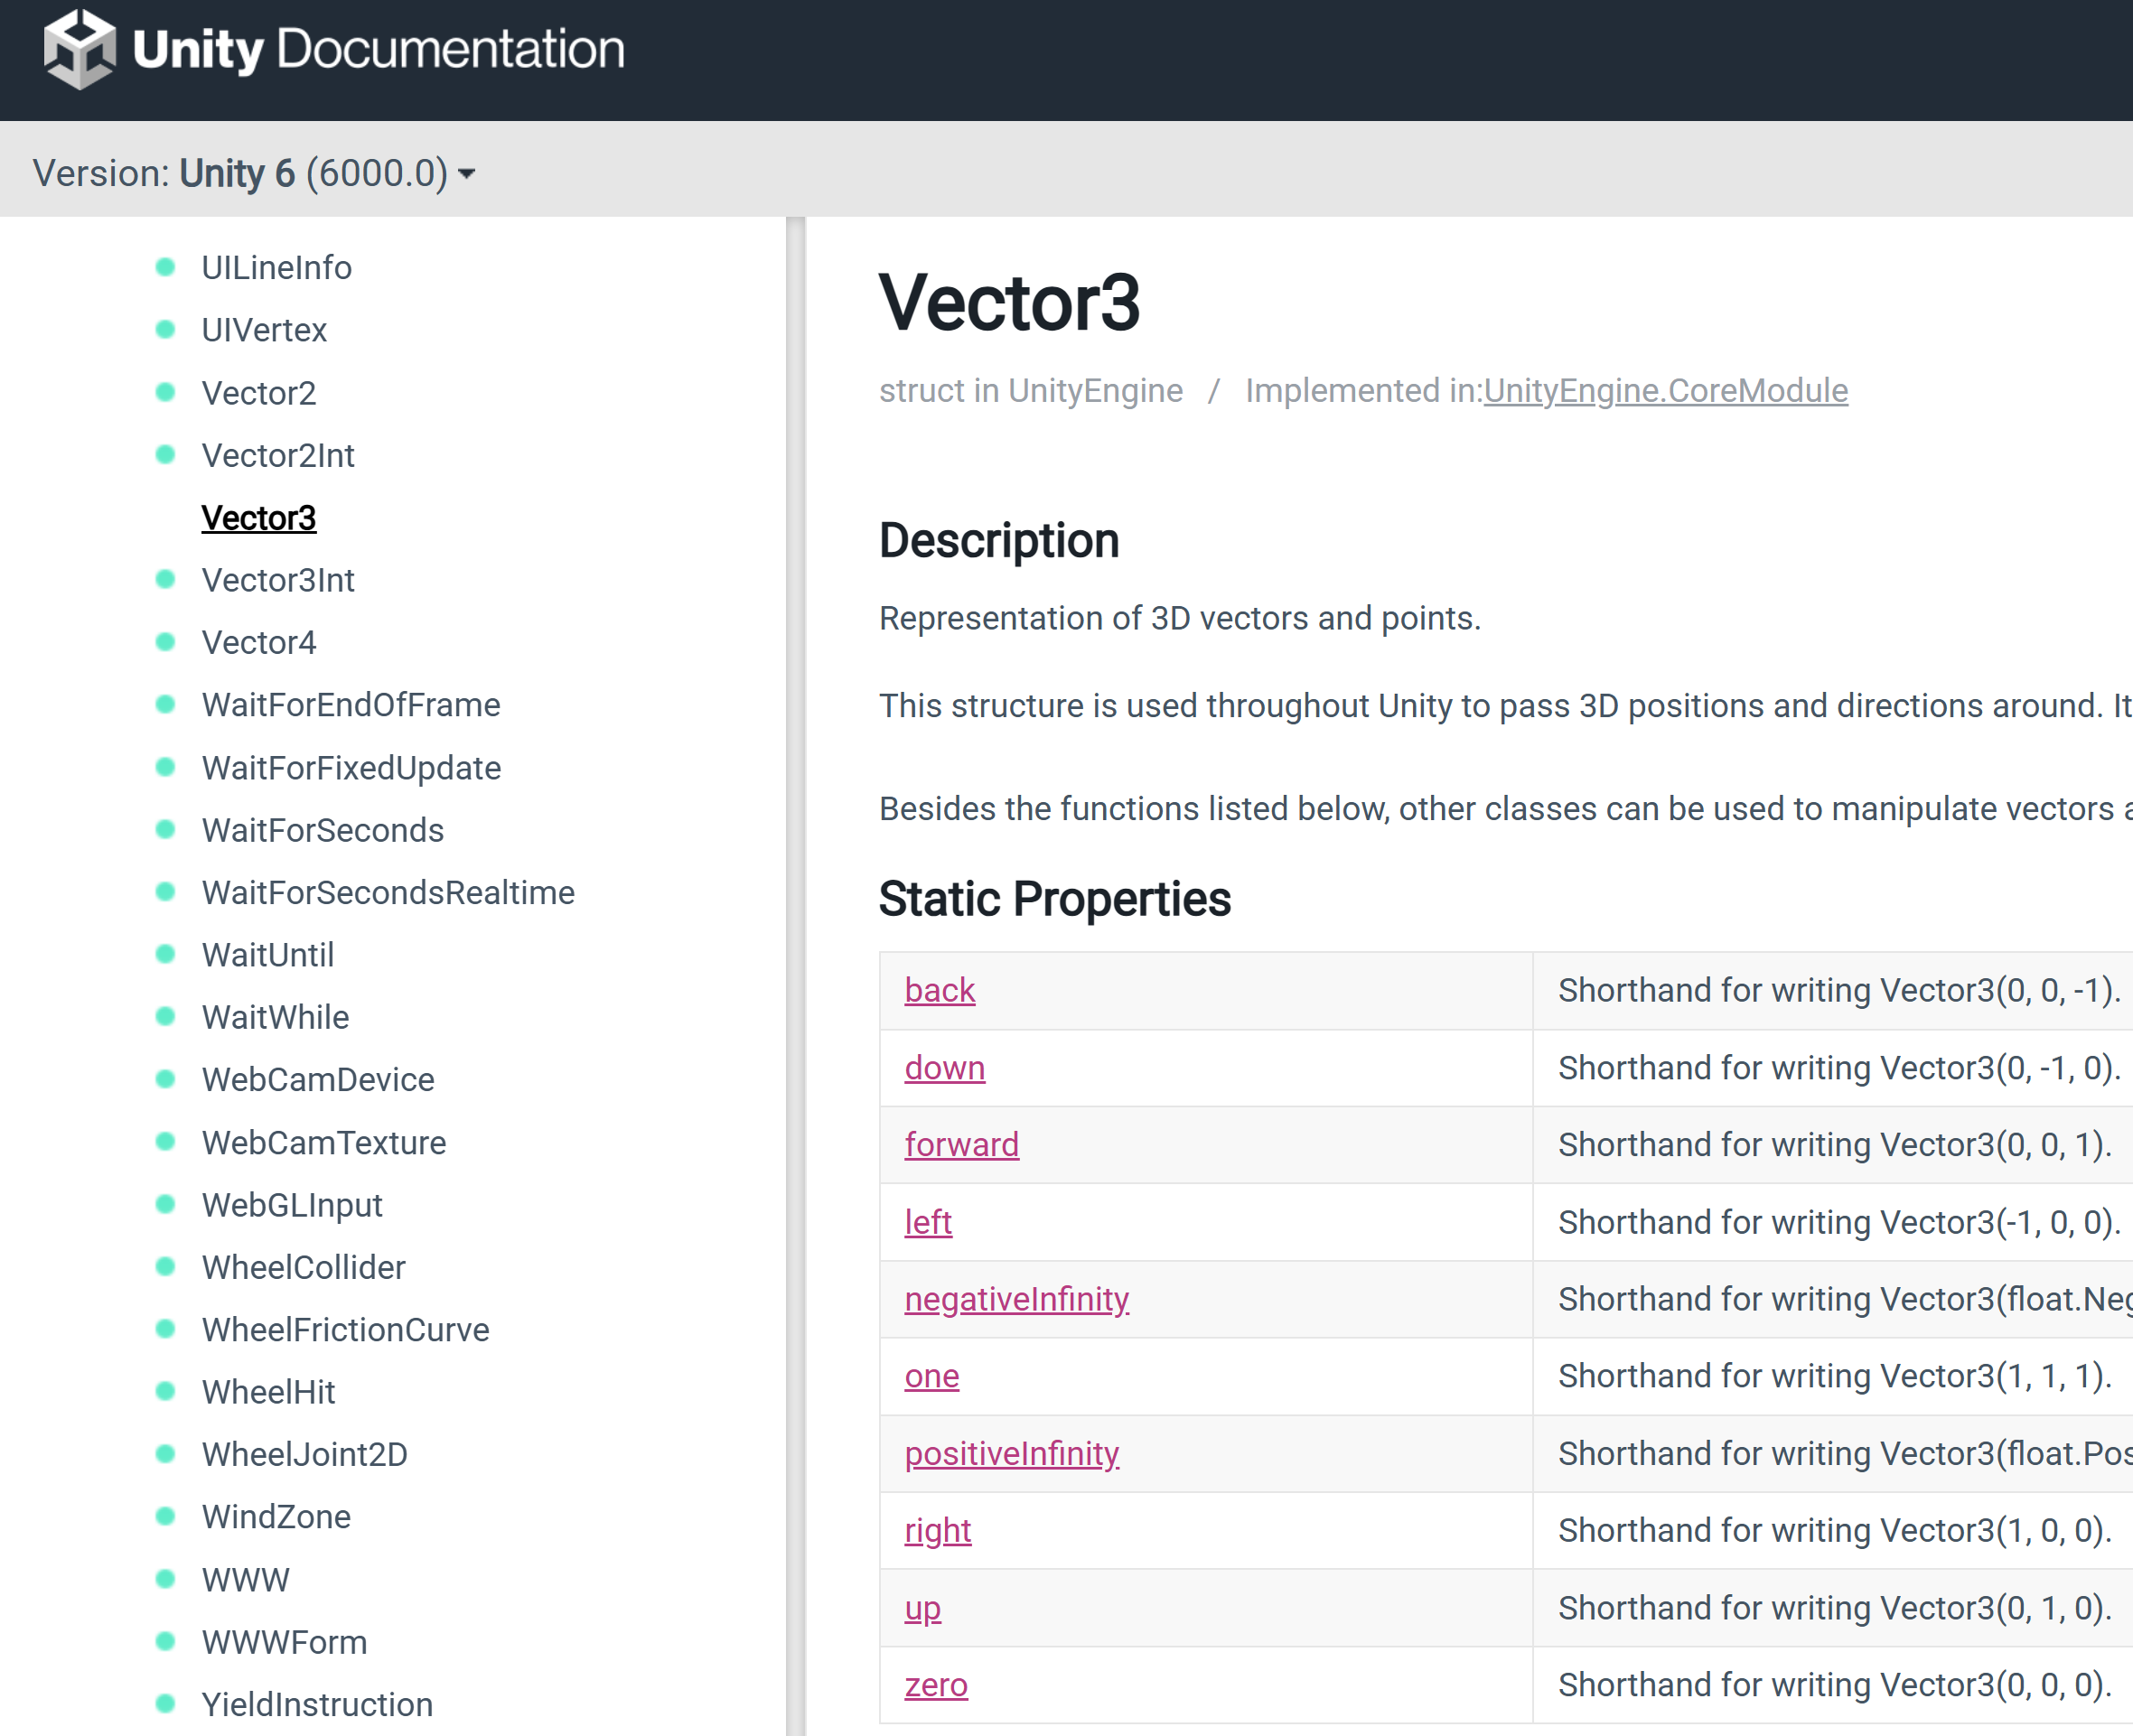
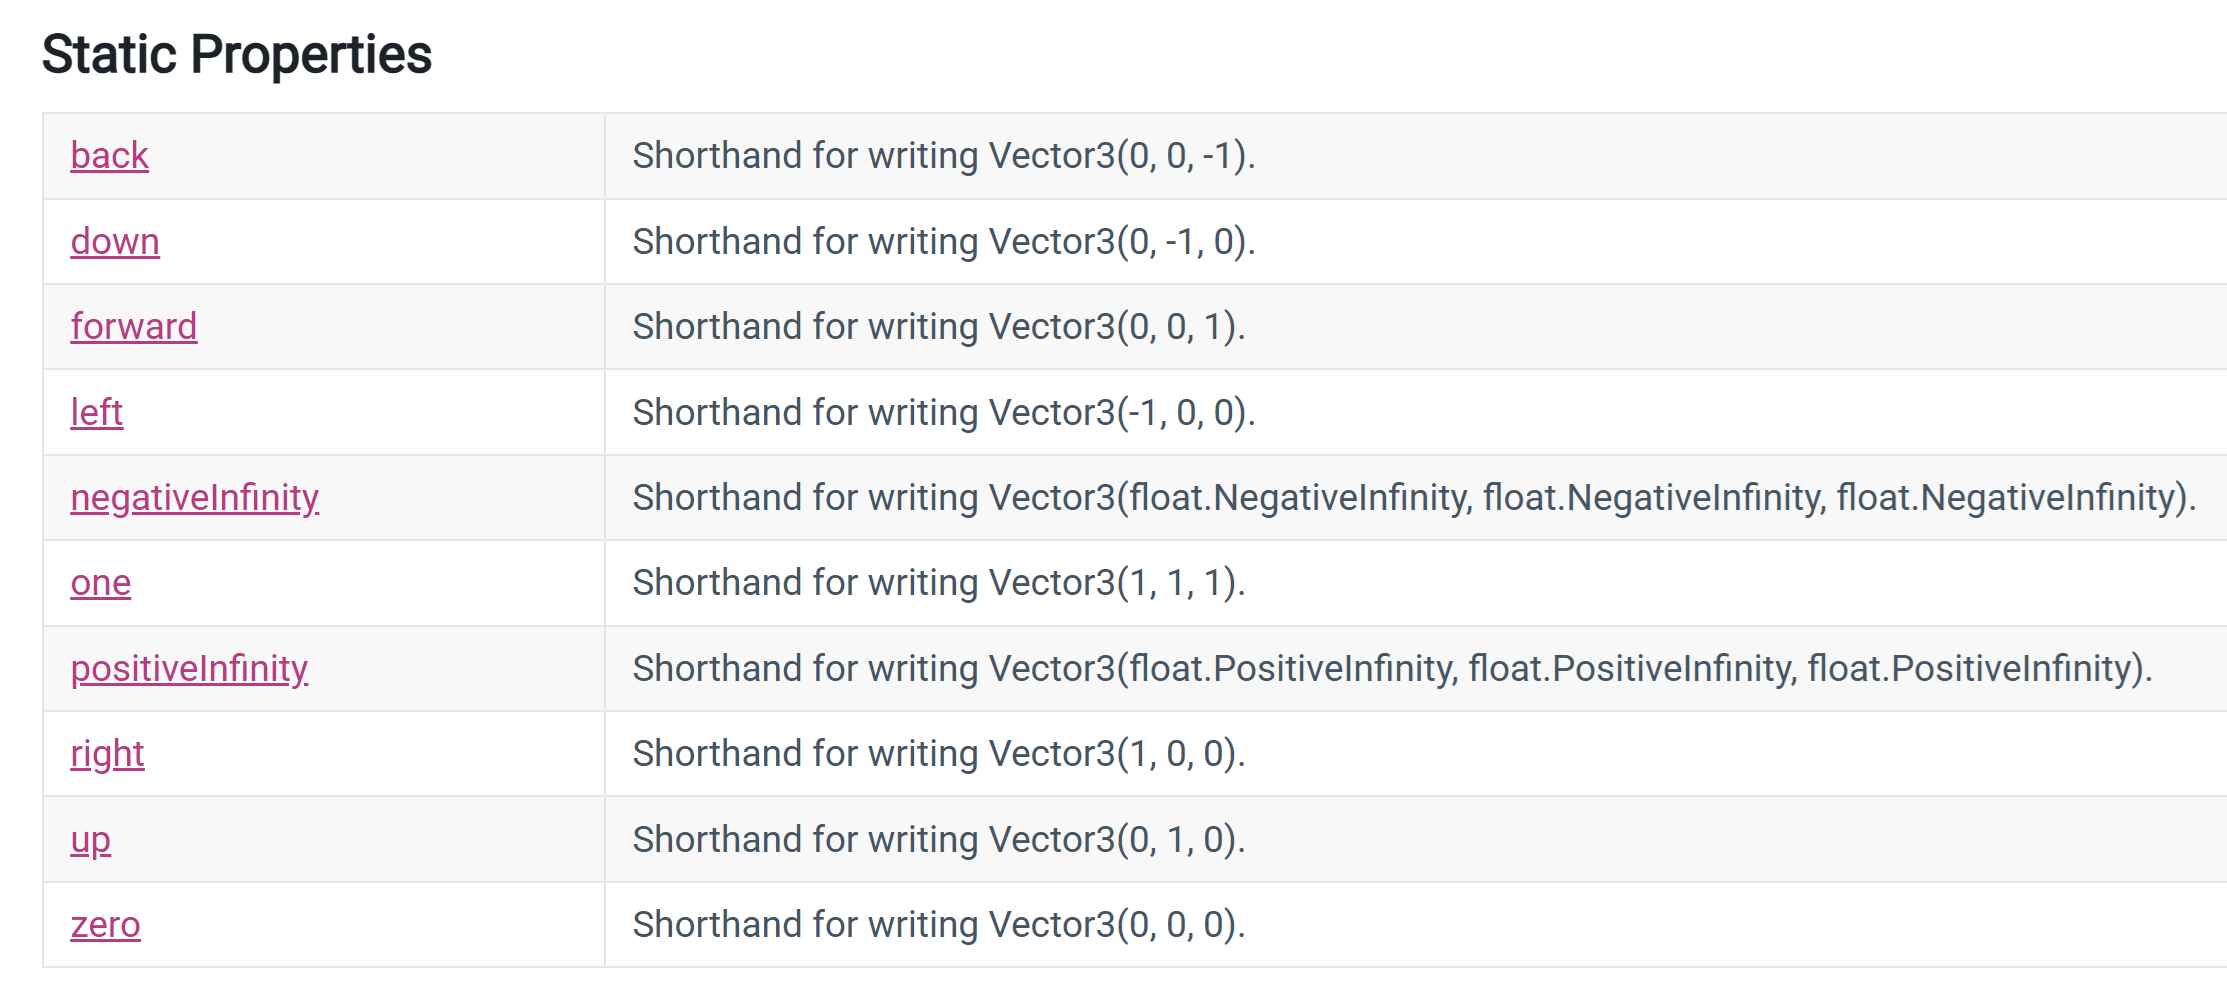
Vector3
Find the documentation about the Vector3 class. You must find this page:
Refresher
How to manage your view:
F key: center an object.
Right-click: look around.
ALT + Left-click: rotate camera while focusing on the selected object.
ALT + Right-click: zoom in & out.
Mouse wheel: zoom in & out.
Hold mouse wheel + mouse move: pan.
Car Controls
Scene Layout
In the Assets folder, create a new folder named MiniGames
Inside this folder, create a new Scene named: Ultimate Race
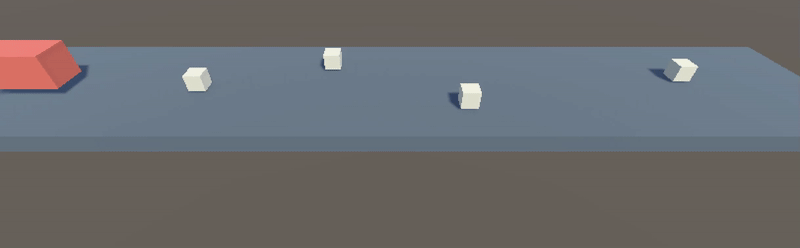
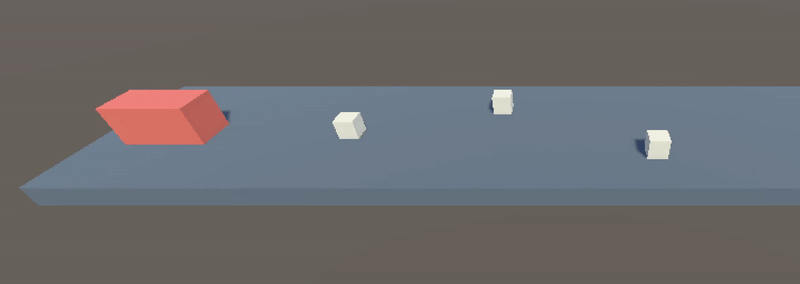
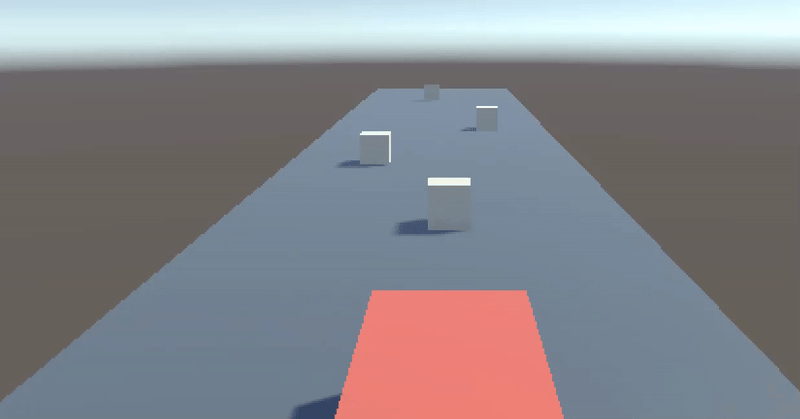
Using 3D Cubes:
Create a road of 100mx10m
Create a car 4mx2mx1m
Some obstacles on the road 1mx1mx1m
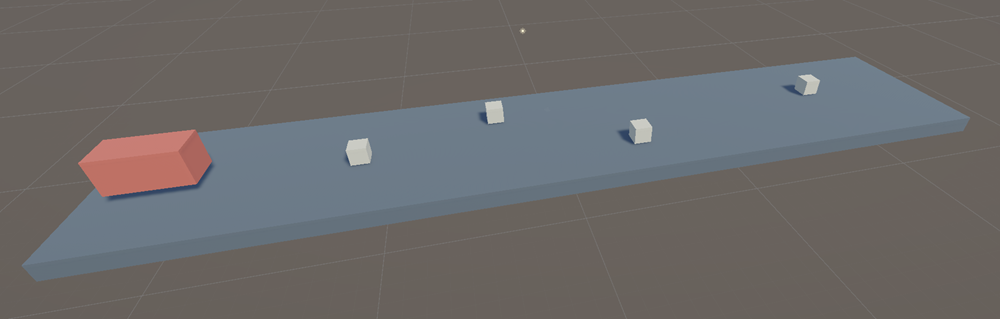
Move your camera so that we can see the whole scene in play mode
Input.GetAxis()
To simplify the code, Unity combines keyboard controls and joystick controls through the Input object. Thus, by using the member function GetAxis(« Horizontal »), we request information about the horizontal control: left/right arrow keys and left/right joystick.
Create a new script for the car
Paste the following code
using UnityEngine;

public class carcontrol : MonoBehaviour
{
        void Start() { }

        void Update()
        {
                float v = Input.GetAxis("Horizontal");
                Debug.Log(v);
        }
}
Run and check the values returned by the GetAxis function
Check the range of values returned by the GetAxis function.
How many different values are returned?
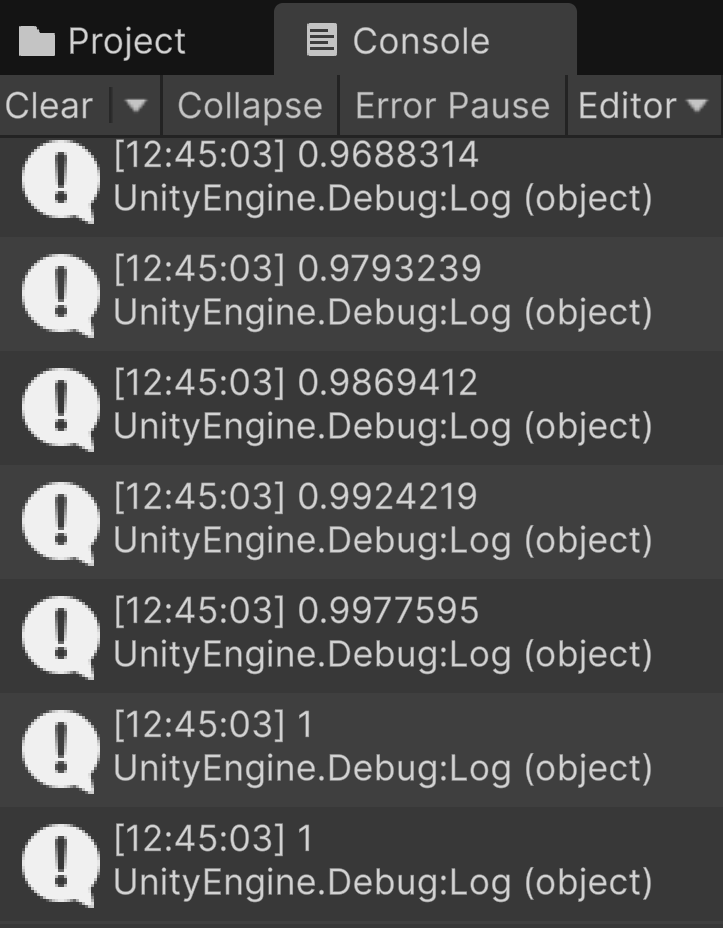
Note
Unity seems to simulate joystick behavior through keyboard keys. For example, when we press the right arrow key, Unity smooths the return values from 0 to 1.
Physic’s law
In unity, rotations use degrees. If a rotation speed is set to 180°/s, it means that our object completes a full turn in 2 seconds or a half turn in 1 second.
We recall the formula that gives the rotation angle based on the rotation speed and the time interval:
Let’s turn
We want to make our vehicle rotate at a maximum speed of 30°/sec.
Add a public float variable turnSpeed in your script
In the update() function, add these lines:
float dt =  Time.deltaTime;
float hInput = Input.GetAxis("Horizontal");
transform.Rotate( ... );
Check the documentation of the Rotate function
Using a simple operation, make it so that:
When input is 0, nothing happens
When input is 1, the vehicle turns at the speed turnSpeed

Help in case nothing works
using UnityEngine;

public class carcontrol : MonoBehaviour
{
        public float rotSpeed;

        void Start() { }

        void Update()
        {
                float dT     = Time.deltaTime;
                float hInput = Input.GetAxis("Horizontal");
                transform.Rotate(Vector3.up, rotSpeed * dT * hInput);
        }
}
Go forward
We want our vehicle to drive at a maximum speed of 10m/s.
Add a public float variable maxSpeed in your script
Check the documentation for Vector3:
Find a shorthand that matches a forward-oriented vector.
Check the documentation for Transform.translate():
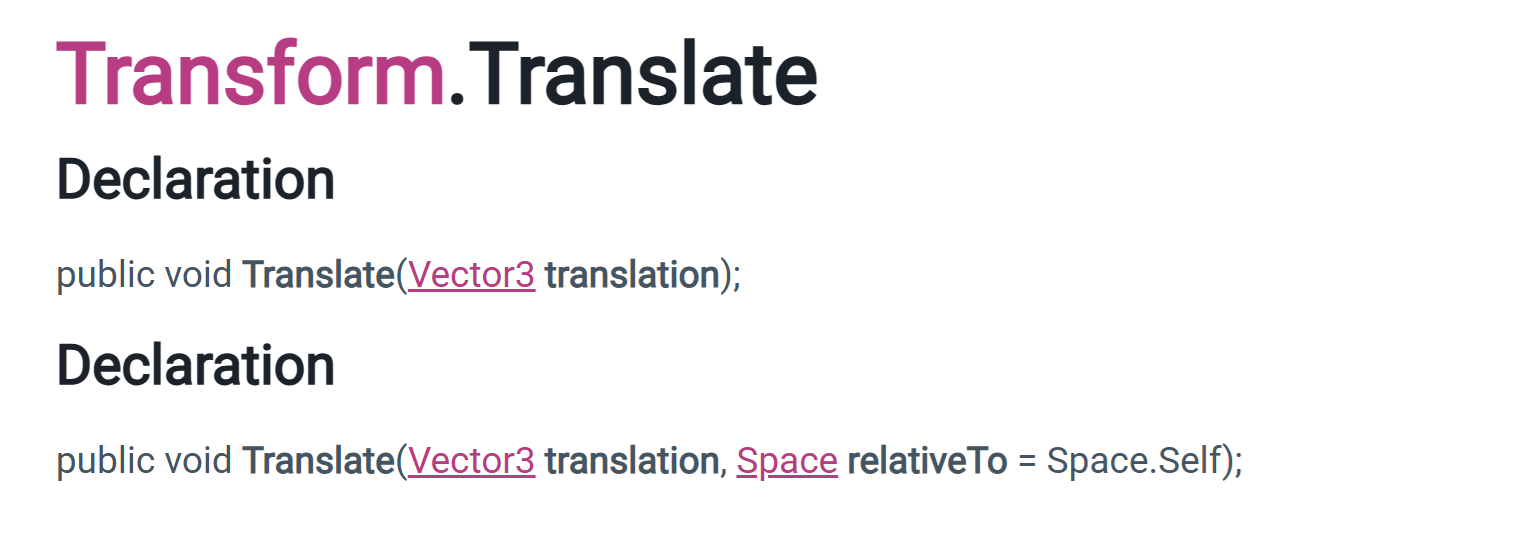
Make it so that:
By default, nothing happens
When the player press the up arrow key, the vehicle goes forward at the speed maxSpeed
Collision
Attach a rigidbody component to the vehicle and to the obstacles.
Adjust their weights to match their actual weights.
Activate gravity
Check that both elements have a mesh collider activated.
Run and check your result:
Chase camera
We want the camera to follow the vehicle
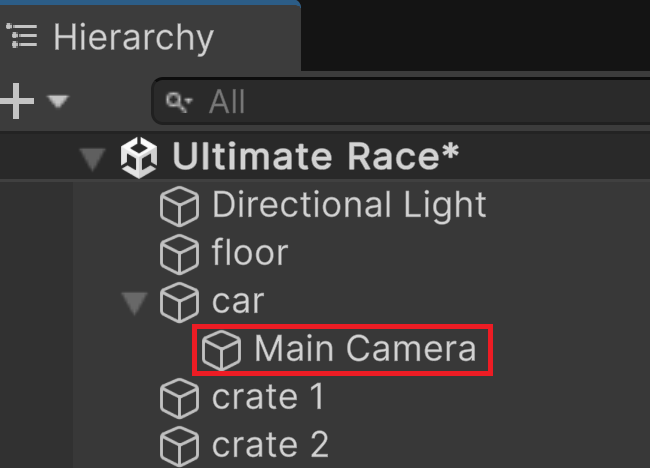
In the Hierarchy, drag and drop the camera into the car GameObject
The camera becomes a child object of the car in the Hierarchy
This way, when the car moves, the camera automatically follows
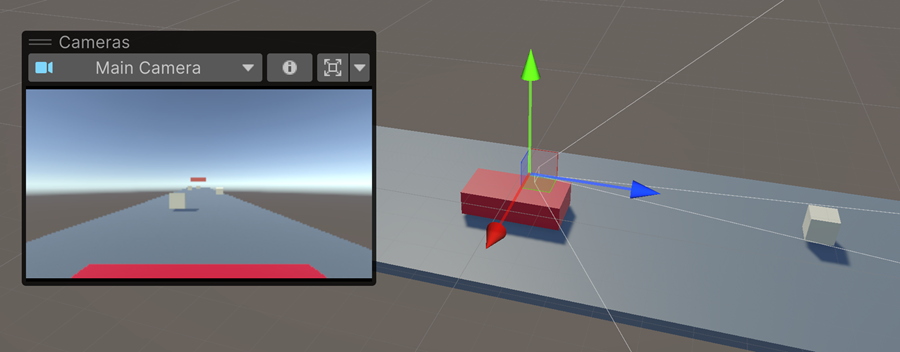
Reset the camera transform node
Activate camera preview
Select translate tool
Move the camera to position it above the car’s roof with a downward view
Finish line
Create a finish line

Create a collider with a script to detect when the car passes between the two poles
Change the color of the banner from red to green