HUD
Canvas
In Unity, a Canvas is a container designed to hold UI (User Interface) elements such as buttons, textbox, and images. In this chapter, we will focus on using the Canvas to create a HUD (Head Up Display) interface. But Canvas can also be integrated into a 3D scene to support text boxes or any other UI elements placed in the scene.
Scene Setup
Navigate to Assets > Scenes
Create a new folder named « Interaction »
Inside this folder, create a new scene called « HUD »
Double click to open it
In the Hierarchy, right click and select UI > Canvas
Press F key to center this canvas on screen
On the top of the Scene view, click on the « 2D » button:

Now, you see the canvas from the front:
HUD
Select the Canvas in the Scene view
In the Inspector, in the Canvas section, check that the Render Mode is set to « Screen Space - overlay »
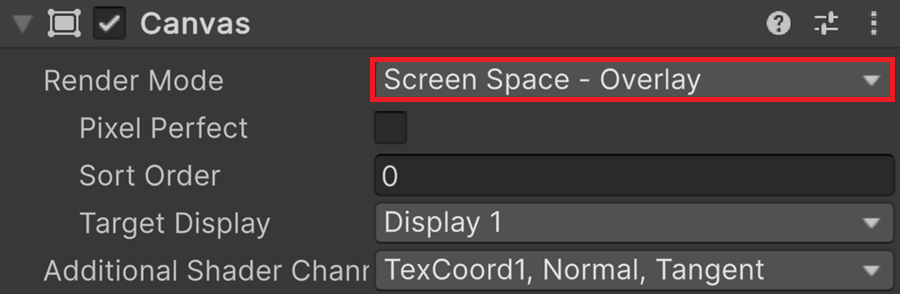
In Unity, Screen Space - Overlay mode renders UI elements directly on the screen, independent of the camera’s position. It ensures a fixed screen position and pixel-perfect clarity. This mode is perfect for static UI elements like:
Health bars
Score displays
Menus and HUDs (Heads-Up Displays)
Notifications and pop-ups
Aspect ratio
We show how to simulate different screen aspect ratios to check what the end user will see. Because sometimes… things can get weird, and the programmer might go mad!
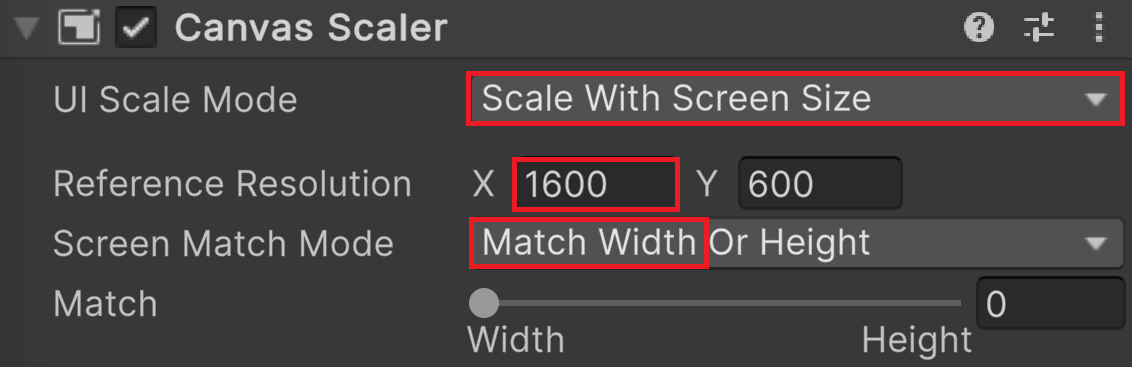
In the Inspector, change the UI Scale Mode for Scale With Screen Size
Set the Reference Resolution X parameter to 1600
The screen match mode is set to « Width or Height »
Select the Game view (do not enter Game mode)
In the top bar, select 16:10 Aspect

Select the Scene view
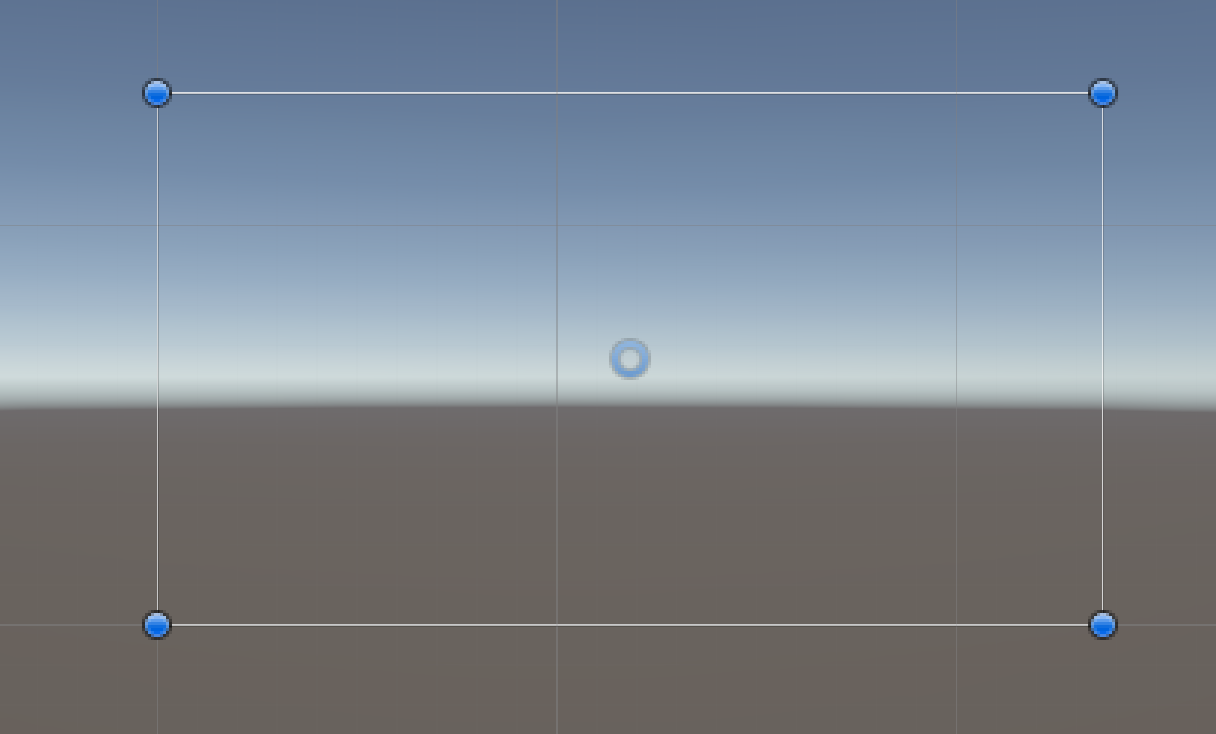
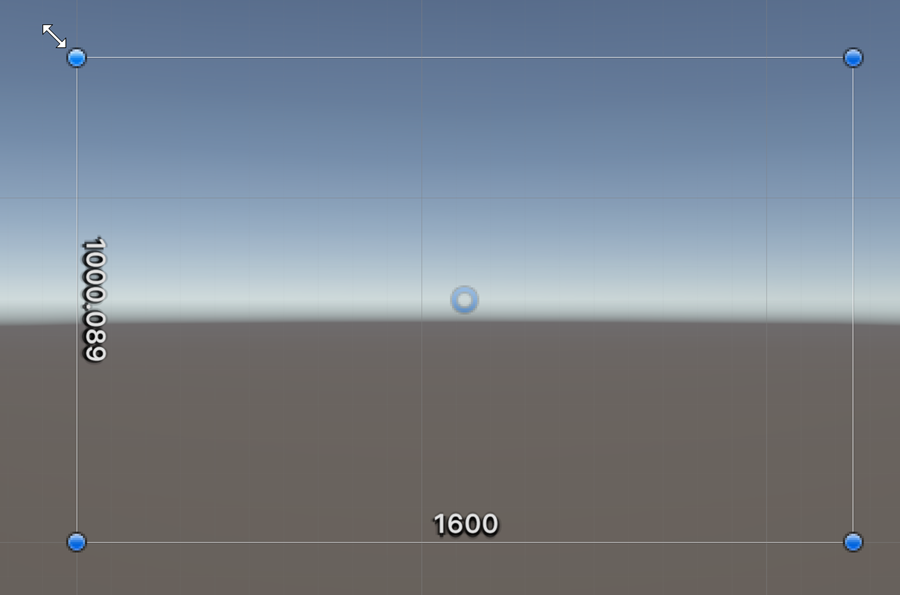
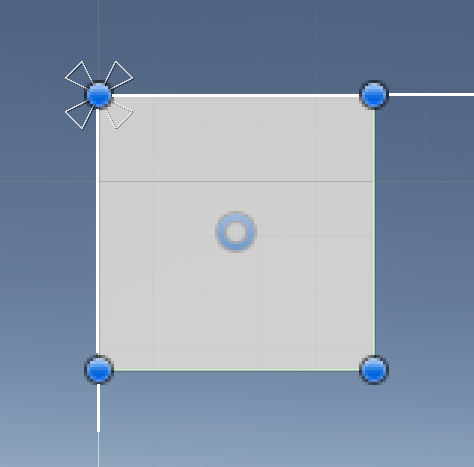
In the Hierarchy, select the Canvas and activate the Rect tool (not the Scale tool)
Select a corner of the rectangle and drag it away
Observe the dimensions of the canvas in pixels:
What is the logic?
We select a reference resolution of 1600 pixels wide
To simulate the screen of the end user, we chose a 16/10 aspect ratio
This implies, that the resolution of the screen of the end user is 1600x1000
Unity sets the size of the Canvas to 1600x1000
Since the canvas resolution matches the end user’s screen resolution, everything you draw on the canvas will appear exactly the same on its screen. Perfect!
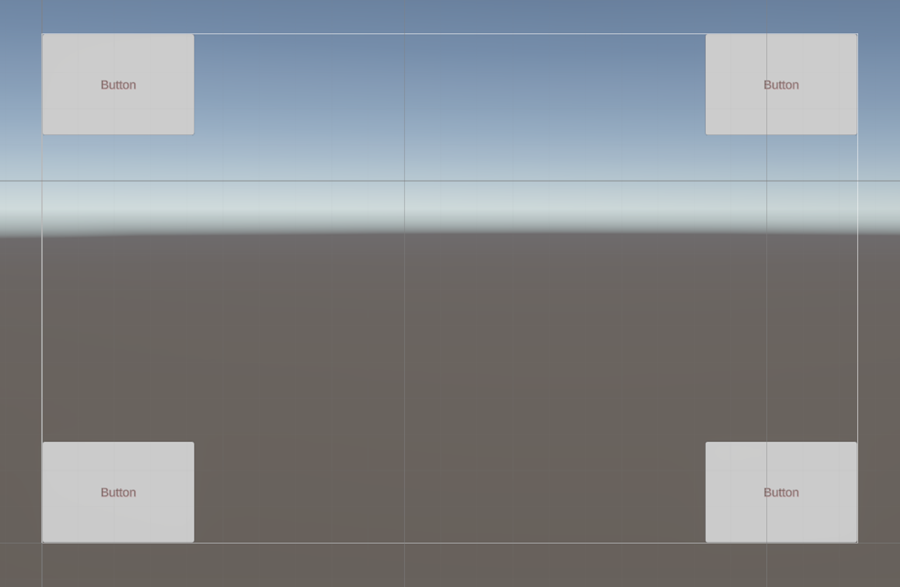
Right click in the Hierarchy and select UI > Button
Create 4 buttons, enlarge them, and place them in each corner of the canvas
Enter Play mode to see what the end user will see on its screen
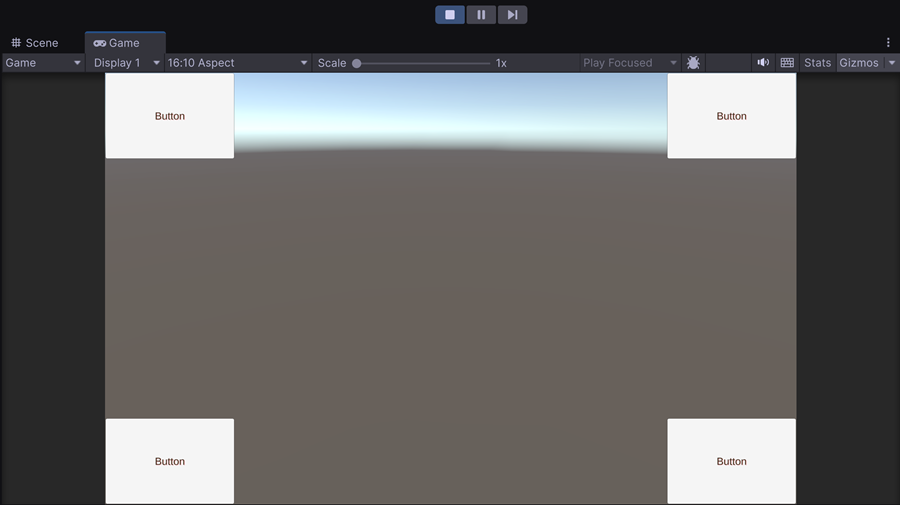
Notice that the Play mode window does not use 100% of the space. This is normal because the window emulates a 16:10 monitor. What you see is what the end user will see. Everything appears to be fine since the HUD matches exactly what was designed.
While in Play mode, change the screen ratio to 16:9
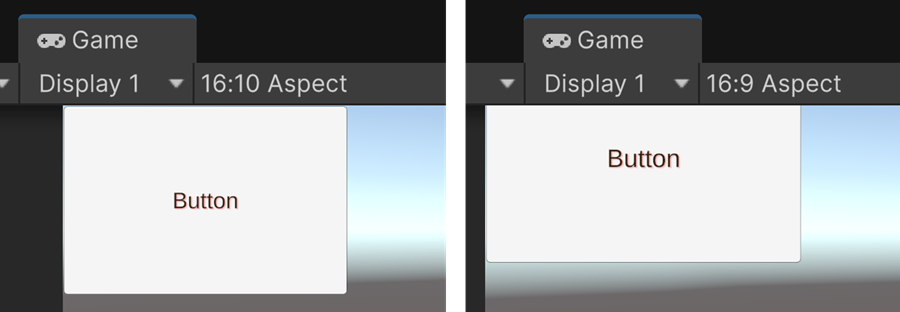
By selecting a 16:9 aspect ratio, the canvas resolution is now 1600x900. As a result, Unity shrinks the height of the canvas, causing anything outside to be cut off or hidden.
Anchor
We want to ensure that the end user can correctly see the HUD because HUD elements are generally placed in the corners or at the top, bottom, or sides—all risky locations! To achieve this, each element is positioned relative to an anchor, which is set to a specific location such as a corner or a side. This way, if the corner changes position, the anchor will follow, and the element will move accordingly. The remaining danger is that if shrunk too much, HUD elements may collide or overlap. This is another issue that goes beyond our scope for today!
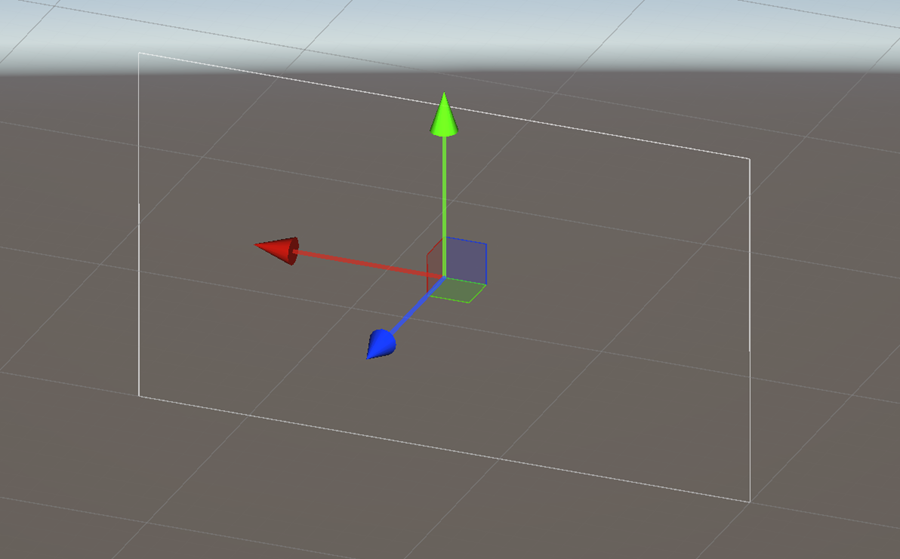
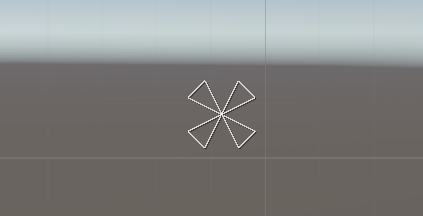
In the Scene view, select a button
Its anchor corresponds to the four-triangle cross in the center of the canvas
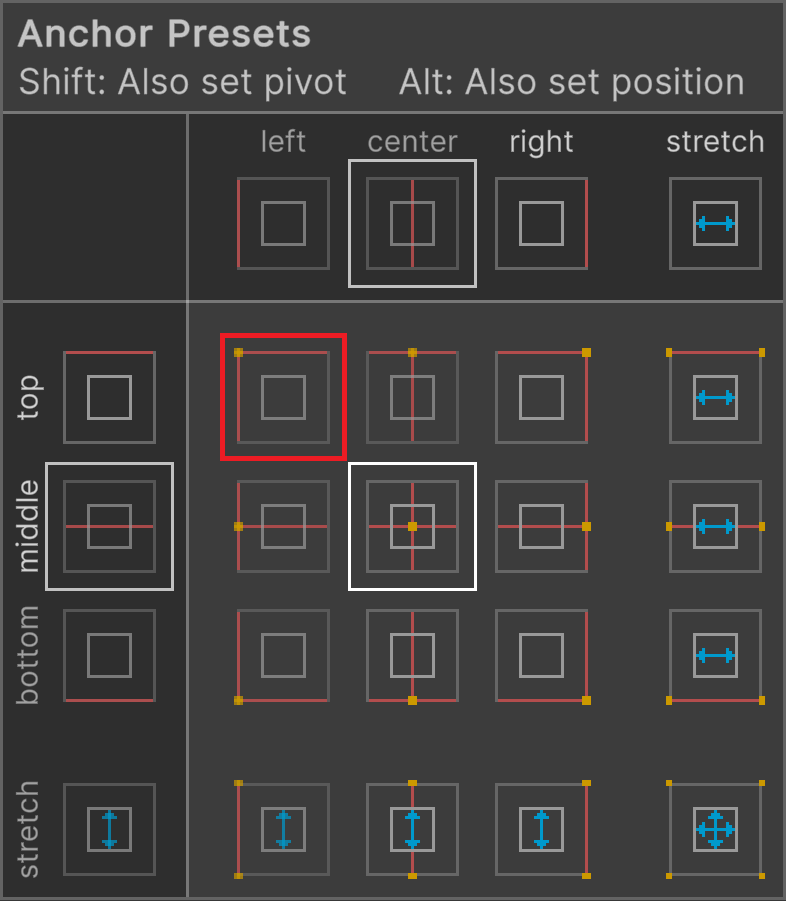
In the Inspector, open the Rect Transform section
Click on the anchor icon:

Select the top left corner of the canvas as an anchor
Move the button in the top left corner
Select the bottom left button and put it just below the top left button
Change its anchor for the top left corner of the canvas

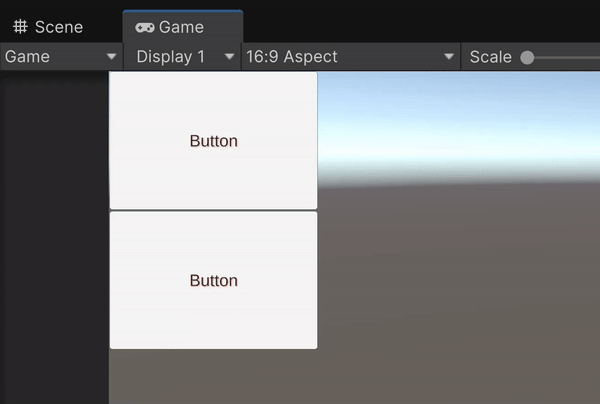
Enter Game view or Play mode
Try different aspect ratios, and you’ll see that the two buttons remain correctly positioned
UI image
Remove all buttons from the canvas
In the Hierarchy, right click and create an UI > Image in the top left corner
Select the Rect tool
Enlarge the component and give it a square shape by holding the SHIFT key
Change its anchor to the top-left corner
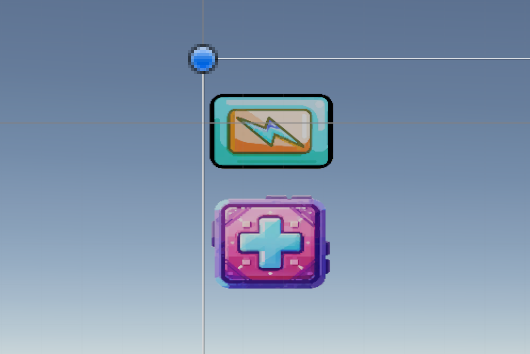
Save this two images inside the Interaction assets folder


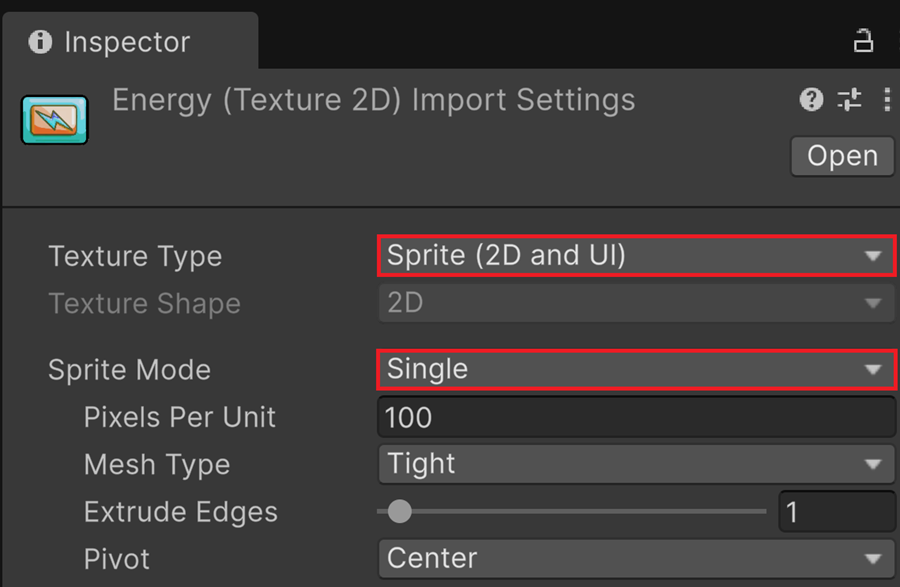
In the Assets folder, select the PNG image of the battery
In the Inspector, select Sprite for the texture type and Single for the Sprite modes
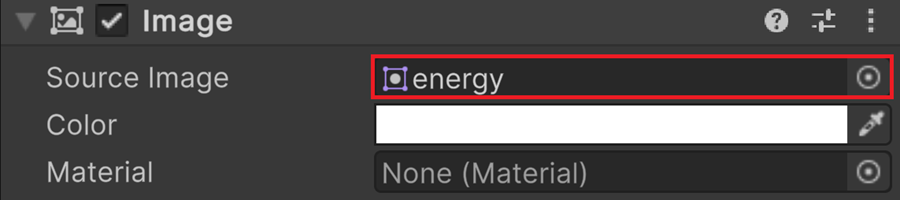
Select the UI-Image in the scene view
Drag and drop the image from the Assets folder into the Source Image field
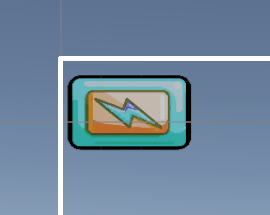
The icon appears in the Scene view
Create a second UI-Image element in the scene view
Put its anchor to the top-left corner
Place the UI-image just below the other
Text
Creation
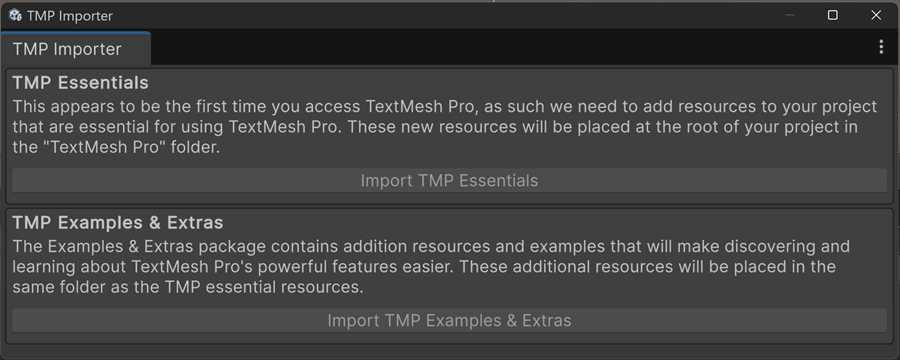
In the Hierarchy window, right click and on the Canvas and select UI > Text - TextMeshPro
You will receive a message box stating that side libraries need to be installed
Please validate
A new text box has been inserted into the canvas
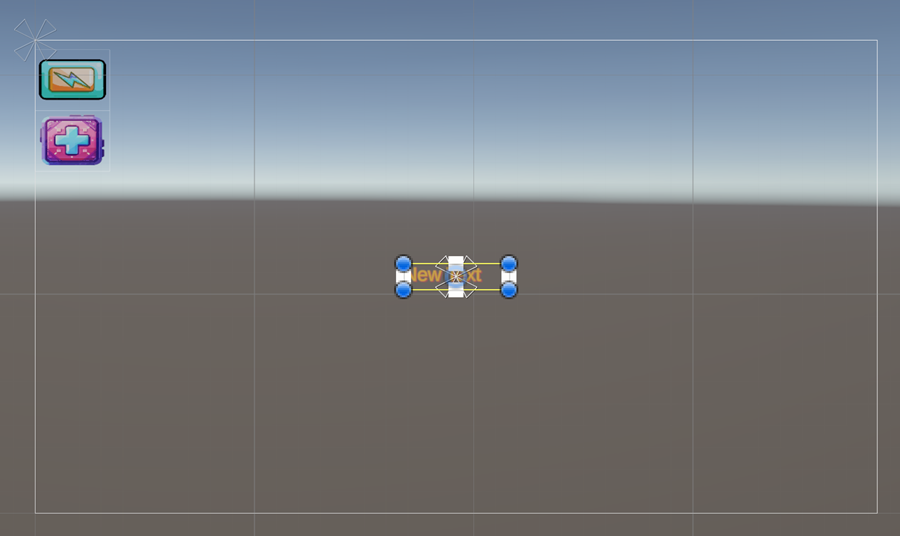
Check that the Rect tool is active
Use the blue handles to extend the text area
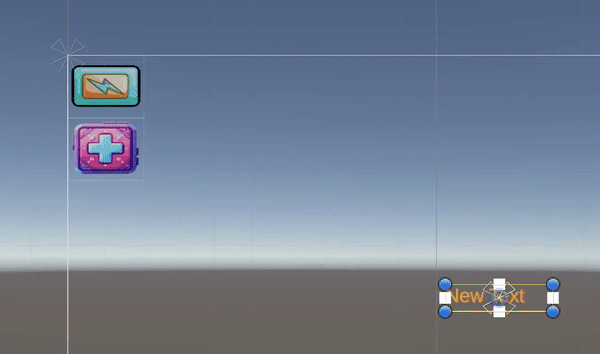
Position the textbox to the right of the battery
Avertissement
Do not use the Scale tool to extend a text area, as it will distort the text on screen.
Change its anchor for the top left corner
TMP Material
You have to create a material for each style used by your TextMesh Pro textboxes, otherwise all textboxes will share the same style.
Select the text box
In the Inspector, find the Shader section:

Right-click on the shader name and select Create Material Preset
Now, you can modify text FX without affecting other textbox
Text Attributes
In the Inspector, you can change many attributes of the text:
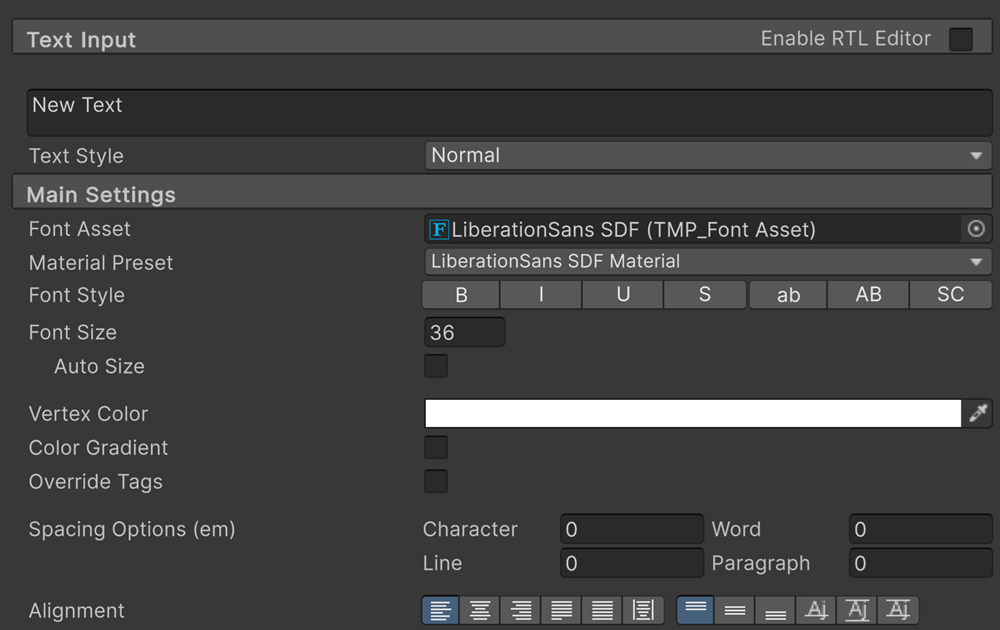
Text input: the text displayed in the label
Font asset: the selected font
Font style: bold, italic, underline…
Font size
Auto size: to automatically fits the label
Vertex Color: text color
Alignment: left/right/center and top/middle/bottom
Avertissement
There exists no parameter to set a background color.
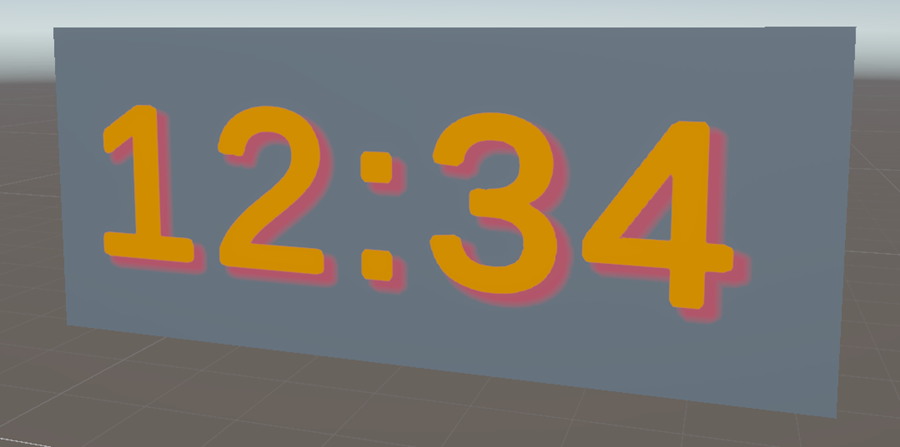
Text FX
In the Inspector, look after the Shader section:
FACE
Color: text color
Softness: blur the font
Dilate: bold or lighten the font
OUTLINE adds a colored border to the text
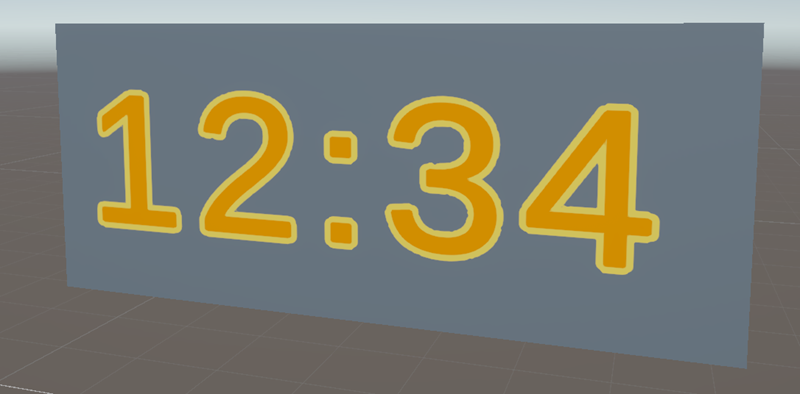
UNDERLAY creates a background offset to create a 3D effect
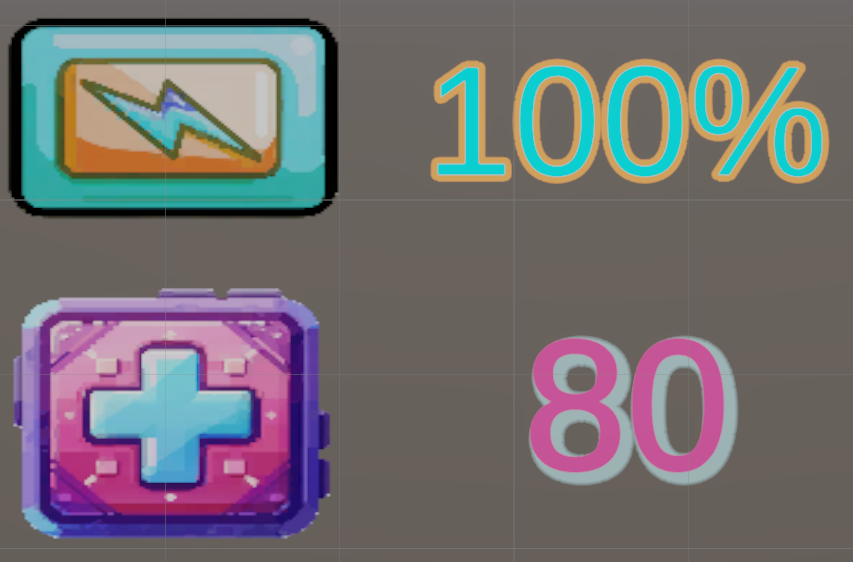
Let’s go
To the right of the battery icon, add text indicating 100%
To the right of the health icon, add text indicating 80
Try to set up styles similar to those below:
ScriptableObject
Intro
It is a good practice in Unity to prepare the HUD (Head-Up Display) in a separate scene for several reasons:
Modularity: By separating the HUD from the gameplay, you can reuse the same HUD across multiple scenes
Ease of Modification: You can work on the HUD independently from the rest of the game
Simplicity: You don’t have to edit your HUD while it’s mixed with objects from the 3D scene
So we need to share some information between the HUD scene and the current active scene.
A ScriptableObject is a reusable data object in Unity that allows you to store and share information across multiple scenes or objects without needing a GameObject. Unlike a MonoBehaviour, a ScriptableObject does not exist in the scene hierarchy but rather as an independent asset in the project.
Why use a ScriptableObject?
Store global data (e.g., settings, player progression, HUD variables)
Share values between multiple scenes
Separate data from gameplay logic for better architecture
Class
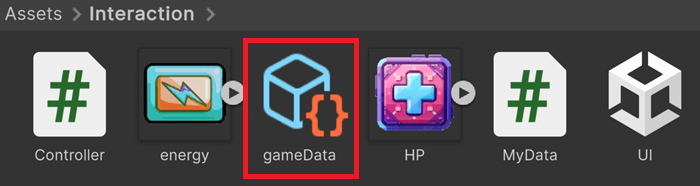
In the Interaction folder, right-click and select Create > Scripting > Scriptable object
Avertissement
Beware, you have just created a class, not an object
Rename the script to MyData
Double click the script icon to open it
Add two public variables:
using UnityEngine;

[CreateAssetMenu(fileName = "MyData", menuName = "Scriptable Objects/MyData")]
public class MyData : ScriptableObject
{
        public int battery = 70;
        public int health  = 40;
}
Instance
In Unity, go to Menu > Assets > Create > ScriptableObjects > MyData
Rename the asset to gameData
In the Inspector, change default values for 99 and 10

Controller
We need to create some code that will push the values into our text labels
In the Hierarchy, right click and create Empty
In the Interaction folder, create a MonoBehaviour script named Controller
Attach the script to the empty object
Edit the script
Add a public variable: public MyData data;
In the Inspector, link the ScriptableObject gameData to this variable by drag and drop
In the Update() function, transfer data to populate the textboxes
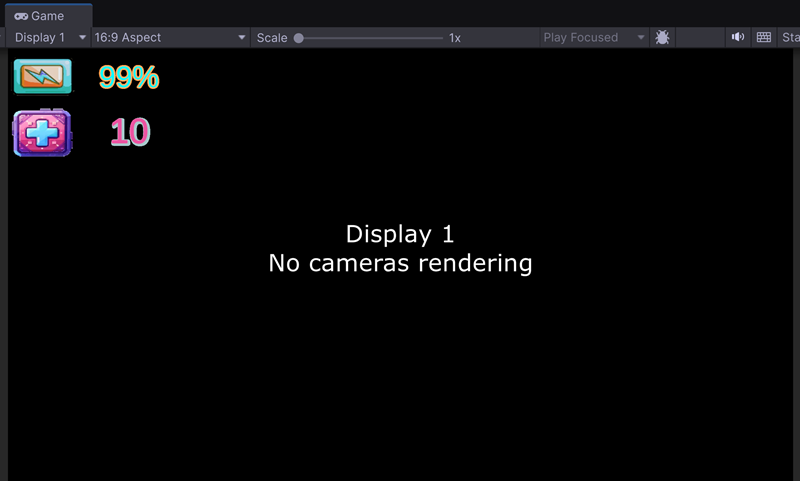
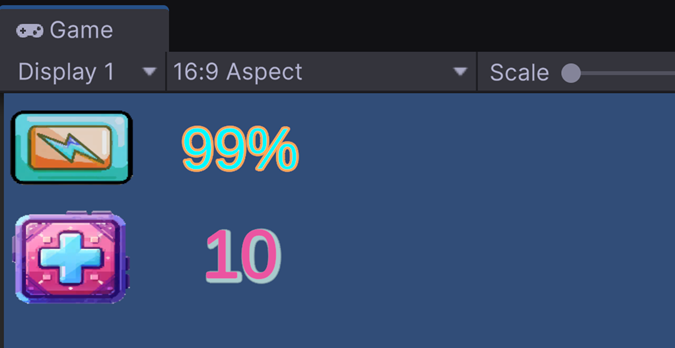
Enter Play mode to check that correct values are displayed on screen

Last step
To avoid any conflict, we remove the camera of the HUD scene
In the Hierarchy, select the main camera
Delete it
Enter Play mode
Main Scene
Setup
In the Interaction folder, create a new scene named MainScene
Double click to open this scene
GameManager
A GameManager is a central script that manages the global elements of your game, such as:
Scene loading (e.g., loading the HUD, switching between levels)
Managing scores, health, and time
Controlling sound and game settings
Storing persistent data
Handling game states (pause, game over, etc.)
We are going to set up a GameManager:
In the Hierarchy, right click and create Empty
Select this new object and rename it to « GameManager »
In the Interaction folder, create a MonoBehaviour script named GameManager
Attach the script to the GameManager object
Open the script
Before any call to the Start() function, the Awake() function is executed first:
using UnityEngine;
using UnityEngine.SceneManagement;

public class GameManager : MonoBehaviour
{
        private void Awake()
        {
                SceneManager.LoadScene("HUD", LoadSceneMode.Additive);
        }

        void Start() {}

        void Update() {}
}
This way, all elements from the HUD scene are inserted in the current scene because of the Additive flag.
Build
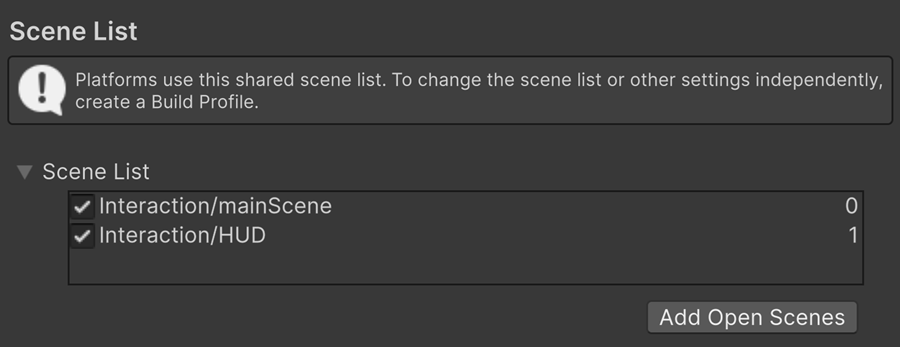
At this point, the HUD scene is not included in the executable file. We need to specify that this scene must be loaded with the main scene:
Open Menu > File > Build Profiles
Select Scene List on the left
Drag and drop mainScene and HUD in the List:
Close and enter Play mode
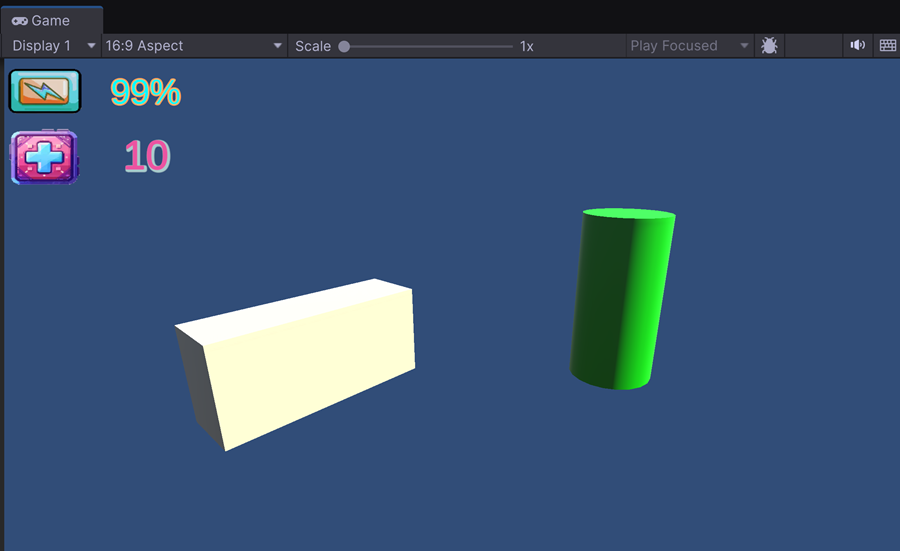
Interaction
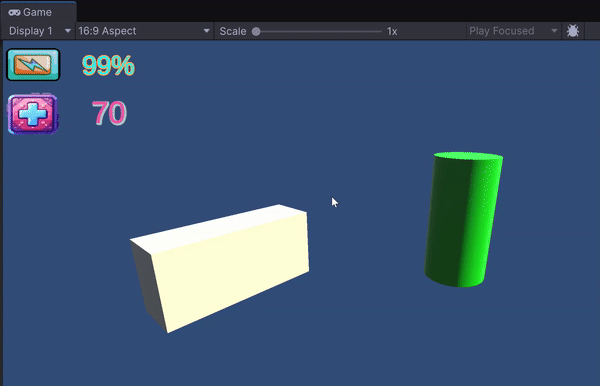
In the main scene, create a 3D white box to represent a health pack
Create a green cylinder to represent a barrel of toxic waste
Enter Play mode
Create a script named healthpack
Associate this script to the health pack in the scene
Edit the script:
using Unity.VisualScripting
using UnityEngine;

public class healthPack : MonoBehaviour
{
        public MyData data;

        void OnMouseDown()
        {
                data.health = 100;
        }
}
Drag and drop the gameData instance into the script
Enter Play mode and click on the health pack, it should change the health
Create a script for the barrel
Remove 10 health point each time the user clicks on this toxic barrel
Enter Play mode to test: