MiniGame4: Stick Quest
The player explores a small map and must find 10 gems.
https://opengameart.org/content/medieval-village-megakit
Setup
Download and install
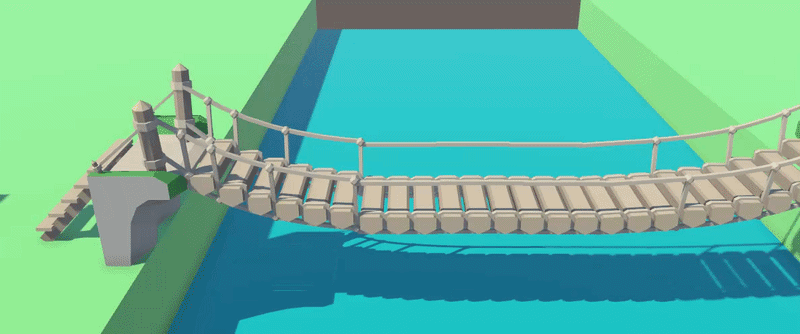
Bridge & ground
Create a folder to store your corrected prefab
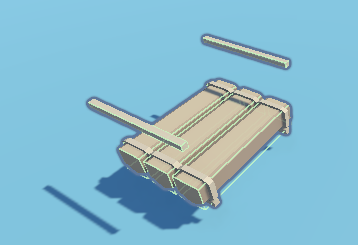
Add colliders to the Prop_Bridge_Rope_End prefab and save the corrected prefab
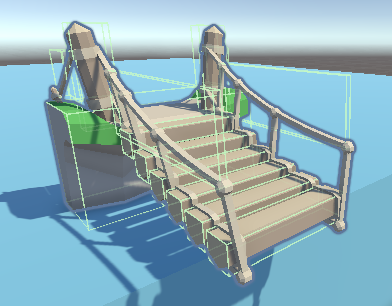
Add colliders to the Prop_Bridge_Rope_Middle prefab and save the corrected prefab
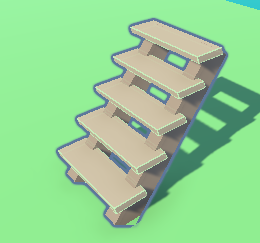
Add colliders to the Prop_Docks_Steps prefab and save the corrected prefab
Create the bridge to traverse the river
Use three cubes to create a river and the ground
Remove the river collider so the character can sink into it
Place a cube below the river to limit the character fall
Character
Create a capsule with a cap for our character
Add a Character Controller and attach the Mover script we use before
Change the camera for a top view position
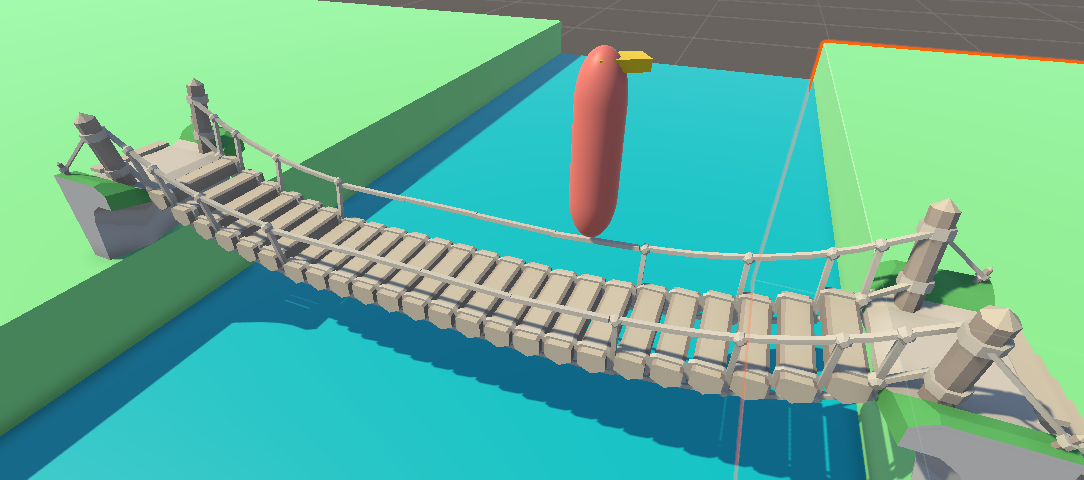
Run the game and check all your collider
You might get a surprise: the bridge rope has its own collider, BUT the character could walk onto it like a simple step!
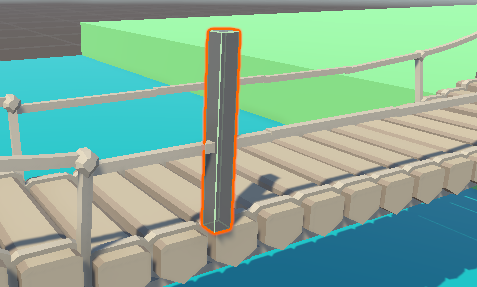
Create a 3D ruler, by creating a cube and setting its scale to 1 0.1 0.1, this ruler is 1 meter long
The dock appear to be 1 meter high. Thus, the dock steps are 25 cm high:
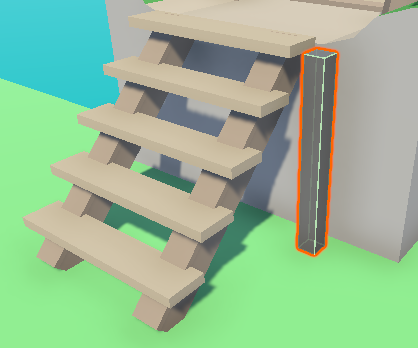
The rope of the bridge seems to be about 40 cm above the walkway:
The dock steps are 25 cm high, the rope of the bridge is 40 cm above the walkway. The Character Controller’s Step Offset is set to 30 cm, so everything should work. But that is not the case. When the character reaches the top of the dock, he is slightly higher than the middle of the bridge. As he moves forward to cross it, he does not really walk — he slowly “falls” onto the bridge. If he touches the rope during that moment, that slight fall combined with the Step Offset is enough to make him step over the rope.
So what’s the conclusion? Is the physics engine broken? Not really. If you look closely at the scene, the rope is only 40 cm above the walkway. In reality, a bridge designed like this would provide no protection — people would fall off IRL. The problem actually comes from the model: the rope was placed too low for aesthetic reasons. It looks nice, but in practice our character falls off the bridge.
What are our options?
Raise the bridge rope by modifying the model. This would be time-consuming and the result might not look great
Do nothing and let the character feed the fish
Use a simple trick: add a higher collider to prevent this situation. The character will no longer be able to jump off the bridge, but that’s acceptable.
We choose the third option:
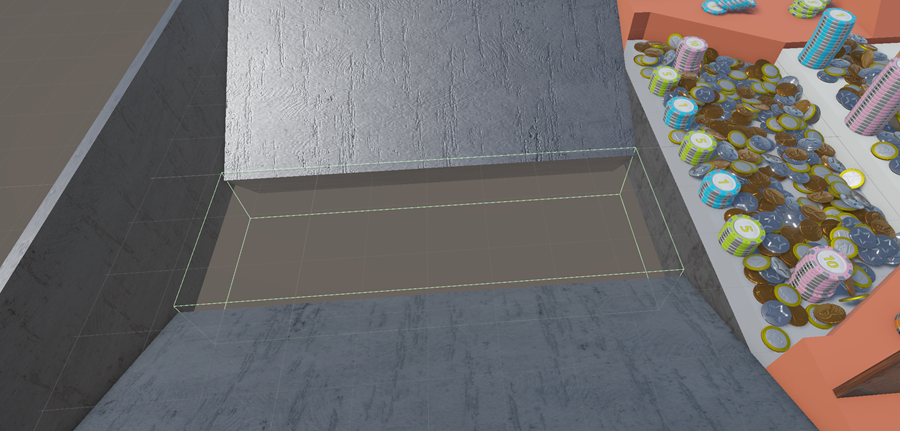
Add a box collider to the bridge and put it above the slope
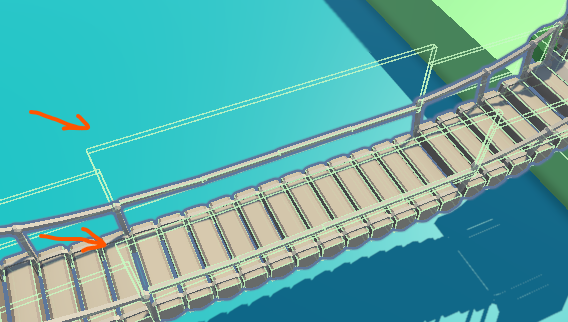
Duplicate this collider and move it on the other side by changing its transform values
Run the game and test again
House
Kit overview
We now work with the Medieval megakit. Let’s have a look into the FBX folder:
The Floor files contain 12 floors with different shapes and textures:

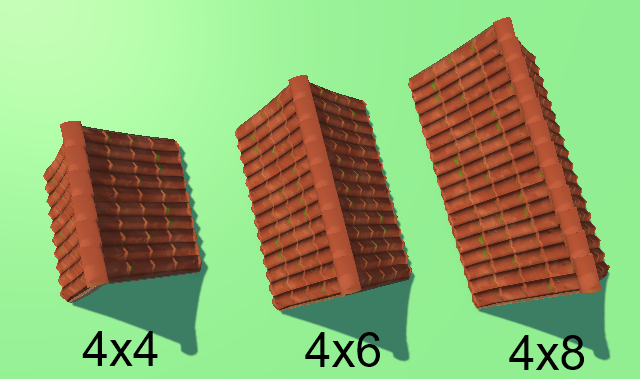
The Roof_RoundTiles_WxL files contain roofs of different sizes. Here are some examples with a width of 4:
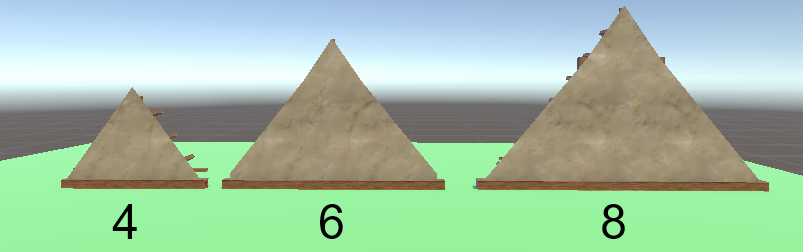
The Roof_Front_BrickW corresponds to the triangle that supports the roof:
The Props files include various decorative objects:

Note
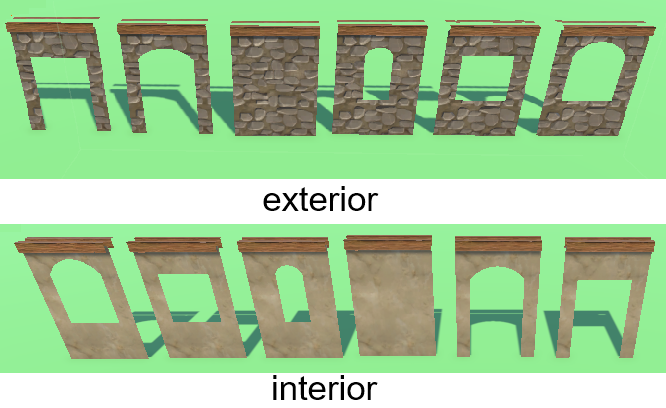
What makes this pack particularly interesting is that the artist created both an exterior and an interior face for each wall. Usually, house packs contain nice buildings that you cannot enter because they are essentially just cubes. On the other hand, interior packs provide walls, chimneys, and furniture but nothing for the outside. This pack is quite rare because it allows you to create houses that look good from the outside and can also be explored from the inside.
The Wall_plaster files include various walls with windows or doors entry:
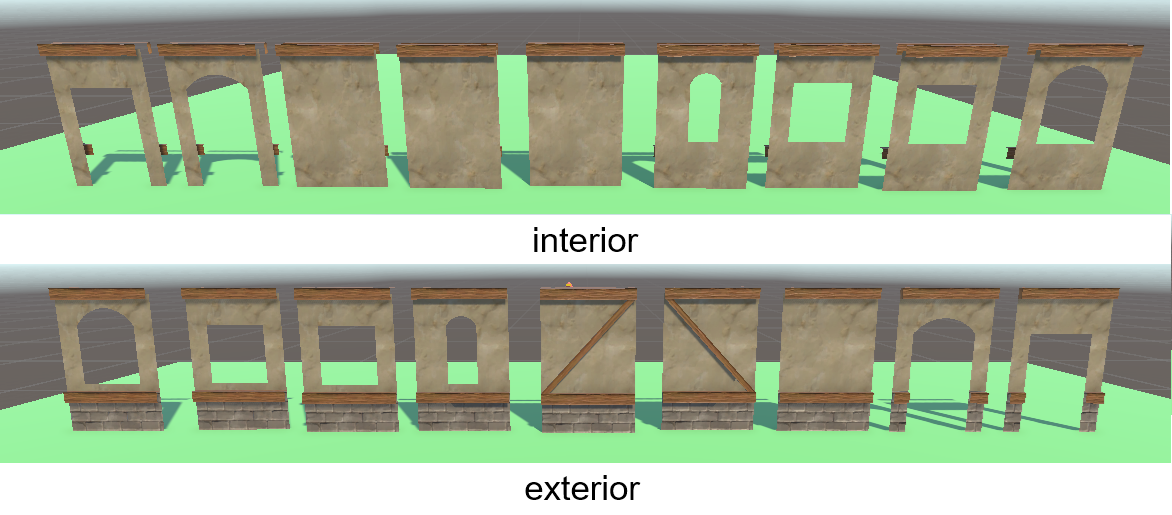
The Wall_UnevenBrick files include somes brick walls with windows or doors entry:
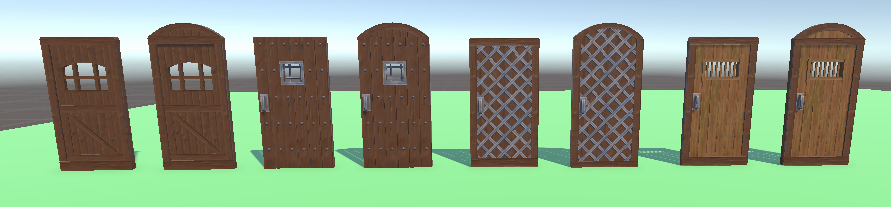
The Door files contain 8 different shapes for the entrance door:
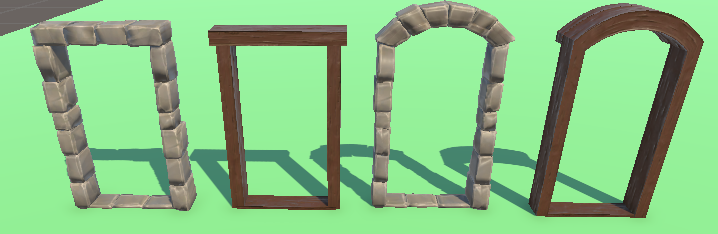
The DoorFrame files contain 4 different door frames:
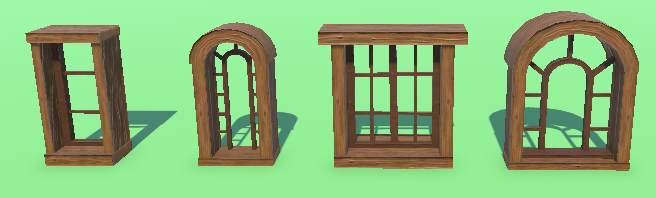
The Window files contain 4 different window shapes:
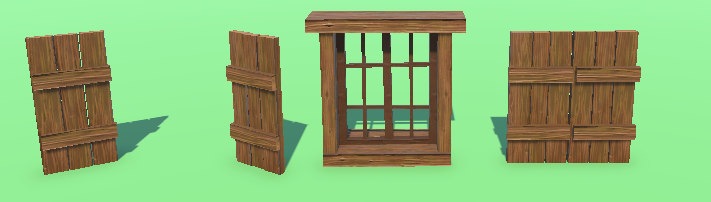
The Shutter files contain shutters for all window shapes, in two versions: open and closed:
There are other resources such as stairs, balconies, and overhangs.
Create your own house
First, create the floor using:
Floor_WoodDark
Create two walls :
Wall_Plaster_Straight
Wall_Plaster_Door_Round
Snap each exterior corner of the walls to the corner of the floor. (snapping: use the V key with the translation tool)
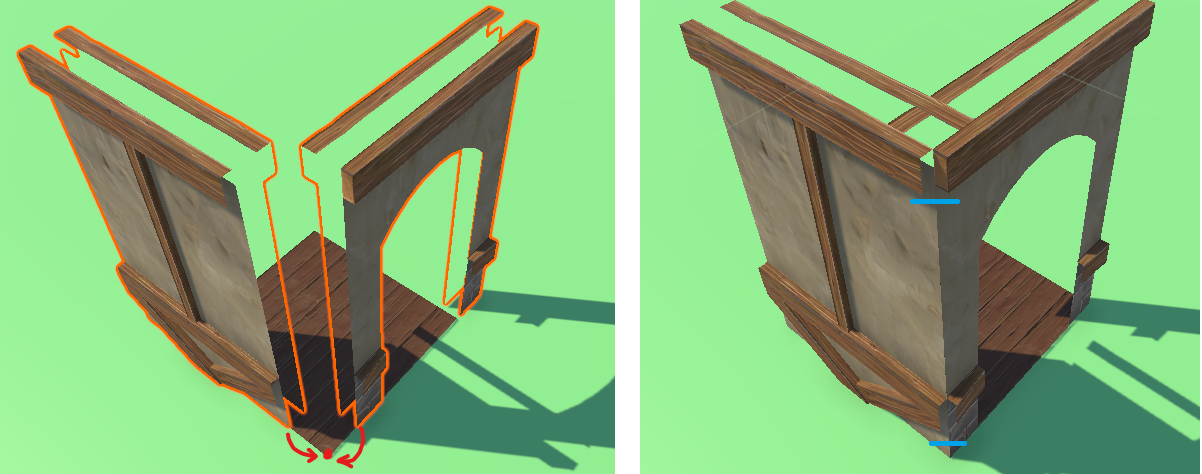
Some connection problems persist - highlighted in blue in the image
Add a wooden pillar to form the outer corners using:
Corner_Exterior_Wood
Create a complete house

Environment
Add some trees and props to decorate the scene

Player Controls
We want the A and E keys to raise and lower the character’s head. For this:
We maintain a variable pitch that stores the vertical rotation of the camera
Each time the player moves the mouse vertically, this value is updated based on the mouse sensitivity tiltSpeed
The angle is clamped between -60° and +60°
After updating the value, the new angle is applied to the camera’s rotation
public Transform cameraPivot;
public float tiltSpeed = 120f;
public float minmax = 60f;
float pitch = 0f;


void Update()
{
    ...

    // US keycode
    if (Input.GetKey(KeyCode.Q))          pitch += tiltSpeed * Time.deltaTime;
    if (Input.GetKey(KeyCode.E))          pitch -= tiltSpeed * Time.deltaTime;
    pitch = Mathf.Clamp(pitch, -minmax, minmax);

    // localRotation.Xrot = pitch
    cameraPivot.localRotation = Quaternion.Euler(pitch, 0f, 0f);
}
Visor
In the hiearchy panel, Right Click > UI > Canvas
In the Inspector Window
Check that Render Mode is set to Screen Space - Overlay.
Set UI Scale Mode to Scale With Screen Size
Reference Resolution → 1920 x 1080
In the hiearchy panel, Right Click → UI → Text - TextMeshPro
Import TMP Essentials if requested
Center and align correctly

Add + in the text field to create a visor
Collecting Sticks
Create sticks
Our scenario is to collect some branches from the ground to light a chimney fire.
Add a Prop_Branch_1 prefab in the scene
Add a box collider to this object
Enable the Is Trigger checkbox
We gather all interactive objects in a specific layer for optimization.
In the Inspector window, click on the Layer dropdown and select Add Layer:
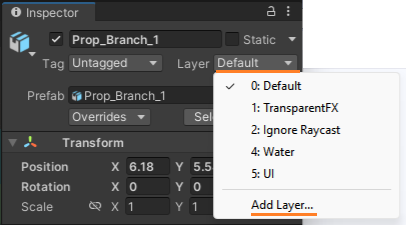
Create a new layer named Collectible
Set the Stick object’s layer to Collectible
Detect sticks
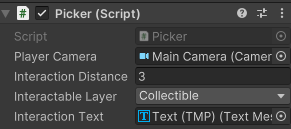
Create a Picker script for our character:
using UnityEngine;
using TMPro;

public class Picker : MonoBehaviour
{
    public Camera playerCamera;
    public float interactionDistance = 3f;
    public LayerMask interactableLayer;

    public TextMeshProUGUI interactionText;

    void Update()
    {
        Ray ray = new Ray(playerCamera.transform.position, playerCamera.transform.forward);

        if (Physics.Raycast(ray, out RaycastHit hit, interactionDistance, interactableLayer))
            interactionText.text = "Object in range";
        else
            interactionText.text = "+";
    }

}
Make sure all the required information is correctly linked to the script:
Run, move and test

OOP design
Our character will collect and interact with various objects. For this, we cast a ray from the camera into the scene. If the ray hits a collectible object, we display a message on the interface such as “Press R to collect”.
We could manage everything from a single script attached to the character. However, this approach quickly leads to several problems:
The script would become very large, because we would need a separate if condition for each type of object.
In addition, every time a new object is added to the game, we would need to modify the character script; otherwise, the interaction would not work.
A better solution is to use a more generic approach. The raycast still belongs to the character, since it is the character who detects the object. However, the logic that defines how the object can be used should belong to the object itself. Each interactive object is therefore responsible for handling its own interaction behavior.
Interactable Objects
We define a common interface for all interactable objects. This interface specifies that an object must be able to return the message that should be displayed on screen. Any object that can be interacted with will implement this interface.
Asset window → Right click → Create → C# Script
Script name : IInteractable
public interface IInteractable
{
    string GetInteractionText();
}
This script is not attached to any GameObject. It simply defines a contract for interactive objects.
Create a script Stick and attach it to the branch on the ground
using UnityEngine;

public class Stick : MonoBehaviour, IInteractable
{
    public string GetInteractionText()
    {
        return "Press R to collect";
    }
}
Update the picker script:
void Update()
{
    Ray ray = new Ray(playerCamera.transform.position, playerCamera.transform.forward);

    if (Physics.Raycast(ray, out RaycastHit hit, interactionDistance, interactableLayer))
    {
        IInteractable interactable = hit.collider.GetComponent<IInteractable>();

        if (interactable != null)
            interactionText.text = interactable.GetInteractionText();
    }
    else
        interactionText.text = "+";
}
Run and test:

Inventory
UI
Layout
In the hierarchy window, right click on the Canvas and select UI > Panel
Rename this Panel: InventoryUI
Selec this InventoryUI and in the Inspector Window select: Add Component → Horizontal Layout Group
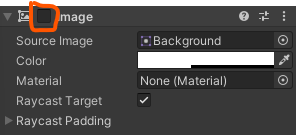
In the Inspector Window, disable the background Image of the InventoryUI
Sprite
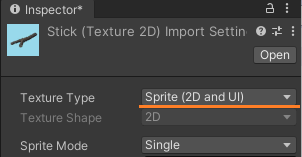
Download the stick spriteand store it in the asset folderIn the asset folder, select this image
In the Inspector window, change Texture Type > Default to Sprite 2D/UI
Images
In the Hierarchy window, right click on the InventoryUI and select UI > Image
In the Hierarchy window, select the Image UI element
Drag and drop the sprite asset to the Inspector Window > Source Image
Select the image in the Hiearchy, duplicate it 9 times to obtain 10 slots
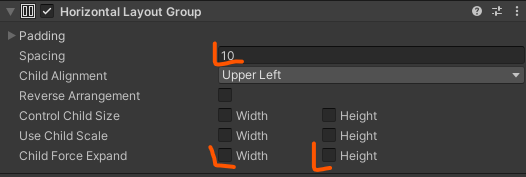
The sprites are distributed horizontally; we would like them to be aligned on the left.
In the hiearchy window, select the InventoryUI
In the Inspector window, in the Horizontal Layer Group
Unselect Child Force Expand
Set the Spacing to 10
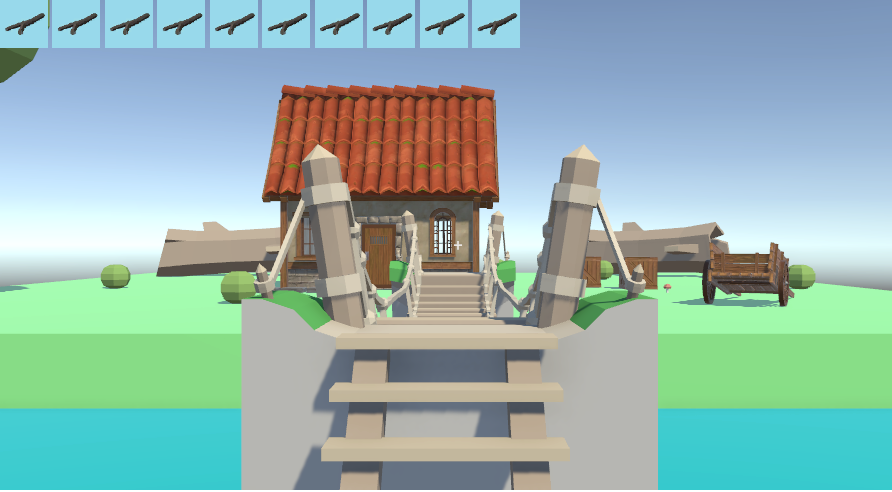
Check that you obtain the following result:
Backpack
Our character has a backpack used to store objects, so we create a separate script to manage it.
Create a new Backpack script
Copy paste this code inside it:
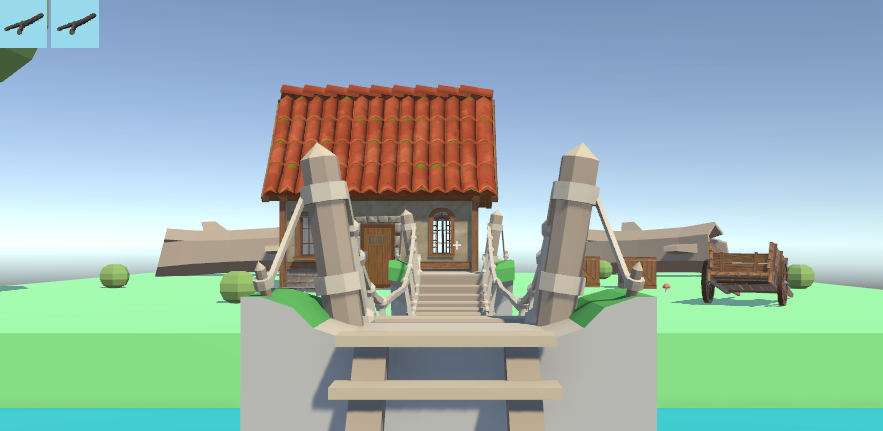
using System.Collections.Generic;
using UnityEngine;
using UnityEngine.UI;

public class Backpack : MonoBehaviour
{
    private List<string> items = new List<string> { "stick", "stick" };
    public Transform inventoryUI;
    public List<Sprite> sprites;

    void Start() {  RefreshUI();  }

    void RefreshUI()
    {
        int i = 0;

        foreach (Transform child in inventoryUI)
        {
            Image img = child.GetComponent<Image>();

            if (i < items.Count)
            {
                img.sprite = sprites.Find(s => s.name == items[i]);
                img.enabled = true;
                i++;
            }
            else
            {
                img.sprite = null;
                img.enabled = false;
            }
        }
    }

    void Update()       {   }
}
Link the InventoryUI to the script
Insert the stick sprite into the list
Run the game, you should obtain this result:
Interaction design
We will now handle the interactions between the character and collectible objects. When the player presses a key to interact with an object, an important design question arises: should the interaction be handled by the character or by the object itself?
Interactions can become quite complex. Consider the example of lighting a fireplace, we have to follow this small scenario:
Is the fireplace already lit? If so, do nothing
Does the player have three pieces of wood? If not, do nothing
Remove the three pieces of wood from the backpack
Add the three pieces of wood to the fireplace
Light the fireplace
Whe have three design options:
1. Handle the interaction in the character
The character script manages all interaction logic. When the player interacts with an object, the character checks the object type and performs the corresponding actions.
Advantages |
Disadvantages |
|---|---|
|
|
2. Handle the interaction inside the object
Each interactive object manages its own behavior. The character only detects the object and triggers the interaction.
Advantages |
Disadvantages |
|---|---|
|
|
3. Handle the interaction in a dedicated interaction class
A separate class or system manages the interaction between the character and objects.
Advantages |
Disadvantages |
|---|---|
|
|
Conclusion
For our game architectures, the second approach — handling interactions inside the objects — is the most practical. The character triggers the interaction, but each object is responsible for defining how it reacts.
Interaction System
Update the IInteractable interface to add a new function:
public interface IInteractable
{
    string GetInteractionText();
    void PerformAction(KeyCode c, GameObject Character);
}
In the stick script, implement this new function:
public void PerformAction(KeyCode c, GameObject Character)
{
    if (c == KeyCode.R)
    {
        Backpack backpack = Character.GetComponent<Backpack>();

        if (backpack != null)
        {
            backpack.AddItem("stick");
            Destroy(gameObject);
        }
    }
}
In the Backpack script, add the AddItem function:
public void AddItem(string name)
{
    items.Add(name);
    RefreshUI();
}
In the Picker script, modify the main function:
if (interactable != null)
{
    interactionText.text = interactable.GetInteractionText();

    if (Input.GetKeyDown(KeyCode.R))
        interactable.PerformAction(KeyCode.R, gameObject);
}
Run the game and pick a stick
Last steps
Sticks
Create a stick prefab
Add more sticks around the character
Door
Create a new interaction with the door: by pressing R, it should open
Pressing R again should close it
Pressing R again should open it…
Fireplace
Used a DoorFrame_Flat_Brick to create a flat fireplace inside the house
Create a black 3D cube to create the interior

Implement the logic to light the fire
Does the player have five pieces of wood? If not, do nothing
Remove the five pieces of wood from the backpack
Light the fireplace
If the fireplace is lit, change the color of its interior to red/yellow
